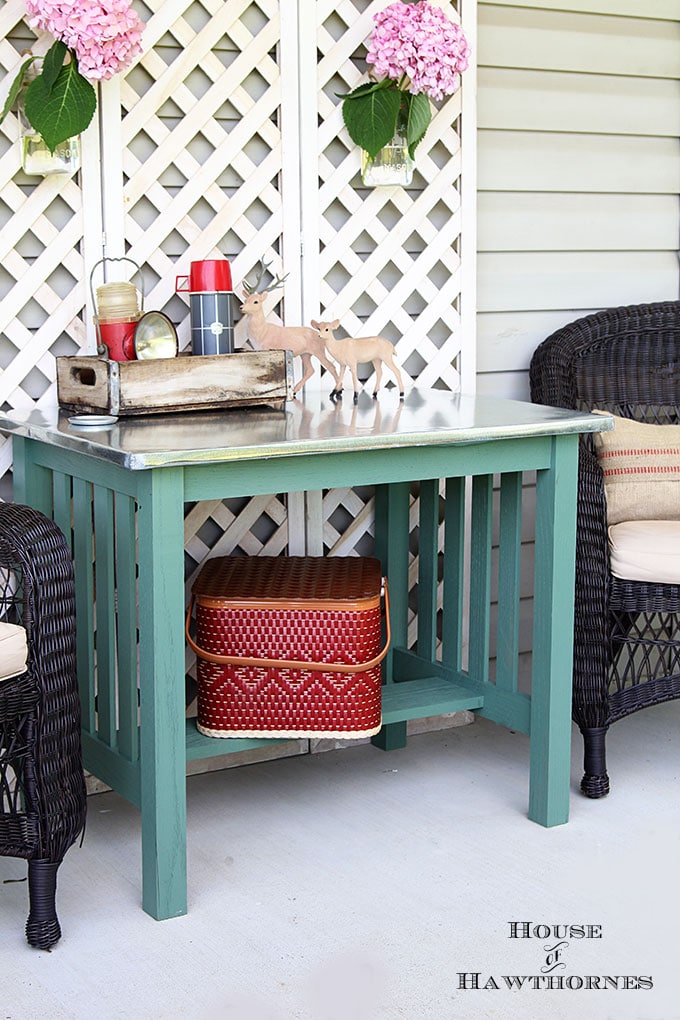
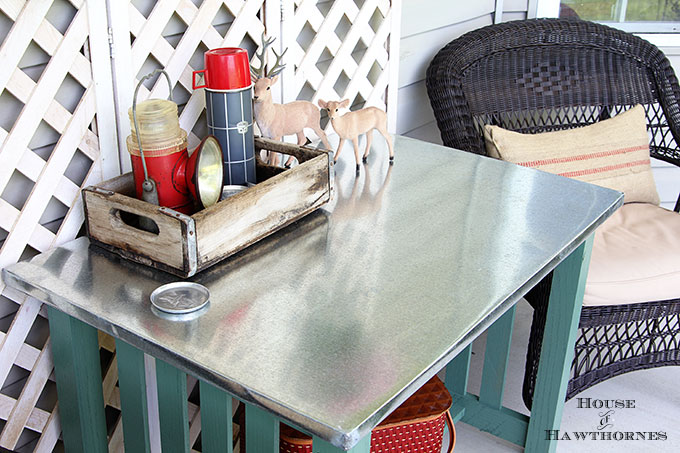
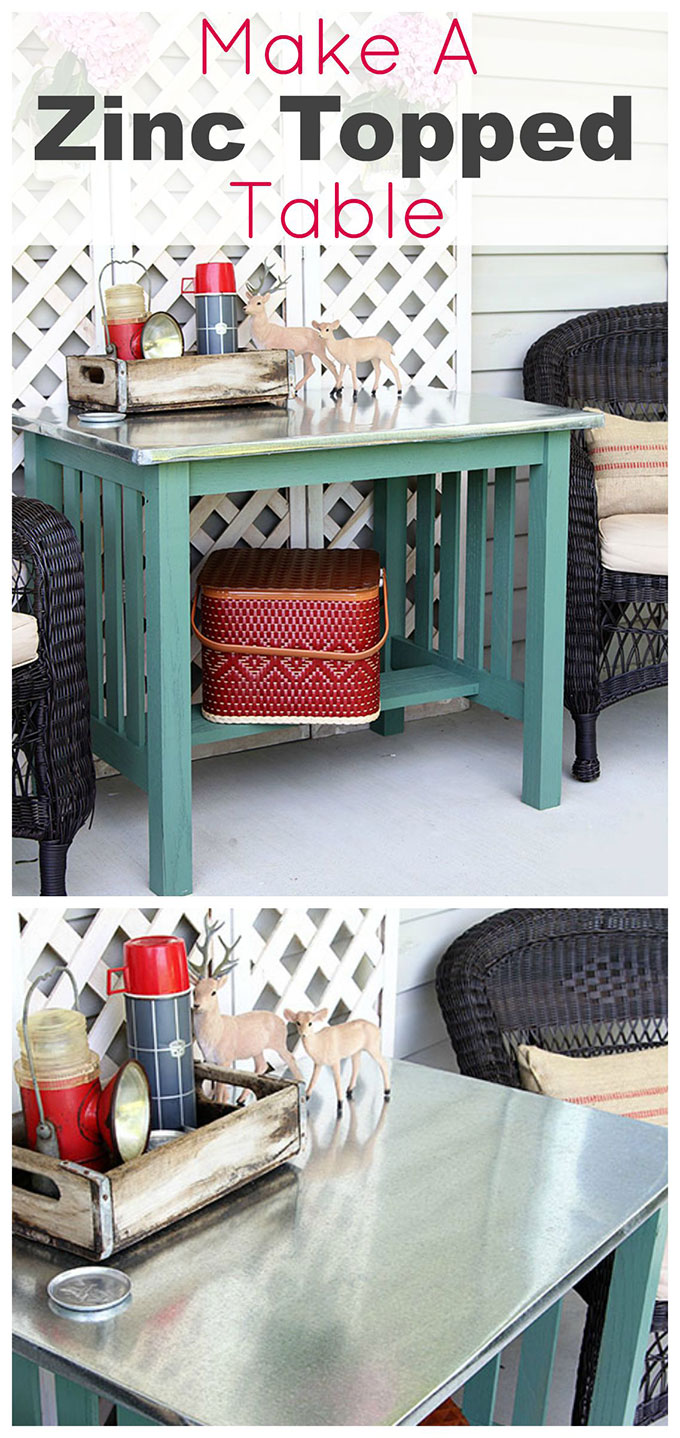
In my Baby Got Back post the other day I told you I'd show you how I made my zinc top table that is on my back porch. So I'm here to make good on my promise.
Now, I've seen zinc top tables at the antique stores for years! Mostly on tables that are used as potting benches. There's just something about the aged, worn, been beaten up and lived to tell the tale look of them that I adore.
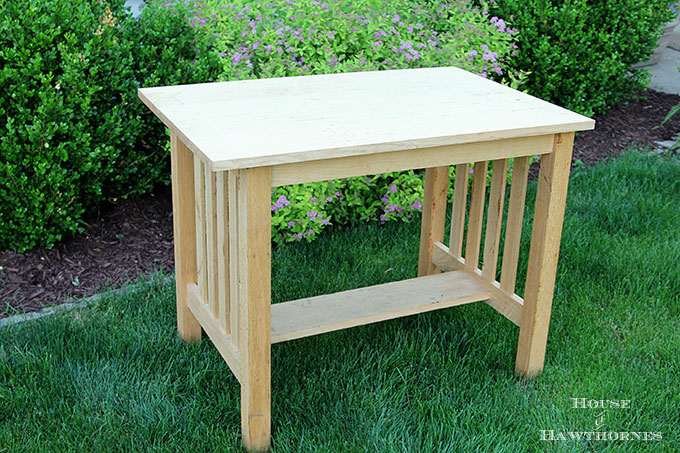
So when I saw this table at a yard sale, I scooped it up to make my very own zinc top table. I think it was a mere $5.
It may look like an Arts & Crafts era piece, but it's actually a high school shop class project from 2015. No fancy antiques were harmed in this project.
I immediately thought it would make an excellent zinc topped potting bench and started dreaming of me in my overalls and gardening apron, standing at the bench potting up some geraniums.
Well, I made the mistake of putting it on the porch while I decided how to refinish it and next thing you know we were eating dinner at it, having a few cocktails on it and so forth. So instead of a potting table, I've made it into just a basic dining table for the porch.
I need to learn to do my projects as soon as I get them home before my mind can wander to other ideas. Squirrel!
I painted the legs a green color. Don't tell anyone, but I just spray painted it (Rust-oleum's Painter's Touch in Satin Moss Green).
Sometimes spray paint is the quick and easy answer and I'm all about quick and easy.
After the paint was dry, I started on the top.
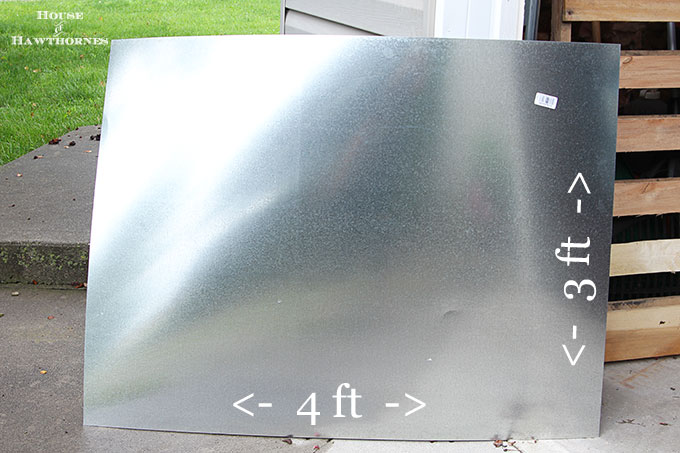
I looked all over for a sheet of zinc, but couldn't easily (or cheaply) find one. What I did find was galvanized sheet metal at the hardware store.
It's located in the HVAC aisle and is used to do something HVAC-ish (how's that for a technical term).
The sheet I bought was 36" x 48" and cost around $16 at Home Depot. My table top was 24"x36", so that was enough to cover the top and sides. Anything larger than that and you may have to special order it.
What about the zinc, Pam? I thought you were making a zinc topped table? Are you doing the old bait and switch, Pam?
Well galvanized sheet metal has a thin layer of zinc coating on it. The zinc is what makes it galvanized and it's the poor man's way to have the look of zinc without the expense of buying solid zinc. And I'm a poor man. Or woman, I guess.
If you are interested in pure zinc sheets you can purchase them (affiliate link coming up) RotoMetals' Amazon store.
Supplies For DIY Zinc Top Table
Piece of galvanized sheet metal
Sheet metal screws #8 ⅝"
Tin Snips
Liquid Nails
Something heavy - bricks, books, your butt, etc
GLOVES - trust me, wear gloves when working with sheet metal
Protective eye wear
Soldering Supplies
Soldering iron or gun
50x50 Solder
Soldering flux or paste
Emery cloth or sand paper
And don't forget, you can shop online at Home Depot and have the items all ready for you to pick up. Saves you from wandering down the aisles looking for this and that or waiting for your online order to arrive via UPS!
Instructions
If possible, remove the top from your table so it's easier to work with.
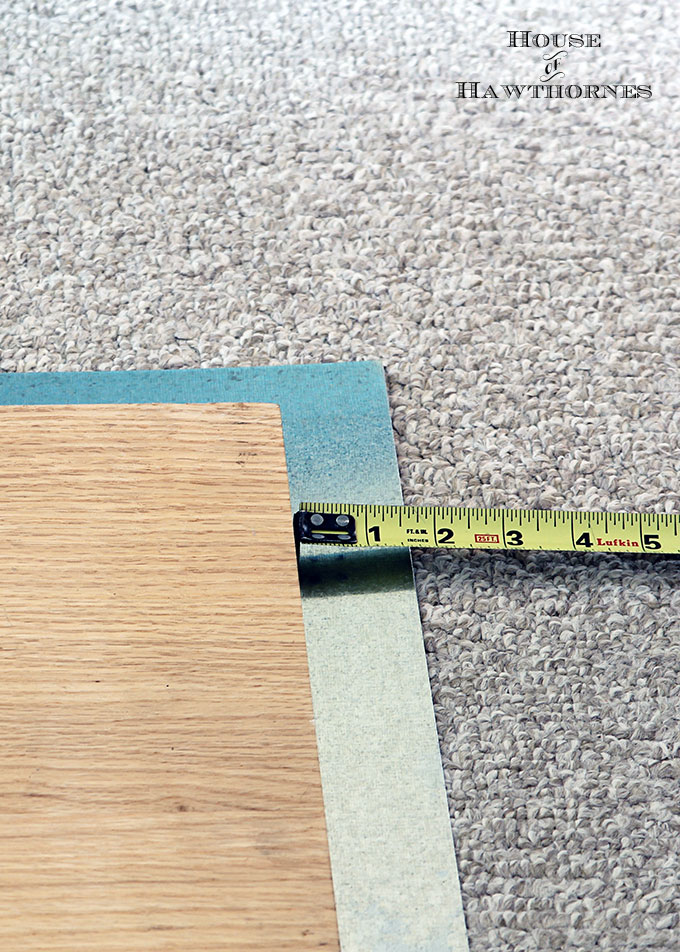
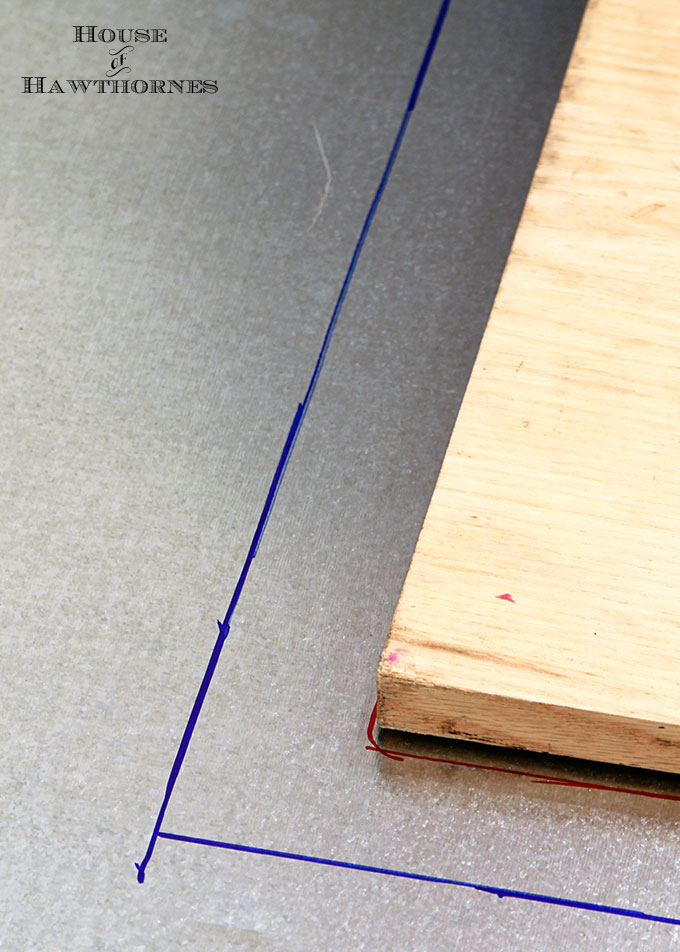
Then lay your existing wood top on the piece of galvanized sheet metal and make sure there is enough overhang to cover the table, wrap around the edge and around to the back. In my case that was roughly 1 ¾" around each side.
I took a Sharpie and outlined around the table so I could make sure I put it back down in the exact same place (red line) and then drew a line 1 ¾" out from that (blue line).
This may sound obvious, but if you place the table top correctly on the sheet metal you will only be cutting two edges not four.
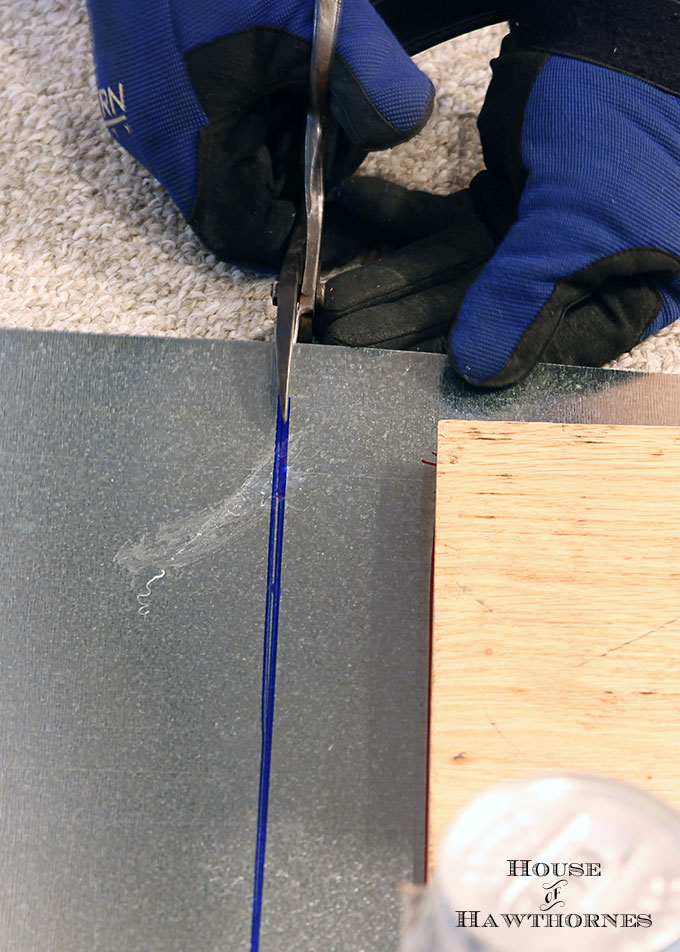
Then I used tin snips to cut on the blue line, making sure I had my fancy heavy duty gloves on for protection. Really, anytime you are touching, carrying, scooting or cutting this stuff make sure you have your gloves on.
Here's where my tutorial pictures go all to Hell. Sometimes I get so "in to" a project that I forget to take photos!
I lifted up the wooden top, applied glue to it and placed it back down on the galvanized sheet metal making sure to keep it within the red lines.
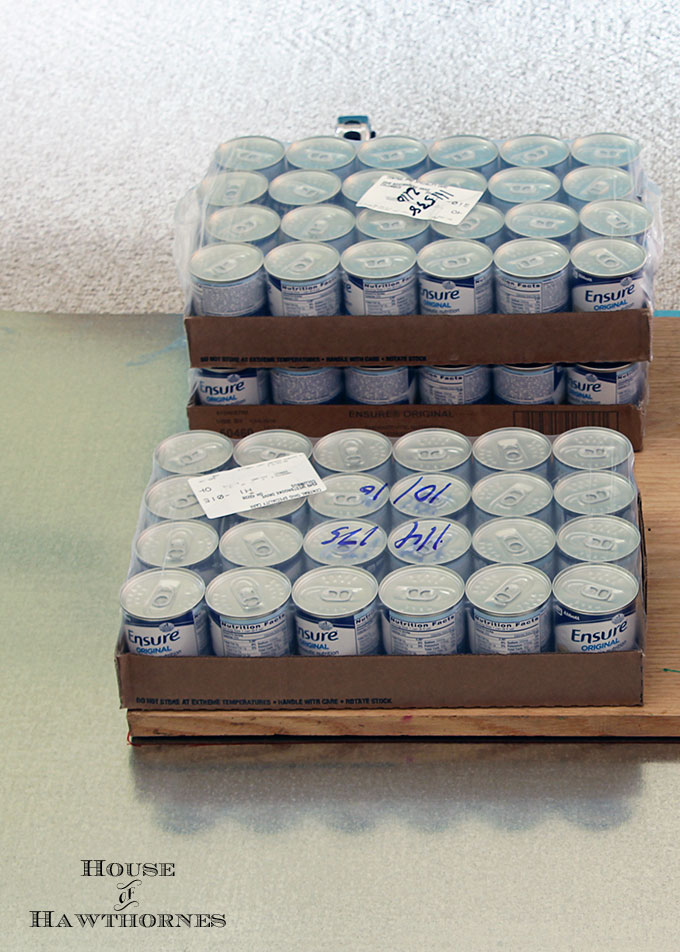
Then I put every heavy object I had inside the house on to it, so it would be sure to get a good bond. Read the instructions on your adhesive, but with my Liquid Nails it needed to set overnight.
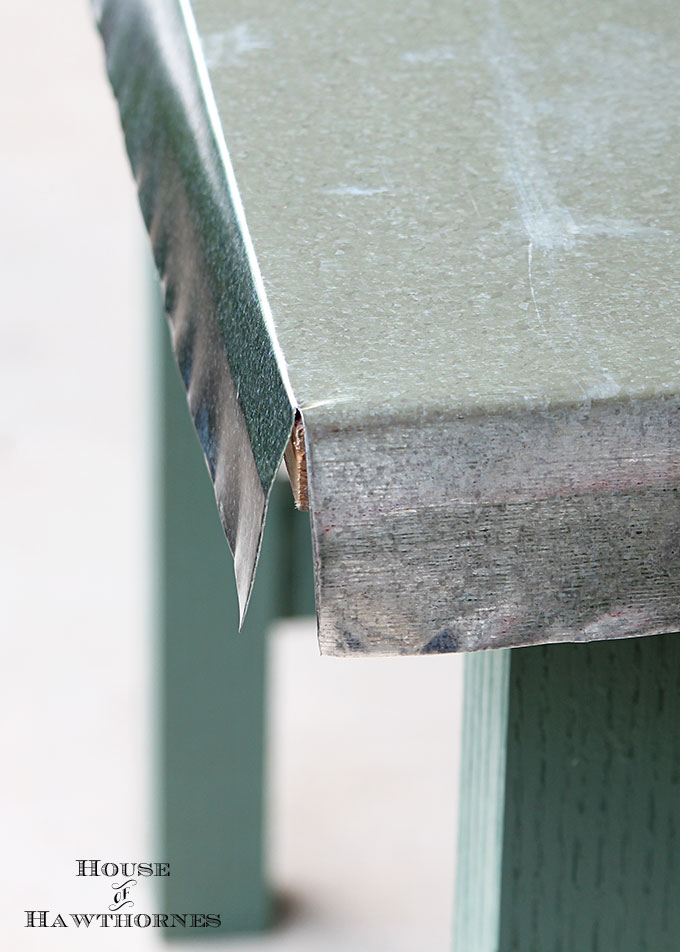
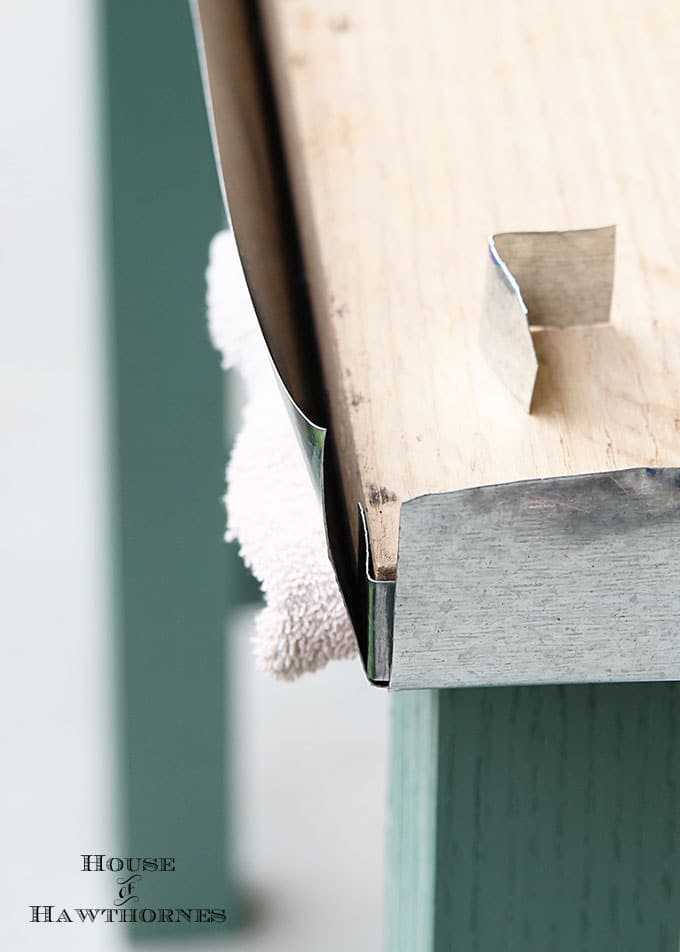
After the glue had dried, I snipped out a square at the corners of the table so I could "easily" bend down the sides without having to overlap the corners.
I say "easily" because you don't have to be Hercules to bend this metal, it is pretty thin and bendable, but it does take some pressure.
Do you remember when you were having a baby and the doctor said you might feel a little pressure? Yeah, not that kind of pressure.
I wasn't happy with exactly how the corners came out since I would have to "fill it in" with solder a little bit too much, so I cute some tiny corner pieces and slid them in the corners so when I soldered I wouldn't have to use 4 rolls of solder.
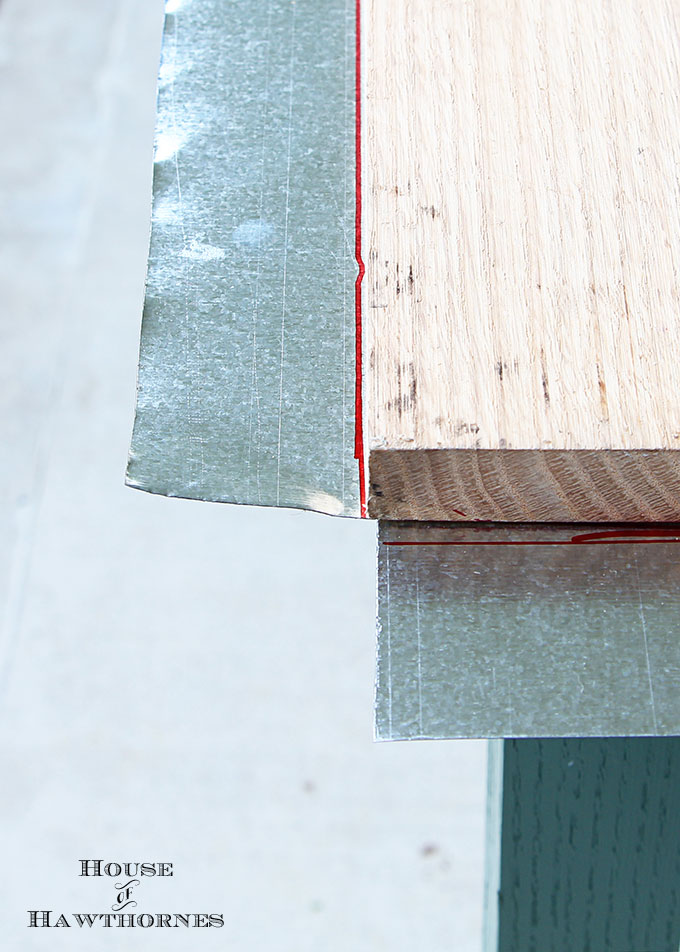
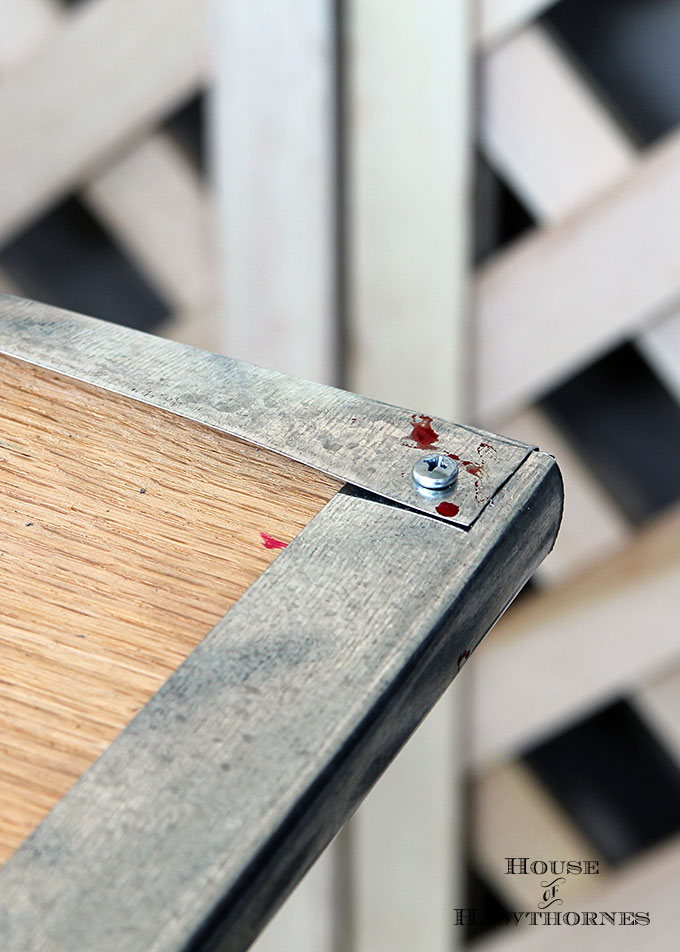
Then I folder the galvanized sheet metal on over to the underside of the table and screwed a few screws in to hold it in place. I put them roughly every 6-8".
Remember when I told you to use gloves? Use them. All the time. Don't take them off for a second to screw a screw in. Really.
Seriously, this stuff is sharp, that's not red paint there.
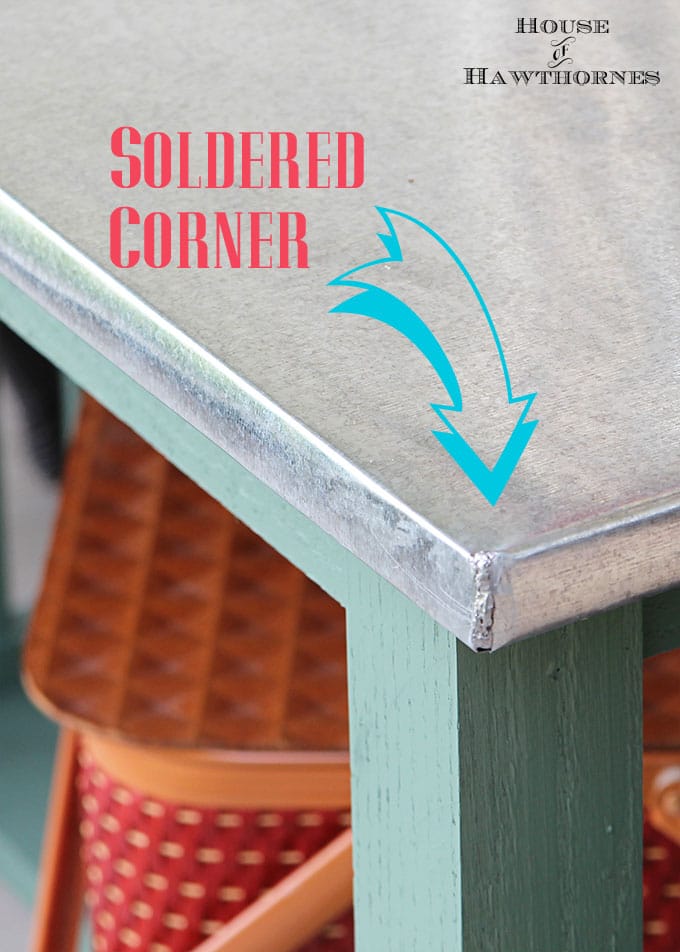
Then I soldered the corners.
Wow, that photo is a little too close up. It really looks so much better from a foot or two away.
To solder it you clean the area with rubbing-alcohol, heat up the soldering iron, apply the flux, touch the solder to the edge of the table and melt it with the soldering iron, filling in any gaps so it looks like one smooth piece. Use an emery cloth or sandpaper to clean up the rough edges.
Did it sound like I really knew how to solder? No, my husband did it. I was afraid it would turn out looking like a bird had pooped on the corners, but I did watch!
All that's left to do is re-attach the top to the table and you're good to go ahead and add your kitschy flocked Christmas deer to your summer table.
I got information on where to buy zinc (even though I didn't end up buying it from there) at VanHook And Co. They also did a nice post on how to "age" the top to give it a more rustic look.
I'm just going to throw caution to the wind and let mine age the old fashioned way. I'm a rebel like that.

Other Projects You May Like:
Vintage Porcelain Enamel Kitchen Table Repurpose
How To Paint A Front Door Without Removing It


chris aka monkey
pam this is truly awesome and you have done a lot of awesome...... zinc is more expensive than mink xx
Dianne
I love this. I have always wanted a zinc topped table. Now I can transform a cheap table and make it look like yours! Thank you for showing us how!
taryterre
What a bargain. Great project. End result wonderful indeed. I must admit I love spray painting with Rust-oleum too
Susanna-Cole King
Wow, I probably should have edited that down, sorry! I swear it didn't look so mammoth in this tiny text box that only shows me a snippet at a time! I'm a fast typist, truly.
chris aka monkey
i thought your book was so funny thanks xx
Susanna-Cole King
Okay, normally I wouldn't really be amused at reading at a tutorial of something I don't plan on doing (I mean that's like reading a user manual for some appliance I don't even have, and I don't even like to read the user manuals for things I do own, I avoid the snooze fest that is tedious instructions for anything, the same way I avoid the DMV or the dentist), but your writing so tickled me pink (to employ a phrase almost no one uses anymore except for me), that I found myself outright enjoying reading this how-to, for a DIY project I will probably not attempt to tackle. I mean, I've already learned my lesson about twenty dozen times.
Okay, so maybe I haven't learned my lesson. But usually I have this seemingly unshakable optimism, almost cockiness, upon embarking on DIY project, and then...swearing like a sailor, sweat breaking out, desperate phone calls to mother who has no idea what the hell I'm doing but whom I find comforting to call anyway because she's the most sympathetic person I know regarding all the trouble I bring upon myself, followed by half a dozen frantic visits to the blessed, blessed men at the pint-sized hardware store down the block who should be nominated for sainthood for all the pickles I've gotten myself into and they've gotten me out of...and somewhere in there, I yell (normally in my head, so my neighbors don't suspect I'd be better suited living in the nut house, you know if my roller skating at 2 am hasn't been ample enough evidence), "Ugh, I am never ever doing a DIY project again!" But you know then I finish and sometimes I'm satisfied just enough to be like, "Hm...what project can I do next?"
But I digress, I'm sorry that got so long winded, this table looks awesome, and I love what you put on it and around it, those pops of red, and where I live, kitschy flocked Christmas deer are precisely the kind of things people keep on summer tables. That and our penchant for plastic pink flamingoes in the lawn that persist even in ice storms.
Pam
Well, I do have a rocking chair in my garage that I have been working on for going on ten years (maybe longer). It's the project that won't end. Maybe I need to go hit up your pint-sized hardware store guys and see if they can help me out 🙂 Thanks for visiting. And writing a book 🙂
Mickey
The table is beautiful! Its good to put a little BLOOD, sweat and tears into a project! I love the color you chose, perfect for a porch. Really enjoyed your blog, this is my first visit here. I hope you will have a minute to visit me athttp://www.mybashfullife.com/ Enjoy your week! xoxo Mickey
Pam
Thank you! I just stopped over and you have a very cute blog! I love that bee in the header! Looking forward to visiting again soon!
melinda
Awesome!
Great price on the table.
M 🙂
Sue Pagels
I seldom take the time to comment (shame on me!) but I really enjoy ALL yours posts, but especially enjoyed this one. Thanks for all the great ideas and humor. I love your humor!
Pam
Well, thanks for commenting, I really do appreciate it!!! And thanks for thinking I'm humorous, I try my hardest to not be normal 🙂
Vickie
Wow, Pam, you've created the perfect outdoor dining/potting table! I've used sheet metal before, and I also learned the hard way that leather gloves are a necessity when cutting it. Soldering the corners was a good idea, too. Well done!
Holly
Great look and you are a brave woman to work with sheet metal. Thanks for the tutorial and for sharing your fun sense of humor!
Holly
Pamela @ FlowerPatchFarmhouse.com
I loved it, and you made it look so fun. I know what you mean about the gloves, we cut the metal roofing for our 'walls' of our back deck and it was sharp! Don't worry about it being a longer than normal post, it was well worth it and you kept it entertaining. So please feel free to do more longer posts and trickier projects. Just be sure to wear your gloves. 🙂
Pam
I actually jabbed myself with one of the corners just trying to get the sheet into my car. You would have thought I'd have learned my lesson, but sadly I didn't.
Linda @ Itsy Bits And Pieces
Wow! I love this project, Pam,,,great tutorial, too! It looks wonderful...Pinning!
Erica
So we own an HVAC company and have a sheetmetal shop. Wonder if my husband would consider me having one of our employees construct this table for me a good use of company time?
Awesome job as always!
Erica
Pam
You would probably know what they actually use this for in HVAC-land then! I was going to ask the dude at Home Depot, but didn't want to look like a "girl".
Jemma
This is amazing and beautiful, what a talented DIY gal you are!
Love it and pinned it!
hugs,
Jemma
Anne@DesignDreams
So pretty! What a great table!!
Patty Soriano
oooh, Pam.... that looks REALLY good ! Too pretty to be spreading dirt all over it!
Pam
Now I'll have to think of something else for my potting table! Or maybe just break down and buy an actual potting table from a store 🙂