
• Skip to primary navigation
  • Skip to main content
  • Skip to primary sidebar
House of Hawthornes
  • DIY
  • Gardening
  • Decorating
  • Thrifting
  • Recipes
  • Seasonal
menu icon
go to homepage
  • DIY
  • Gardening
  • Decorating
  • Thrifting
  • Recipes
  • Seasonal
  • 🛒 Our Amazon Shop
    • Facebook
    • Instagram
    • Pinterest
    • Twitter
    • YouTube
  • search icon
    Homepage link
    • DIY
    • Gardening
    • Decorating
    • Thrifting
    • Recipes
    • Seasonal
    • 🛒 Our Amazon Shop
    • Facebook
    • Instagram
    • Pinterest
    • Twitter
    • YouTube
  • ×
    Home » DIY & Crafts

    Making Zinc Letters And Numbers

    Published by Pam Kessler | 348 words. · About 2 minutes to read this article. -

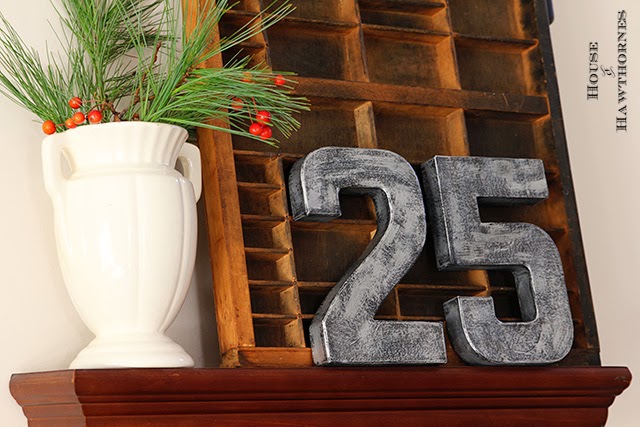
    Although I originally made these faux zinc numbers for the holidays, they are perfect just about any time of year. You could make some with the year you got married, your street address or your children's birth dates. Or heck, once you get into the letters instead of numbers the possibilities are endless - names, initials, whatever you want to say in big old shout-it-from-the-rooftop letters.

    Remember Mary's big old M on the wall of her apartment on the Mary Tyler Moore Show! You've got the idea!

    The other day I knocked these zinc-like numbers out in no time.
    DIY faux zinc letters and numbers - great trendy industrial look and super easy to make!

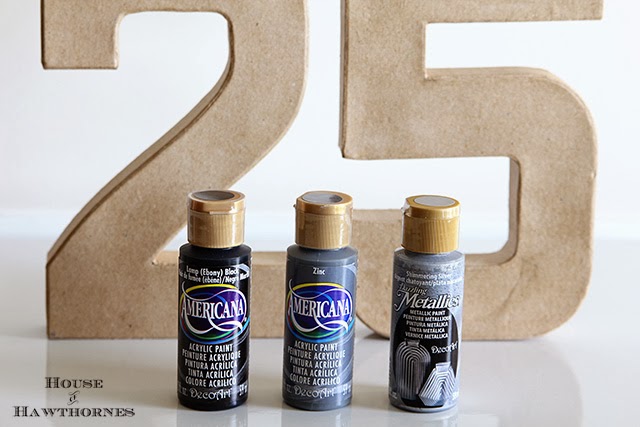
    Materials:

    • Cardboard numbers - I bought them at Hobby Lobby ($2.49 ea)
    • Craft paint in dark black - I used Americana brand's Lamp Black
    • Craft paint in gray - I used Americana brand's Zinc
    • Craft paint in metallic silver - I used DecorArt brand's Dazzling Metallics in Shimmering Silver
     

    DIY faux zinc letters and numbers - great trendy industrial look and super easy to make!

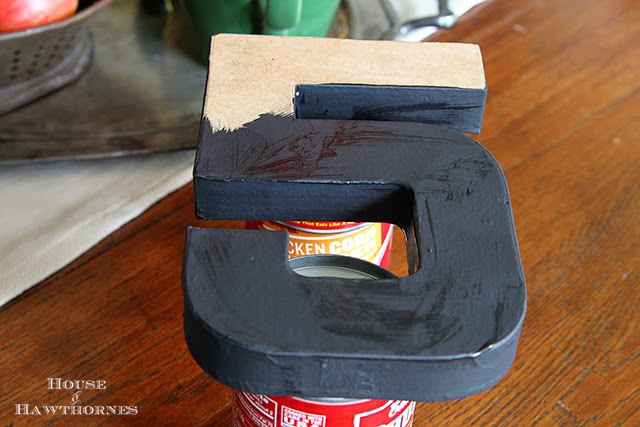
    I started out painting the numbers with the dark black and let that dry to the touch. I coated the entire number on the front and sides.
    DIY faux zinc letters and numbers - great trendy industrial look and super easy to make!

    I added a coat of the gray color using a dry brush technique.

    To dry brush, I dabbed the paintbrush into the paint and then pounced it on a paper towel so that very little paint was left on the brush. And just putting it here and there using short brush strokes.

    I let that dry to the touch.
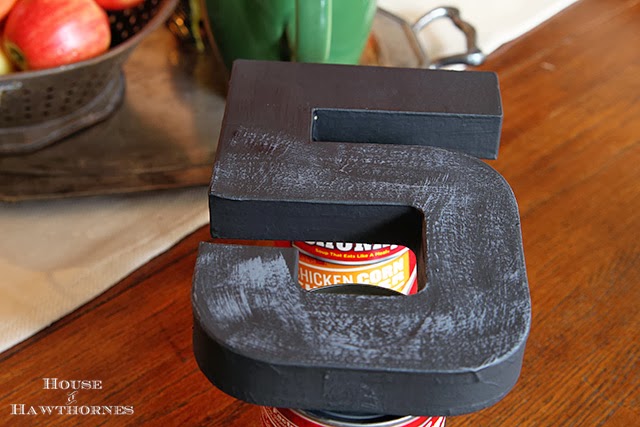
    DIY faux zinc letters and numbers - great trendy industrial look and super easy to make!

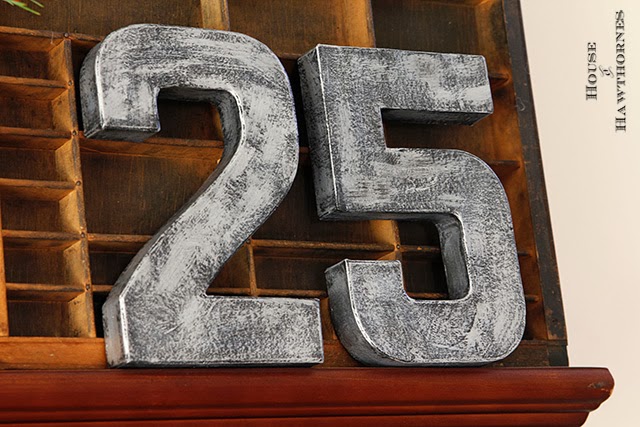
    Then I added the shiny silver color, also using the dry brush technique and using short brush strokes. I would say I coated it 82 maybe 83%, so that there was still a fair amount of black left showing through.
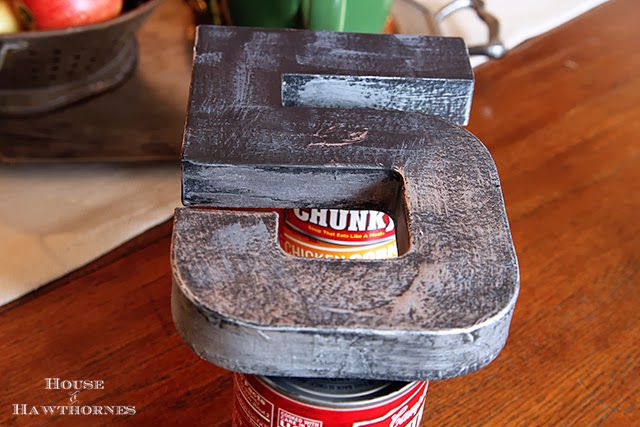
    DIY faux zinc letters and numbers - great trendy industrial look and super easy to make!

    I think they look fairly zinc-ish.

    DIY faux zinc letters and numbers - great trendy industrial look and super easy to make!

    After I got done, I thought maybe it was too obtuse a reference. Would people understand the 2 and the 5 were for December 25th?

    So I added the greenery and berries (totally stolen out of my yard) just to make sure it was understood that they were for Christmas and not representing my age.

    'Cause you all know I get mistaken for 25 All. The. Time!
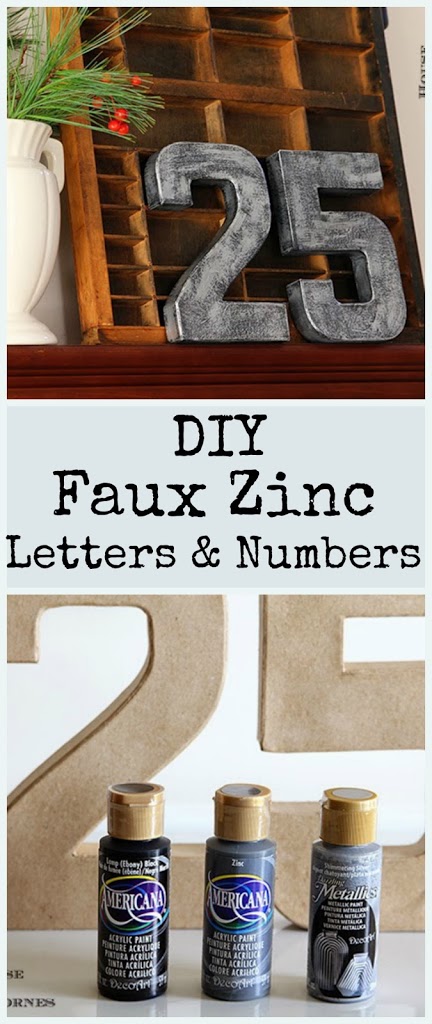
    DIY faux zinc letters and numbers - great trendy industrial look and super easy to make!


    « Losing My Head At An Estate Sale
    Cozy Hot Cocoa Station For The Holidays »
    22.1K shares
    • Facebook
    • X

    Reader Interactions

    Comments

    1. Vickie @ Ranger 911

      November 21, 2013 at 8:46 pm

      Well, I figured out the 25 right away, but I thought the numbers were on top of your birthday cake! I like the zinc finish!

    2. Sweet Peas

      November 21, 2013 at 3:41 pm

      Wow you can't even tell that is cardboard! Great job!!

    3. Erica of Golden Egg Vintage

      November 20, 2013 at 11:00 pm

      LOve them! Great job!
      Erica

    4. Robin Johnson

      November 20, 2013 at 10:46 pm

      You are so smart Pam! I love the look of them and want to make my own asap. Thanks for the inspiration.

    5. Linda @ Itsy Bits And Pieces

      November 20, 2013 at 10:20 pm

      Those look so great, Pam! Thanks for the inspiration!

    6. TARYTERRE

      November 20, 2013 at 9:27 pm

      What a clever idea. LOVE it. The evergreen and berries make the scene perfect.

    7. CherryPicked

      November 20, 2013 at 8:09 pm

      Awesome idea! I love it.

    8. Joanne Noragon

      November 20, 2013 at 7:45 pm

      Really neat. They look way zincish. And since when aren't you twenty fiveish?

    9. Linda@Coastal Charm

      November 20, 2013 at 7:42 pm

      Awesome looking numbers Pam!

      Blessings,
      Linda

    10. Marissa

      November 20, 2013 at 7:24 pm

      They turned out awesome!
      It won't be long ..

    11. ThrifterSisters

      November 20, 2013 at 7:19 pm

      Pinning!

      ~Erica

    12. TracyMB @ Crows Feet Chic

      November 20, 2013 at 7:07 pm

      Macy would have just rolled her eyes and put the five back in front of the two. Love the letters -- you spring chicken. 🙂

    13. Cozy Little House

      November 20, 2013 at 7:05 pm

      I could hardly believe that that first photo was cardboard!
      Brenda

    14. Carlene @ Organized Clutter

      November 20, 2013 at 6:54 pm

      I like the letters Pam! Thanks for the tip.

    15. Jennifer Schmitz

      November 20, 2013 at 6:24 pm

      Your zinc numbers turned out great. They look so real!

    16. Kerin

      November 20, 2013 at 6:14 pm

      Pam, I love the way they turned out!!!
      You are so lucky, to get mistaken for 25.
      Sheesh, I get mistaken for 29..... so much older than you *****giggle**.

      Keep up the crafting 🙂

      K.

    Newer Comments »

    Primary Sidebar

    Hi, I'm Pam. Let me show you how to create a budget-friendly home you'll love using repurposed thrift store finds, easy DIY & craft projects, and seasonal flower gardening tips.

    More about me →

    Spring Crafts & Decor

    • Spring tulips
      How To Care For Tulips In A Vase: No More Drooping
    • Upcycled Spring Home Decor Projects
    • Vintage inspired Easter eggs using temporary tattoo paper and vintage Easter postcard images.
      DIY Easter Egg Temporary Tattoos: Vintage Style
    • Rustic modern farmhouse Easter porch decorations most of which are repurposed.
      Easter Porch Decor : A Repurposed Modern Farmhouse Look
    • Easy 5 Minute Spring Porch Pot Refresh
    • Vintage Easter Images | Adorable Free Printables

    Reader Favorites

    • How to make window art with glass plates from the thrift store for a mosaic look.
      Window Art With Glass Plates
    • Easy Homemade Candles In Granny's Candy Dish
    • Clean Silver With Baking Soda And Aluminum Foil
    • squirrel repellent
      Homemade Squirrel Repellent Recipe

    Footer

    ↑ back to top

    About

    • About Us
    • Contact
    • Privacy Policy
    • Web Stories
    • Blog

    Shop

    • Amazon Favorites
    • Shop The Look

    Newsletter

    • Sign Up For Emails & Updates

    Categories

    • DIY
    • Gardening
    • Budget Decor
    • Thrifting
    • Recipes
    • Seasonal

    Please use appropriate safety precautions when attempting projects. All projects are attempted at the reader's own risk.

    As an Amazon Associate, I earn from qualifying purchases.

    Copyright © 2025 House Of Hawthornes, LLC