• Skip to primary navigation
  • Skip to main content
  • Skip to primary sidebar
House of Hawthornes
  • DIY
  • Gardening
  • Budget Decor
  • Thrifting
  • Seasonal
menu icon
go to homepage
search icon
Homepage link
  • DIY
  • Gardening
  • Decorating
  • Thrifting
  • Seasonal
  • 🛒 Our Amazon Shop
    • Facebook
    • Instagram
    • Pinterest
    • Twitter
    • YouTube
  • ×

    Home » DIY And Crafts

    Making Zinc Letters And Numbers

    Published by Pam Kessler | 348 words. · About 2 minutes to read this article. - 33 Comments

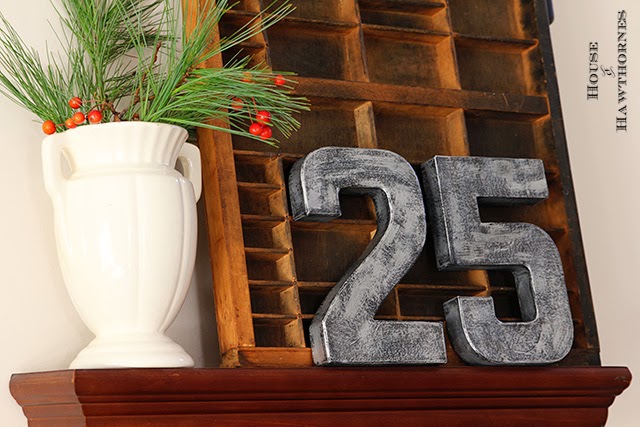
    Although I originally made these faux zinc numbers for the holidays, they are perfect just about any time of year. You could make some with the year you got married, your street address or your children's birth dates. Or heck, once you get into the letters instead of numbers the possibilities are endless - names, initials, whatever you want to say in big old shout-it-from-the-rooftop letters.

    Remember Mary's big old M on the wall of her apartment on the Mary Tyler Moore Show! You've got the idea!

    The other day I knocked these zinc-like numbers out in no time.
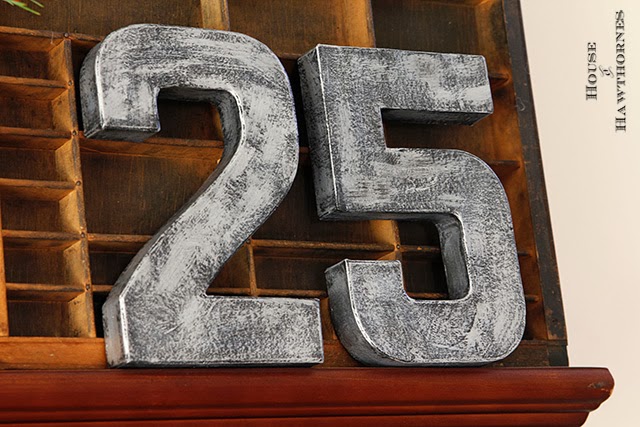
    DIY faux zinc letters and numbers - great trendy industrial look and super easy to make!

    Materials:

    • Cardboard numbers - I bought them at Hobby Lobby ($2.49 ea)
    • Craft paint in dark black - I used Americana brand's Lamp Black
    • Craft paint in gray - I used Americana brand's Zinc
    • Craft paint in metallic silver - I used DecorArt brand's Dazzling Metallics in Shimmering Silver
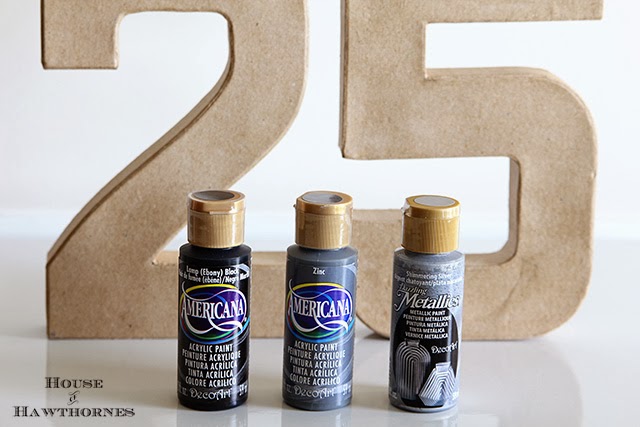
     

    DIY faux zinc letters and numbers - great trendy industrial look and super easy to make!

    I started out painting the numbers with the dark black and let that dry to the touch. I coated the entire number on the front and sides.
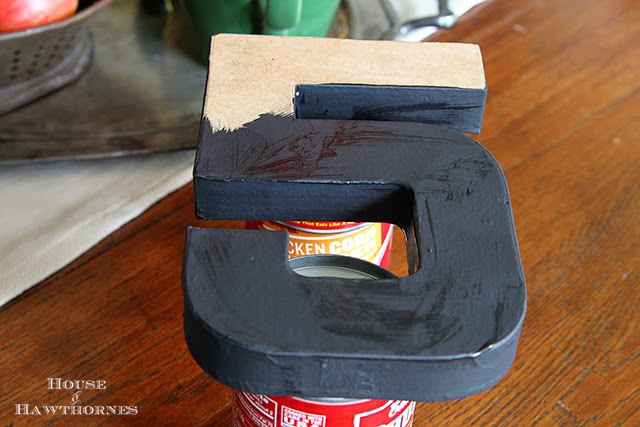
    DIY faux zinc letters and numbers - great trendy industrial look and super easy to make!

    I added a coat of the gray color using a dry brush technique.

    To dry brush, I dabbed the paintbrush into the paint and then pounced it on a paper towel so that very little paint was left on the brush. And just putting it here and there using short brush strokes.

    I let that dry to the touch.
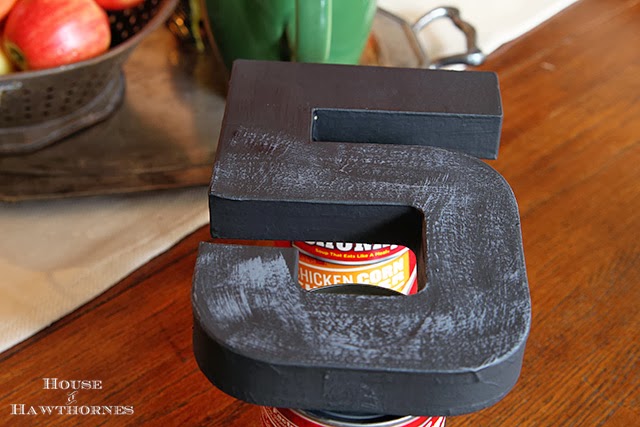
    DIY faux zinc letters and numbers - great trendy industrial look and super easy to make!

    Then I added the shiny silver color, also using the dry brush technique and using short brush strokes. I would say I coated it 82 maybe 83%, so that there was still a fair amount of black left showing through.
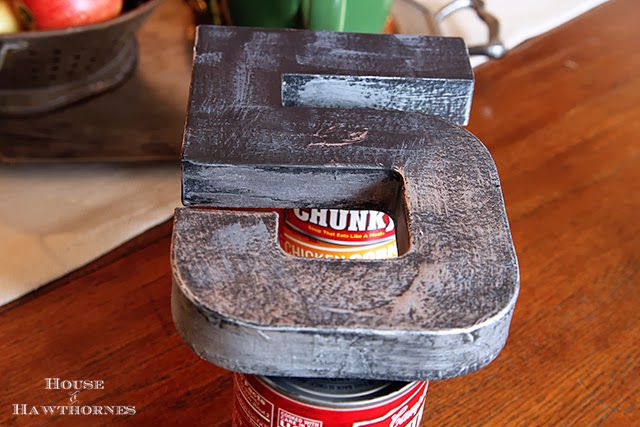
    DIY faux zinc letters and numbers - great trendy industrial look and super easy to make!

    I think they look fairly zinc-ish.

    DIY faux zinc letters and numbers - great trendy industrial look and super easy to make!

    After I got done, I thought maybe it was too obtuse a reference. Would people understand the 2 and the 5 were for December 25th?

    So I added the greenery and berries (totally stolen out of my yard) just to make sure it was understood that they were for Christmas and not representing my age.

    'Cause you all know I get mistaken for 25 All. The. Time!
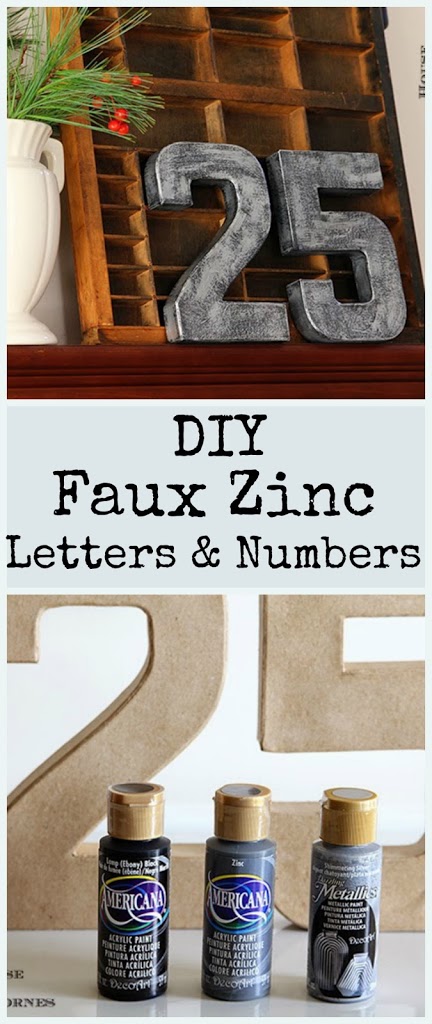
    DIY faux zinc letters and numbers - great trendy industrial look and super easy to make!


    « Losing My Head At An Estate Sale
    Cozy Hot Cocoa Station For The Holidays »
    22.1K shares

    Reader Interactions

    Comments

    1. Down to Earth Style

      November 22, 2013 at 8:38 pm

      Very cool! Love this idea especially 25 for Christmas.

      Reply
    2. Susan @ Rustic ReDiscovered

      November 23, 2013 at 8:54 am

      Love the numbers. Great project! The finished look is awesome.

      Reply
    3. [email protected]

      November 23, 2013 at 5:41 pm

      They look great!! And I love "obtuse" references to things...sort of like a decorating "game" 🙂

      Reply
    4. fiona anderson

      November 24, 2013 at 12:44 pm

      These are really great. I have some letters that I've been thinking about gilding or maybe trying to do a zinc finish like yours, so it was great to find this post, thank you.
      Pinning this too !

      Reply
    5. Debby

      November 26, 2013 at 10:23 pm

      Wow, love those. I like using the 25 as well.

      Reply
    6. Ginny @ OrganizingHomelife.com

      November 27, 2013 at 1:21 pm

      They look fantastic! Great tutorial. Like I needed another excuse to go to Hobby Lobby! 😉

      Reply
    7. LivingVintage

      November 30, 2013 at 8:28 pm

      I really thought you were about to show us how to work with metal. Sneaky, sneaky.

      Reply
    8. Ursula Carmona

      October 01, 2014 at 7:22 am

      These are great Pam! And so much more affordable than actual zinc letters!!!

      Reply
    9. Vanessa

      November 25, 2014 at 1:59 pm

      I love this project Pam. I am going to give these a try.

      Reply
    10. Linda

      December 10, 2014 at 10:36 am

      The wooden section piece that you used to put the 25 in front of, what is that from? I purchased one almost like that & thought maybe it was used in an older post office for letters to be put in since the sections are small. Am I close? I really enjoy viewing your site, lots of ideas & all I really need is.....time! Merry Christmas!

      Reply
      • Pam Kessler

        December 11, 2014 at 5:40 pm

        It's a printer's box also known as a California Job Case. It was used to keep all the letters and numbers used in printing on the old machines in a specific order. Some of the boxes are larger than others because those letters were used more often so you needed more of those ones (more e's are needed than y's, etc).

        Reply
    11. Clare

      September 19, 2016 at 6:30 am

      Hi Pam, thanks SO much for this tutorial! I found it to be just the paint effect I was looking for to get a 'metal look' on a tissue box cover I was making for my sons industrial style bedroom. You can check it out here, I even included a link back to this page, hope thats ok? http://mylifeinstep.com/8-easy-diy-tissue-box-covers-jazz-up-the-rooms-in-your-home/

      Reply
      • Pam

        September 19, 2016 at 7:23 am

        I love your tissue box. Those nuts and bolts on the corner are so cute! Thanks so much for linking back to my tutorial!

        Reply
    « Older Comments

    Leave a Reply Cancel reply

    Your email address will not be published. Required fields are marked *

    Recipe Rating


    Primary Sidebar

    Learn how to create a budget friendly home you'll love using repurposed thrift store finds, easy DIY & craft projects and seasonal gardening tips.

    Trending Content:

    • DIY Industrial Pipe Shelves
    • How To Grow Peonies - A Complete Guide
    • How To Paint A Front Door Without Removing It
    • Homemade Squirrel Repellent Recipe
    • DIY Earring Holder
    • How to Make A Penny Bowling Ball
    • Top 10 Thrift Store Shopping Tips
    • Blueberry Crostata Recipe
    • How To Make Winter Porch Pots
    • How To Grow Hydrangea In Pots

    About Me

    Pam Kessler | Author of House Of Hawthornes

    Footer

    ↑ back to top

    About

    • About
    • Contact
    • Privacy Policy
    • Web Stories
    • Blog

    Let's Connect

    • Subscribe
    • Instagram
    • Pinterest
    • Facebook

    Shop

    • Amazon Favorites
    • Shop The Look

    Please use appropriate safety precautions when attempting projects. All projects are attempted at the reader's own risk.

    As an Amazon Associate, I earn from qualifying purchases.

    Copyright © 2023 House Of Hawthornes, LLC

    🍪 We use cookies to give you the most relevant experience by remembering your preferences and repeat visits. By clicking “Accept”, you consent to the use of ALL the cookies.
    Do not sell my personal information.
    I Accept Read Privacy Notice
    Privacy & Cookies Policy

    Privacy Overview

    This website uses cookies to improve your experience while you navigate through the website. Out of these cookies, the cookies that are categorized as necessary are stored on your browser as they are essential for the working of basic functionalities of the website. We also use third-party cookies that help us analyze and understand how you use this website. These cookies will be stored in your browser only with your consent. You also have the option to opt-out of these cookies. But opting out of some of these cookies may have an effect on your browsing experience.
    Necessary
    Always Enabled

    Necessary cookies are absolutely essential for the website to function properly. This category only includes cookies that ensures basic functionalities and security features of the website. These cookies do not store any personal information.

    Non Necessary

    Any cookies that may not be particularly necessary for the website to function and is used specifically to collect user personal data via analytics, ads, other embedded contents are termed as non-necessary cookies. It is mandatory to procure user consent prior to running these cookies on your website.