
• Skip to primary navigation
  • Skip to main content
  • Skip to primary sidebar
House of Hawthornes
  • DIY
  • Gardening
  • Decorating
  • Thrifting
  • Recipes
  • Seasonal
menu icon
go to homepage
  • DIY
  • Gardening
  • Decorating
  • Thrifting
  • Recipes
  • Seasonal
  • 🛒 Our Amazon Shop
    • Facebook
    • Instagram
    • Pinterest
    • Twitter
    • YouTube
  • search icon
    Homepage link
    • DIY
    • Gardening
    • Decorating
    • Thrifting
    • Recipes
    • Seasonal
    • 🛒 Our Amazon Shop
    • Facebook
    • Instagram
    • Pinterest
    • Twitter
    • YouTube
  • ×
    Home » DIY & Crafts

    Updating An Oak Chair Farmhouse Style

    Published by Pam Kessler | 261 words. · About 2 minutes to read this article. -

    I have this old oak chair that I have been wanting to do something with for a long time.

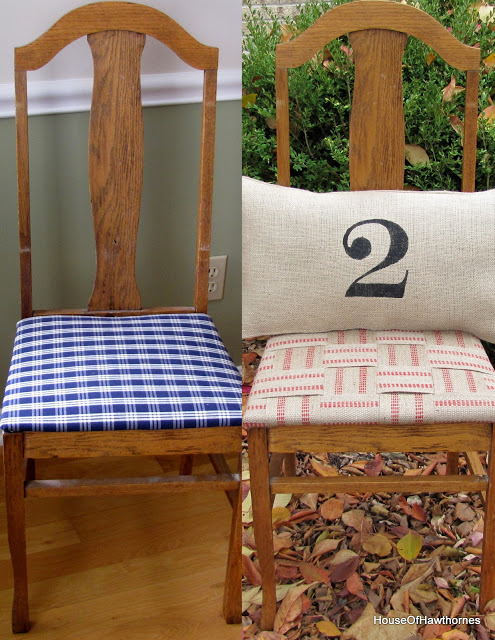
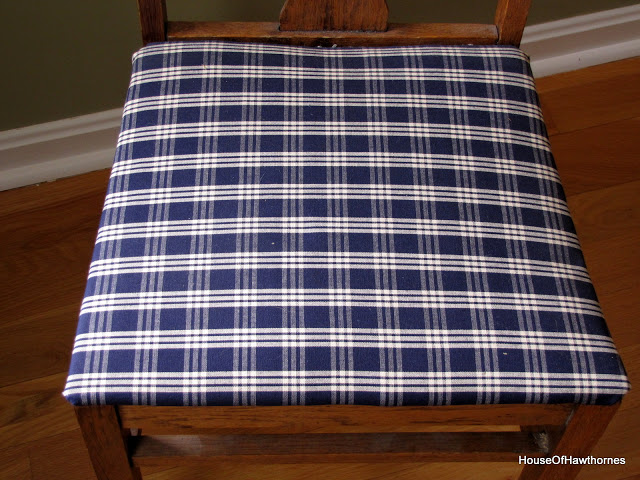
    It's a very sturdy oak chair, but the blue checked fabric wasn't quite my style anymore.
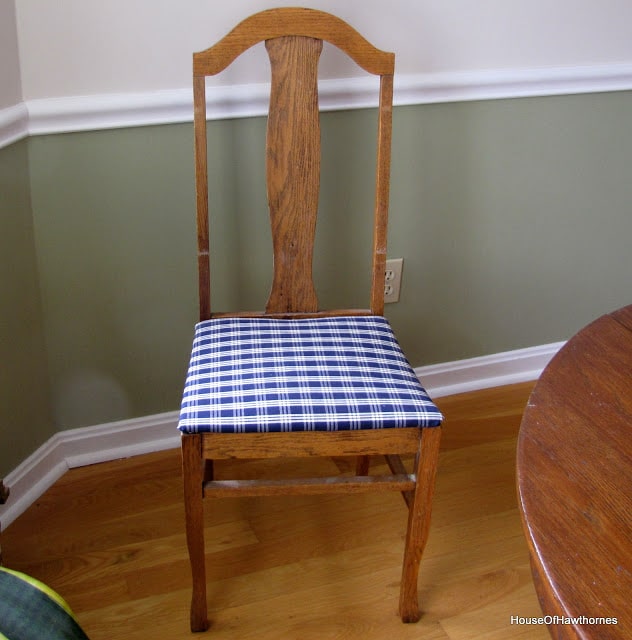

    A couple years ago I put this checked fabric on it because it was leftover from curtains I made for my kitchen at our old house. But it goes with NOTHING in this house.

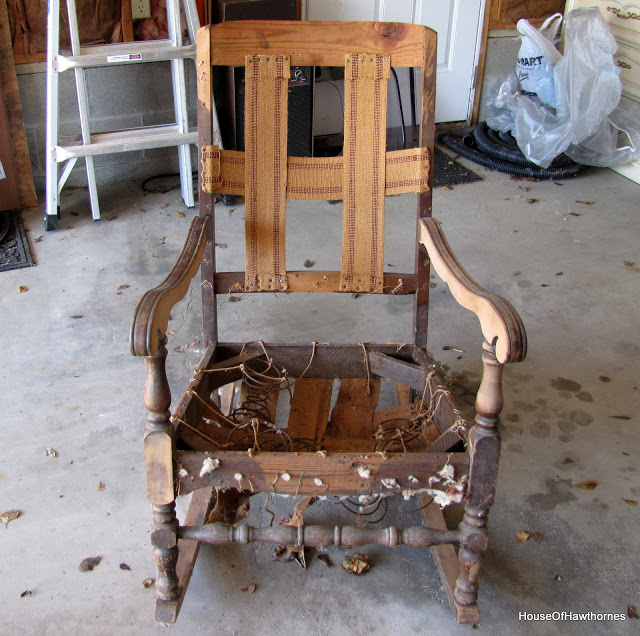
    And then last week when I was showing you this rocking chair project, I was sort of obsessed about the upholstery webbing.

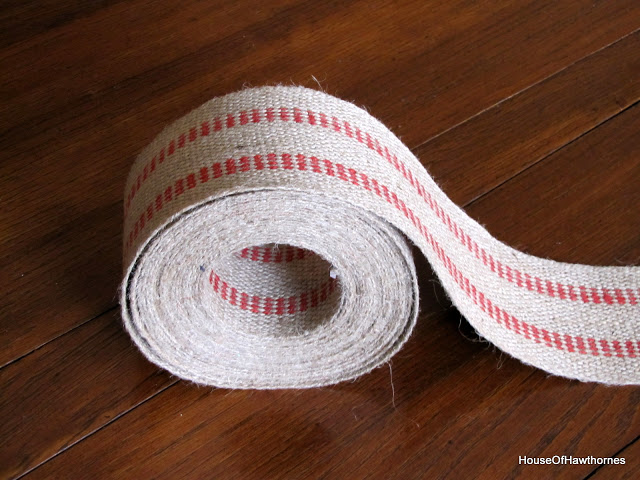
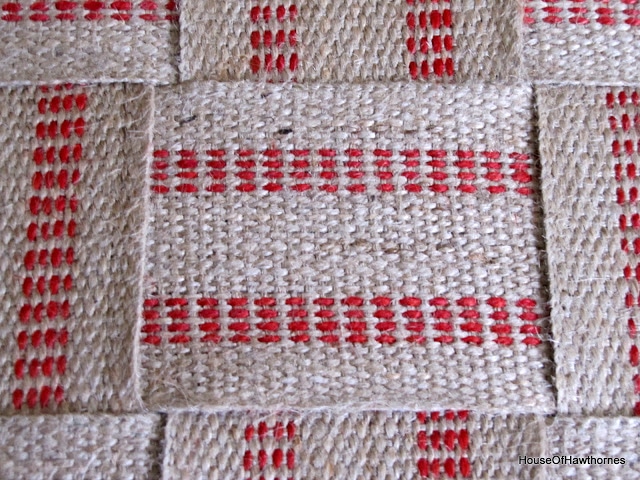
    It's some pretty sturdy stuff and similar to burlap in texture, so I wanted to do something with it.

    So when I was a JoAnn Fabrics I picked up a few yards of it and decided to use it on my oak chair project.

    I didn't bother taking the blue and white checked fabric off the chair, I just put the webbing over it.

    I stapled the first row of horizontal webbing to the back on two sides (right and left in the photo). I made sure the long side was hanging over the seat enough to be able to be rolled over the lip and stapled to the back when I was finished.
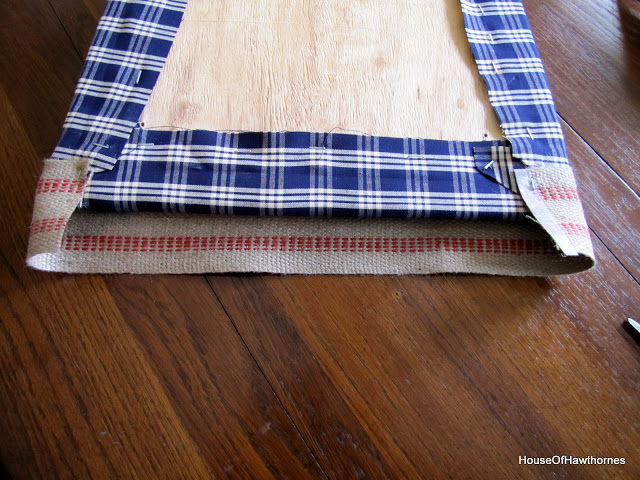

    I continued stapling rows side by side
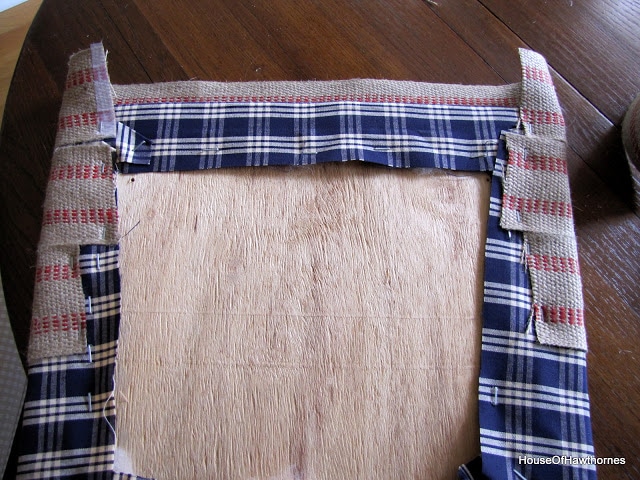

    as close together as I could get them.
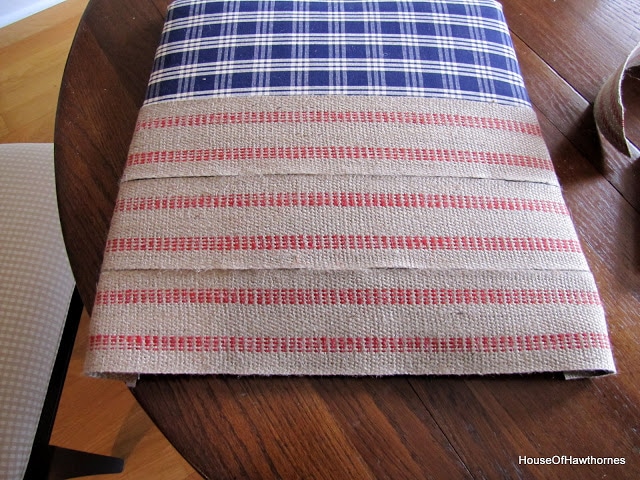

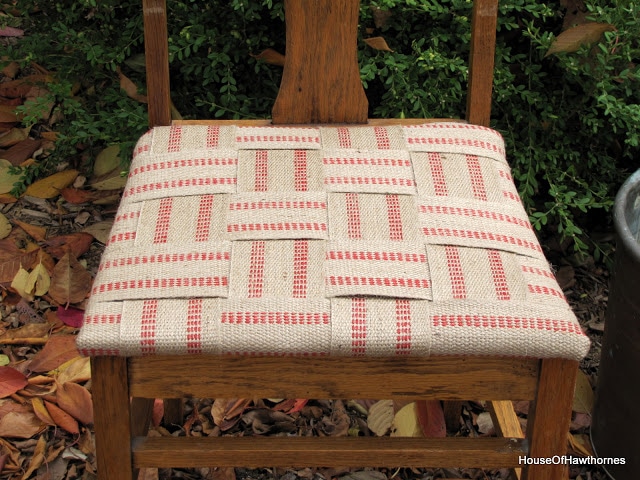
    And then I wove the vertical webbing through the horizontal pieces
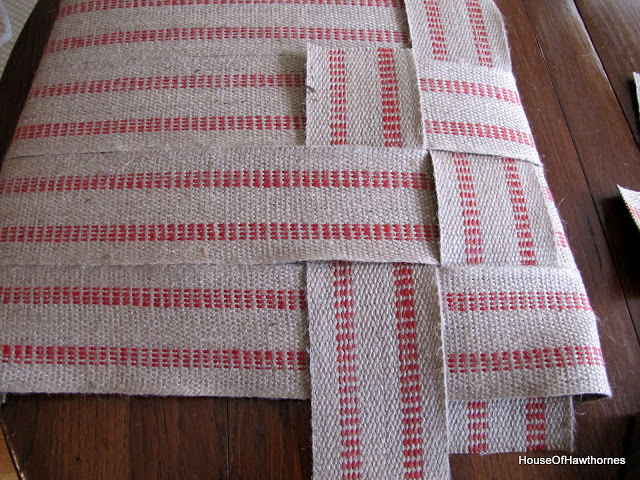

    until it was completed. Then I stapled the vertical pieces on the backside.
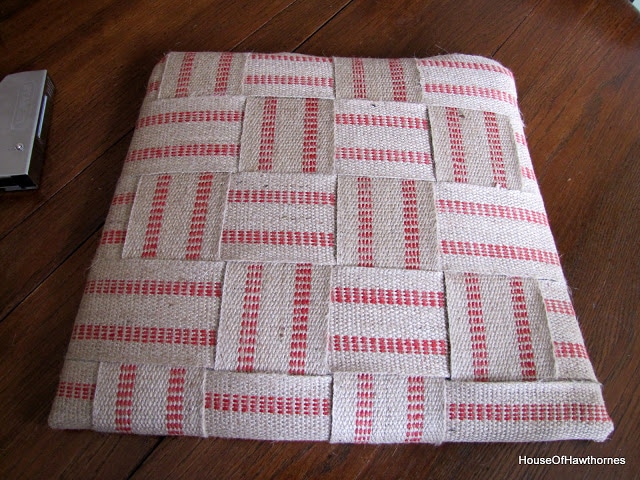

    I just love the texture of this stuff!

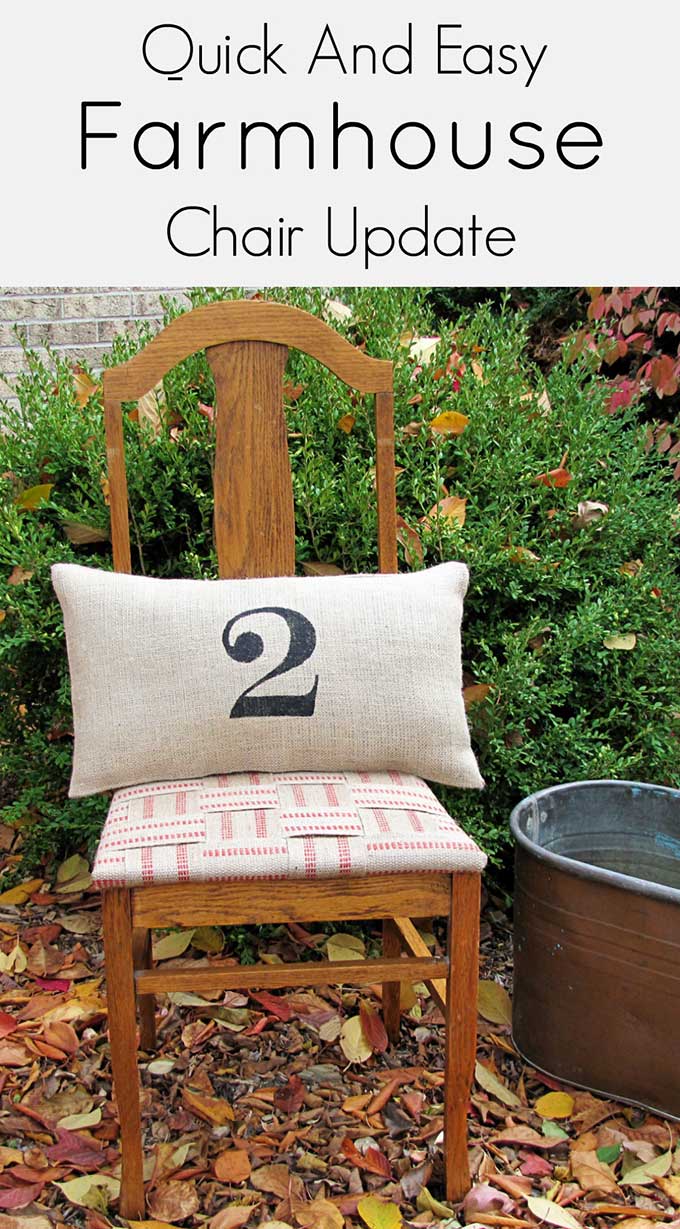
    Here's the finished project.
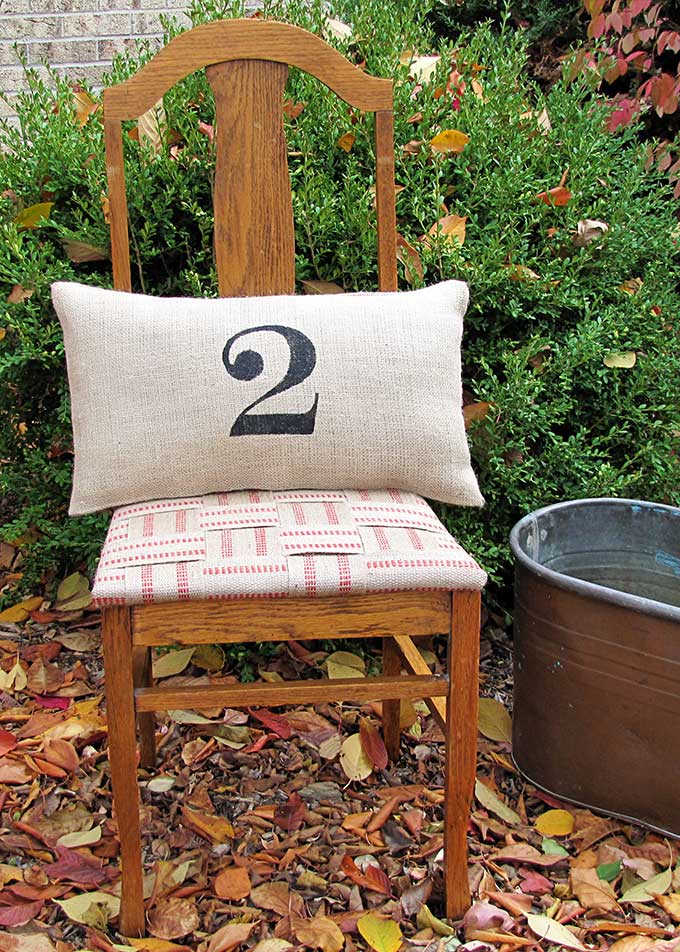
    Quick and Easy way to give an old oak chair a farmhouse update!


    Before and After


    Quick and Easy way to give an old oak chair a farmhouse update!

    « Thrifty Shopping Finds
    Lionel Trains Around The Christmas Tree »
    • Facebook
    • X

    Reader Interactions

    Comments

    1. Pamela

      November 07, 2010 at 10:51 pm

      Very creative Pam! The chair looks fantastic. I never would have thought of this!
      Pamela xo

    2. Chrissie

      November 07, 2010 at 10:34 pm

      Very creative! I love this look and the pillow is great too!

    3. xinex

      November 07, 2010 at 9:59 pm

      I love it! It's very pretty, Pam. You did a great job....Christine

    4. Jan

      November 07, 2010 at 1:41 pm

      That's a GREAT idea & I have a chair to work with!

    5. Sue

      November 07, 2010 at 1:22 pm

      Pam, I've always liked upholstery webbing for projects, but this takes the cake for the best use I've seen for it!! Looks just fantabulous!! Like my descriptive word? LOL

      ~ Sue

    6. SALTBOX TREASURES

      November 07, 2010 at 1:14 am

      Hi Pam, Thanks for visiting and following my blog.
      I love this chair! I'm going to get some of this upholstery webbing for a lampshade. It looks great.
      ~ Julie

    7. Jeanette

      November 06, 2010 at 9:41 pm

      Wow! I really like that! I just redid a chair for my craft room and I wish I would have seen this a little sooner!!

    8. Anne - Fiona and Twig

      November 06, 2010 at 9:00 pm

      What a fantastic transformation!
      I love what you did here, great job. 🙂

    9. Cat Nap Inn Primitives

      November 06, 2010 at 8:21 pm

      Oh I SSSSSOOOOo love how you did this chair..it is awesome..love the pillow too:) you did a fantastic job.;)

    10. Mimi

      November 06, 2010 at 7:55 pm

      Pam, that came out great!

    11. NanaDiana

      November 06, 2010 at 7:01 pm

      Well, that's cute! Love it! Hugs- Diana

    12. Kelly

      November 06, 2010 at 5:48 pm

      Pam, thanks so much for your comment and for following my blog! It truly means a lot. I am in LOVE with this chair re-do! I have always wanted to do this kind of project on a chair, but, all of my chairs have hard bottoms! I may just have to buy an old junky one and try it! Thanks again....I'm a new follower!

    13. La

      November 06, 2010 at 4:53 pm

      I love it, Pam! You didn't only change the color, but the personality of the chair. AWESOME!

    14. Erin@likegrandmas

      November 06, 2010 at 4:03 pm

      Pam that is gorgeous!!! I love what you did to your chair and I love how you've displayed it! Great job!!!

    15. Sandy

      November 06, 2010 at 2:33 pm

      Great idea!!!!! I like the texture also, I am anxious to see what happens to that wonderful old rocker!!!!! If anyone can make it great, you can!!!! 🙂 Sandy

    16. Olive Cooper

      November 06, 2010 at 2:18 pm

      I like it so much better now. You are right that the texture is very cool. ♥O

    Newer Comments »

    Primary Sidebar

    Hi, I'm Pam. Let me show you how to create a budget-friendly home you'll love using repurposed thrift store finds, easy DIY & craft projects, and seasonal flower gardening tips.

    More about me →

    Gardening Ideas

    • 5 Simple Tips For Growing Clematis Vines
    • Growing Black-Eyed Susan Vine
      How To Grow Black-Eyed Susan Vine
    • How to store peonies - pink peonies in a vase setting on a white wooden table.
      Storing Peonies To Bloom Later
    • Plant combinations for container gardens.
      Favorite Plant Combinations For Container Gardens
    • Summer Shade Container Planter using begonia, coleus, polka dot plants, ferns and other plants that can be taken in the house in the fall.
      Create A Lush Summer Shade Container Planter
    • Tips on how to grow peonies. Everything from soil conditions to USDA Plant Hardiness Zones to ants. Includes how to cut peonies for flower arrangements.
      How To Grow Peonies - A Complete Guide
    • squirrel repellent
      Homemade Squirrel Repellent Recipe
    • Homemade spider spray using natural ingredients.
      Homemade Natural Spider Repellent

    Reader Favorites

    • How To Make A Barn Quilt
    • How to make window art with glass plates from the thrift store for a mosaic look.
      Window Art With Glass Plates
    • Easy Homemade Candles In Granny's Candy Dish
    • Clean Silver With Baking Soda And Aluminum Foil

    Footer

    ↑ back to top

    About

    • About Us
    • Contact
    • Privacy Policy
    • Web Stories
    • Blog

    Shop

    • Amazon Favorites
    • Shop The Look

    Newsletter

    • Sign Up For Emails & Updates

    Categories

    • DIY
    • Gardening
    • Budget Decor
    • Thrifting
    • Recipes
    • Seasonal

    Please use appropriate safety precautions when attempting projects. All projects are attempted at the reader's own risk.

    As an Amazon Associate, I earn from qualifying purchases.

    Copyright © 2025 House Of Hawthornes, LLC