

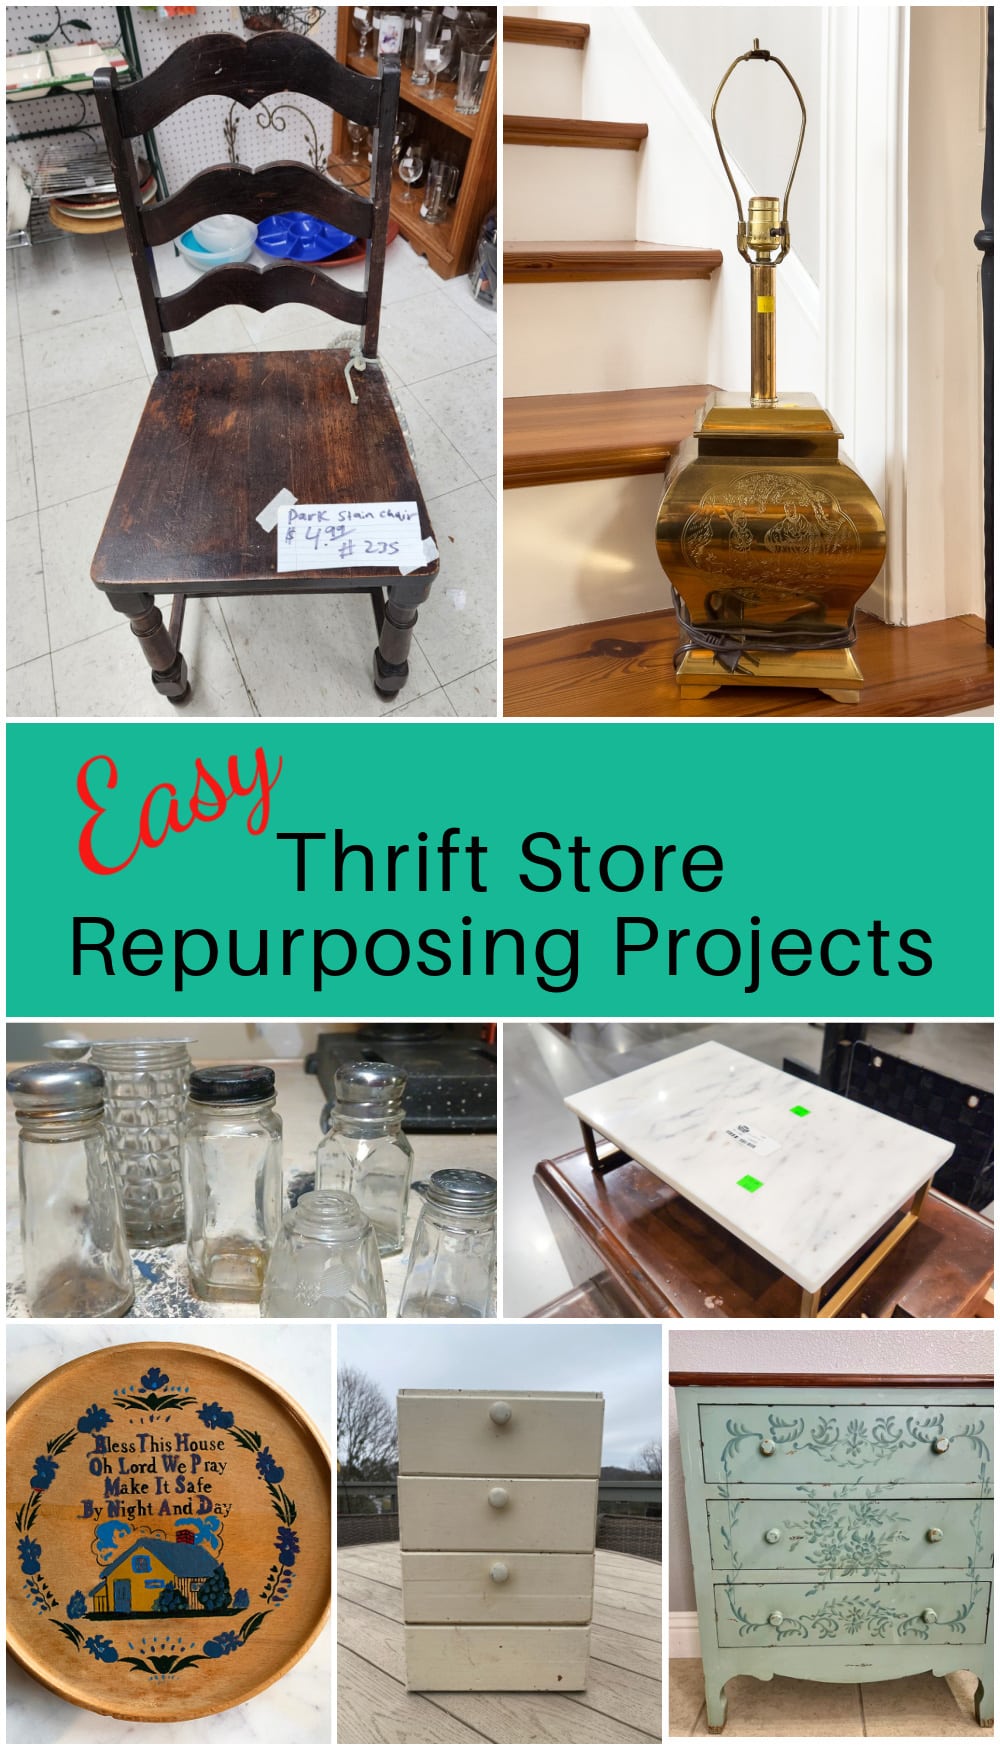
The wooden aisle is one of the first aisles I visit at the thrift stores.
Sometimes, it seems like a dumping ground for 1980s geese shelf sitters and wooden shelves adorned with heart cutouts. But if you dig a little deeper, you can find all sorts of wooden bowls, plaques and boxes that you can repurpose into unique home decor pieces.
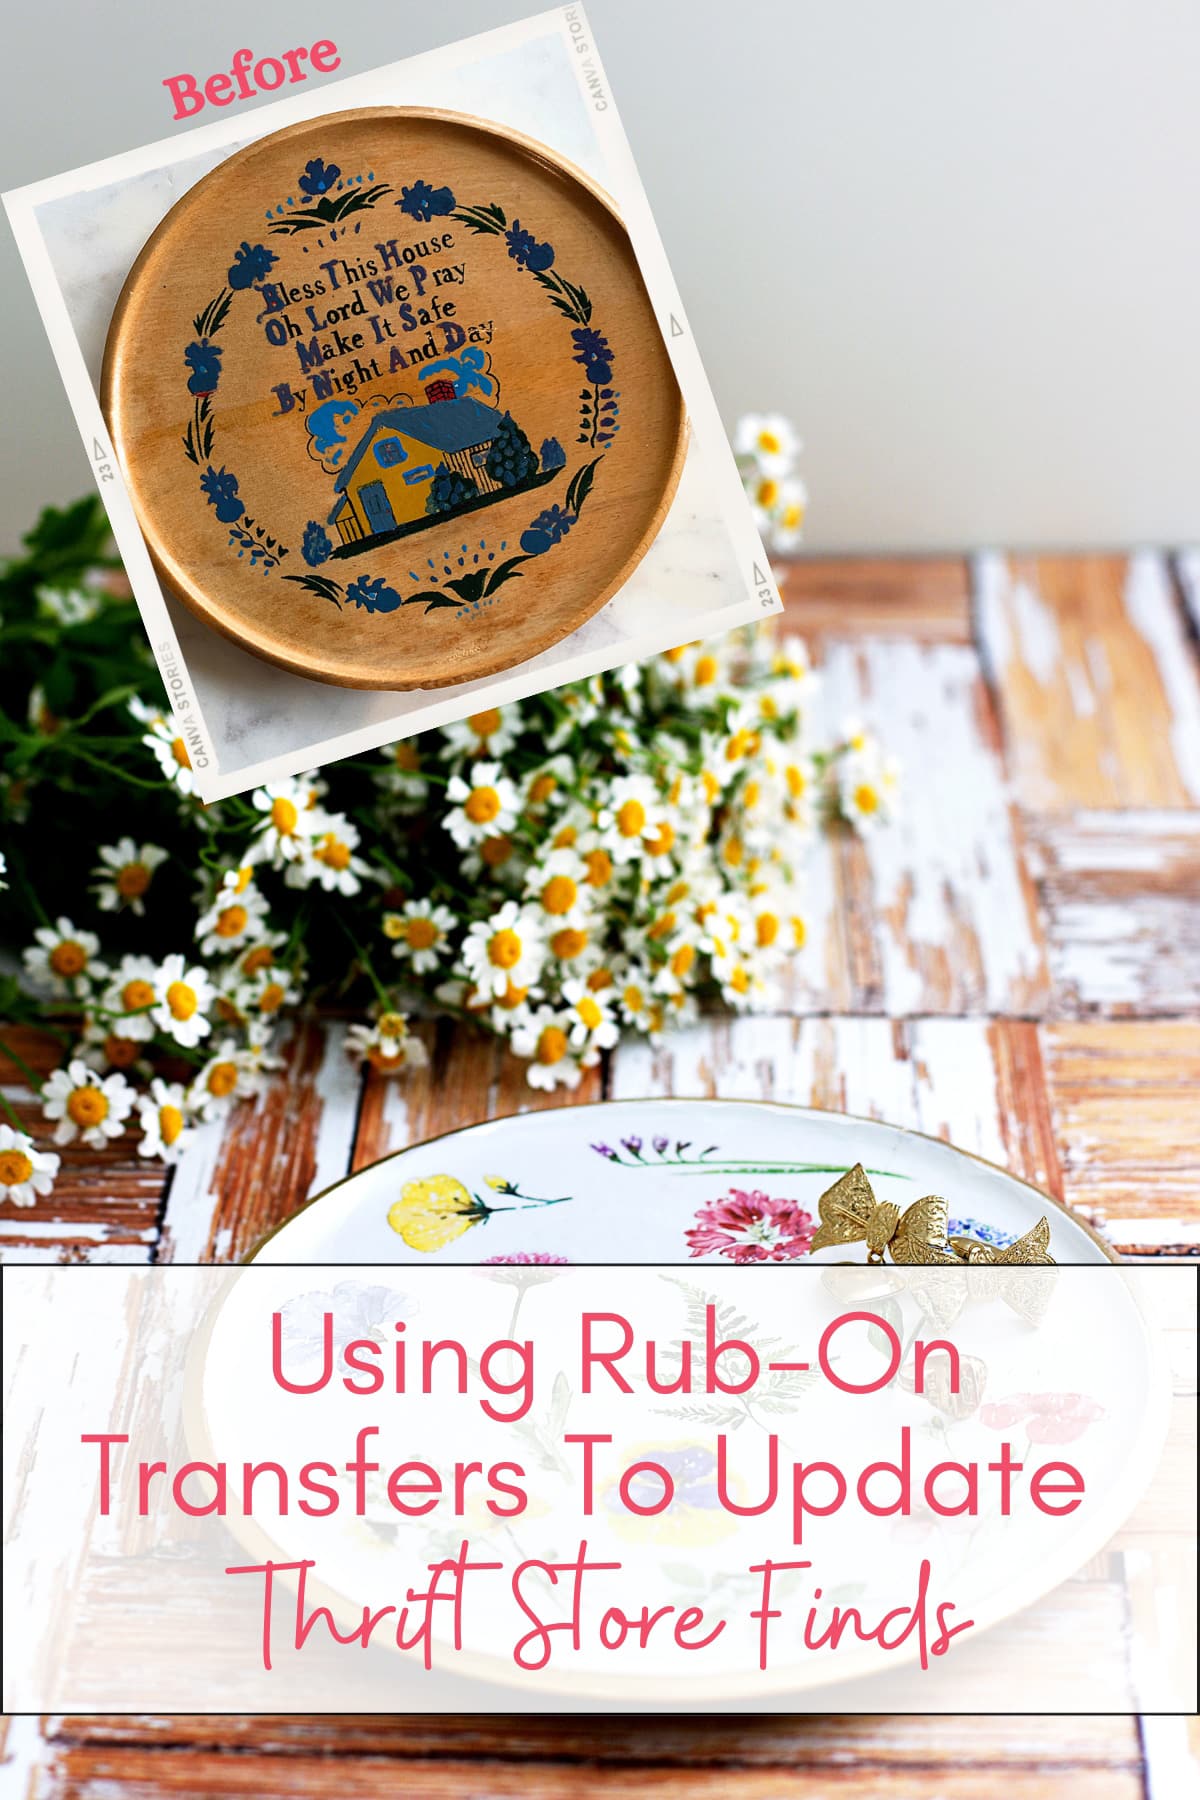
For instance, I found this wooden piece that was meant to be hung in the kitchen.
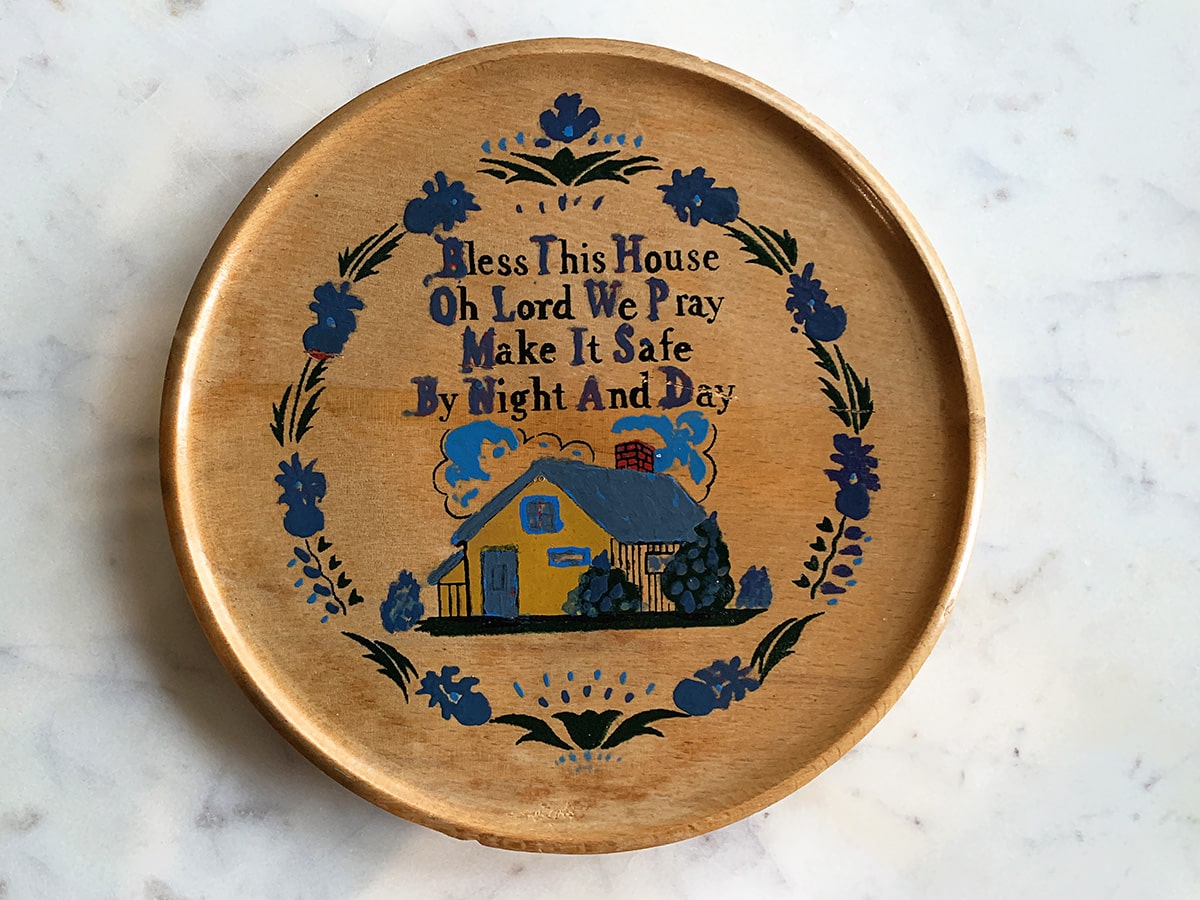
From researching online, it appears to be a fairly common homewares piece from Ucagco (United China And Glassware Company), which imported lots of inexpensive china and painted knickknacks from Japan.
Someone gave it a little makeover at some point by adding some extra paint to some of the letters and flowers.
Since it was basically a flat surface, I thought it would make a great project to update with rub-on transfers to more fit my style. OK, so kitschy stuff sort of is my style, but this was just too kitschy for even me.
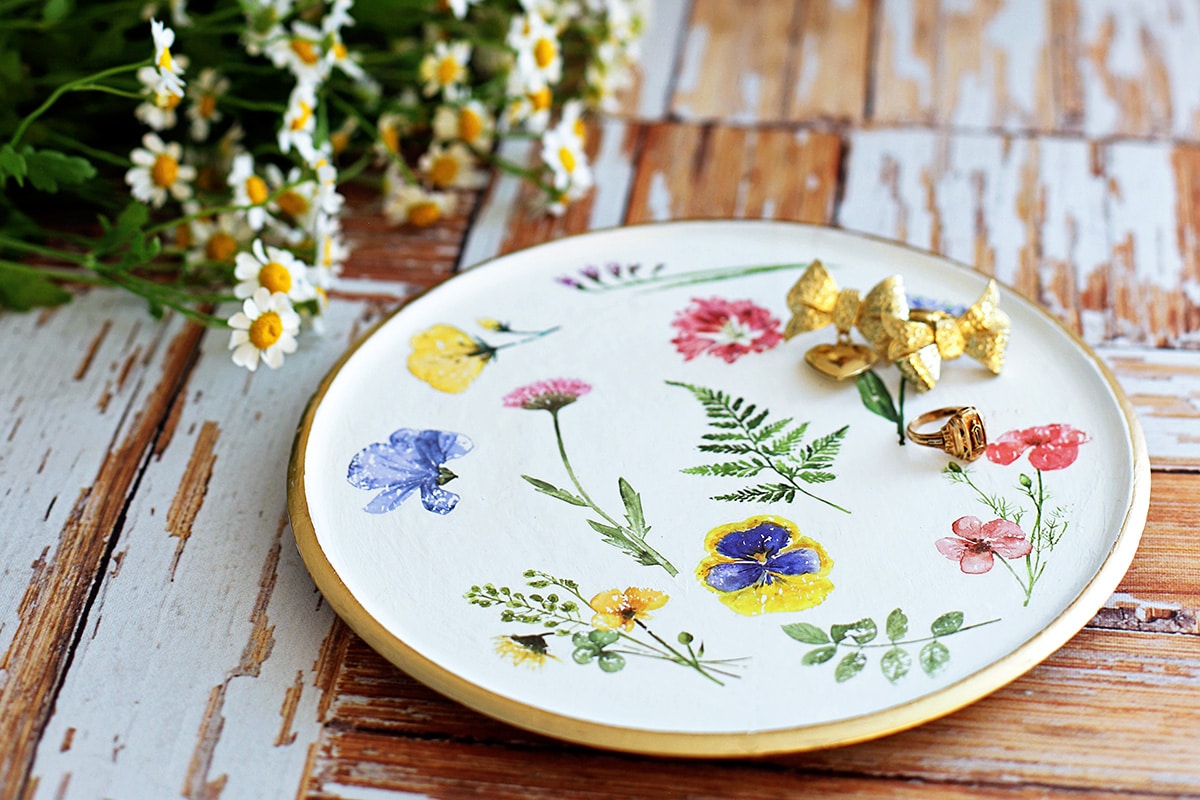
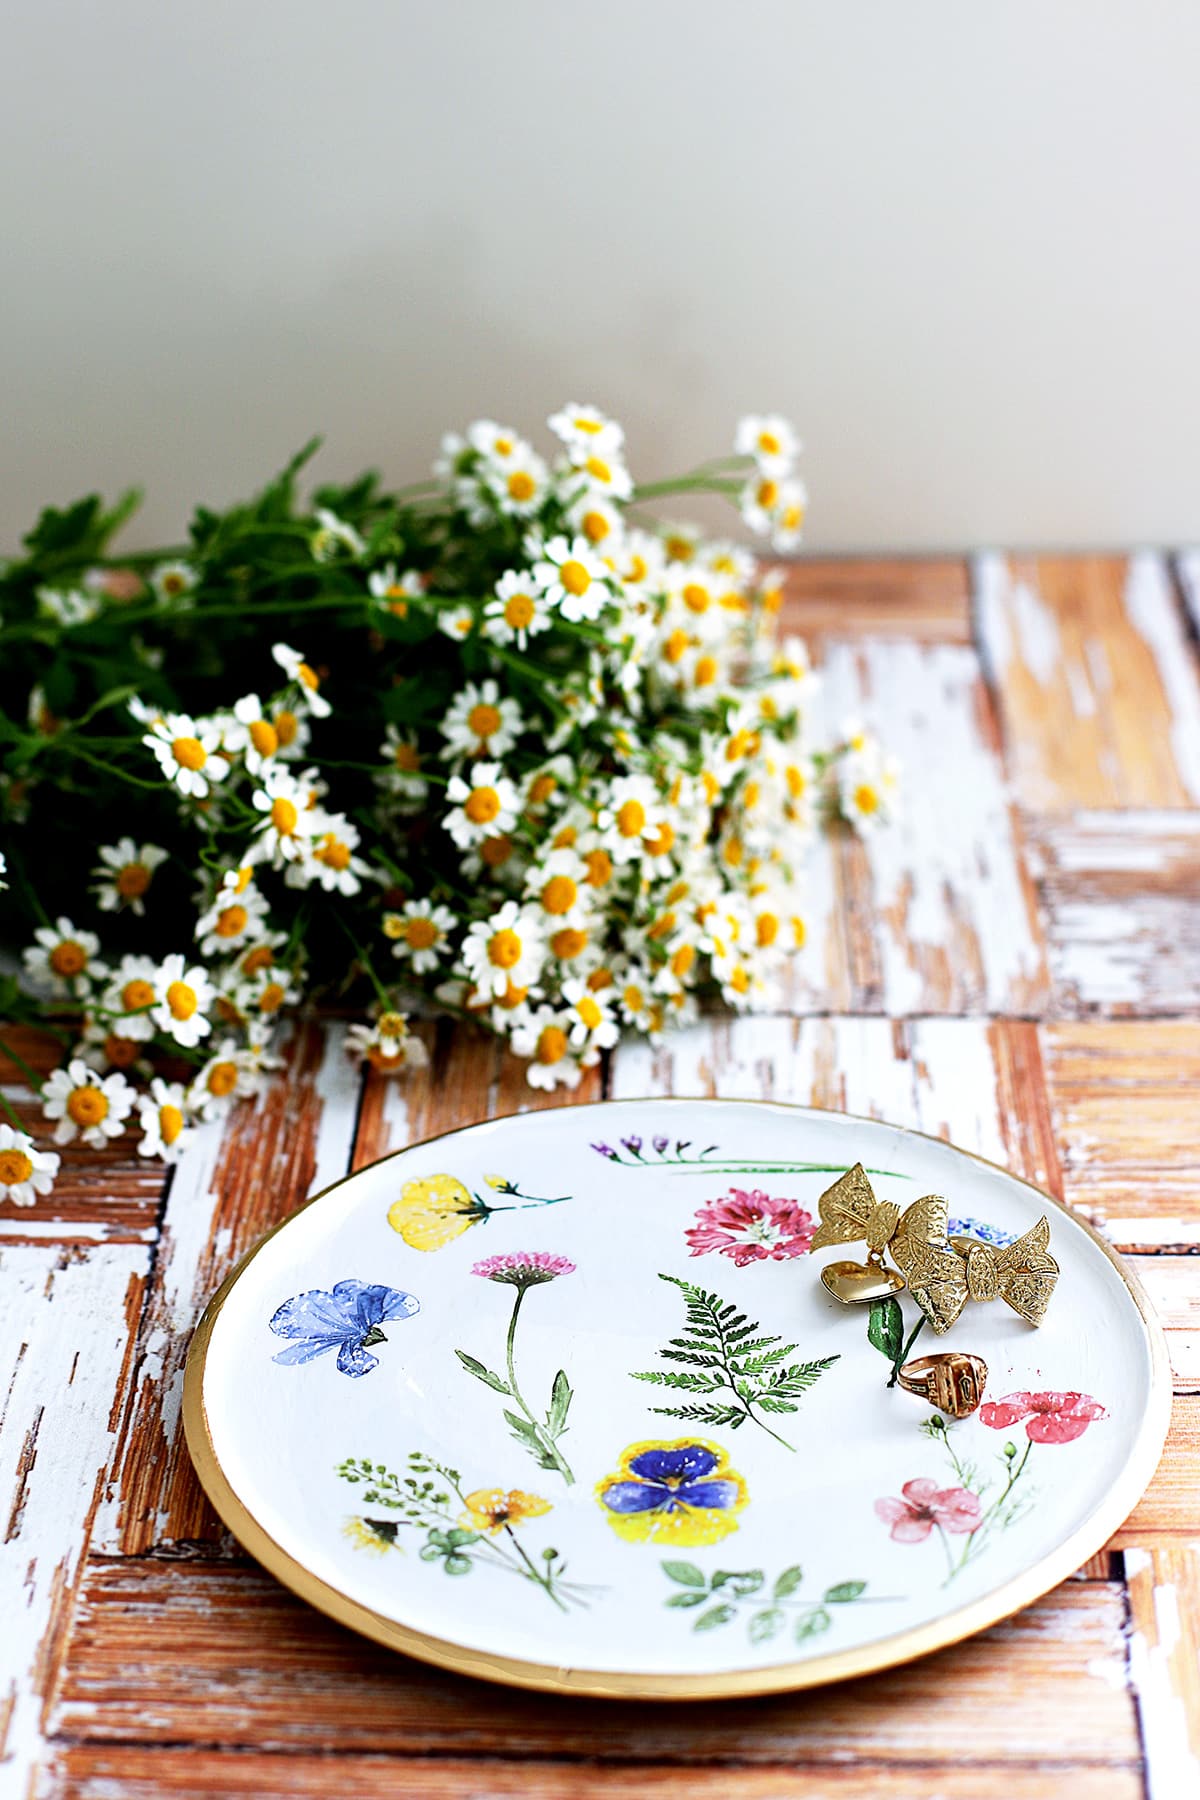
I'm going to transform it into a tray for keys, change or jewelry instead of hanging it on the wall. I guess you would call it a catch-all tray or trinket holder.
✨ BTW, today is Thrift Store Decor Wednesday, so make sure your hang around to the end of the post to see the rest of the team's thrift store repurposes for the month!
(This post contains some affiliate links for your convenience. You can read my full disclosure policy here.)
Transforming A Vintage Kitchen Plaque Into A Catch-All Tray
Supplies
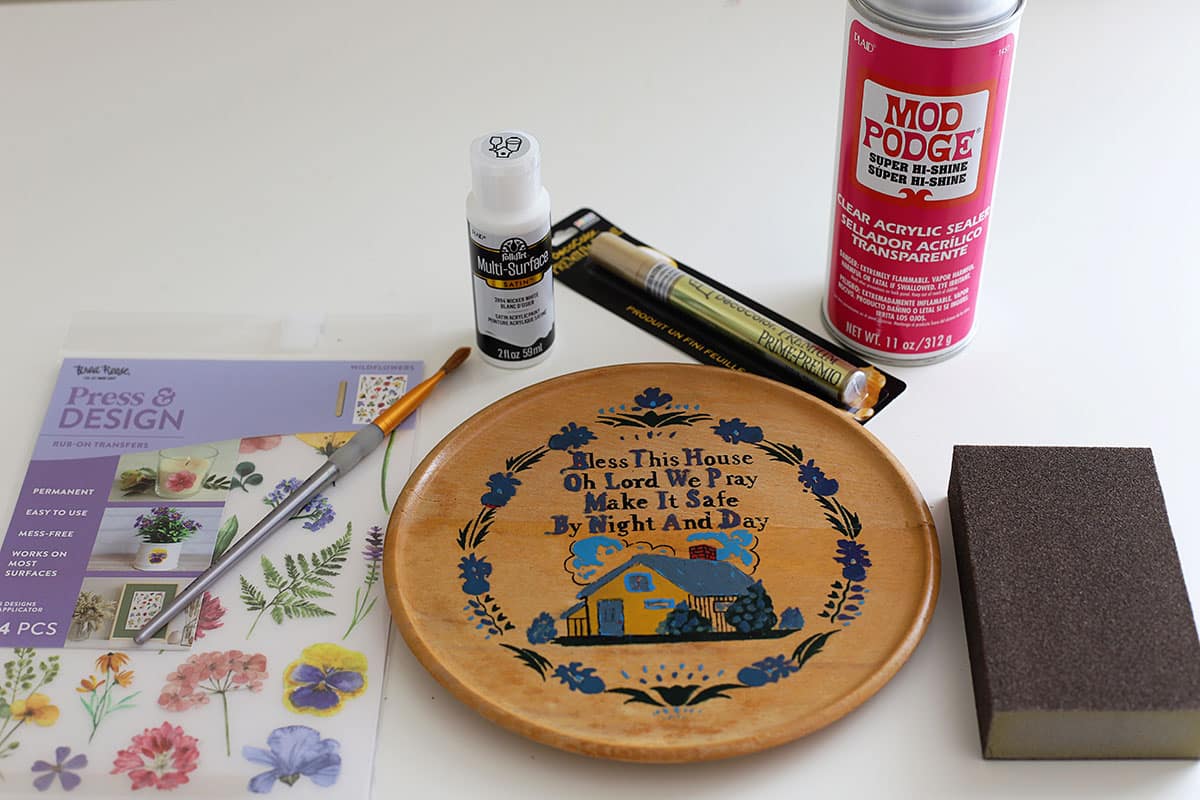
- FolkArt Multi-Surface Satin Paint in Wicker White (#2894)
- DecoColor Premium Paint Marker in Metallic Gold Leaf (Chisel Tip)
- Clear Acrylic Sealer (Water-Based) - I used Mod Podge Super Hi-Shine
- Craft Paint Brushes
- Sanding Sponge or Paper
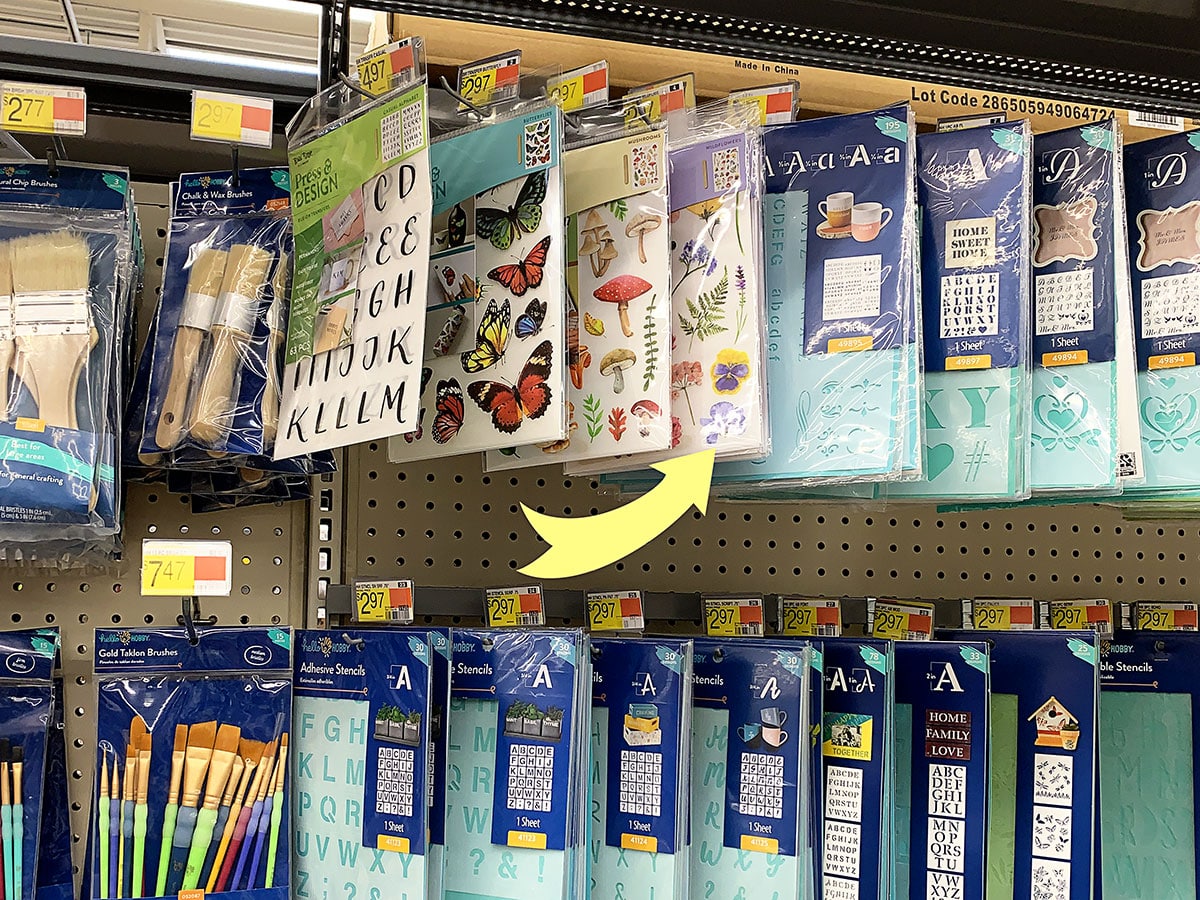
- Rub-On Transfers - I used Brea Reese Wildflower Transfers from Walmart*
* As far as I can tell, they don't ship these, but they had plenty at my local Walmart (see photo below for what to look for in-store - head for the stencils and craft brushes).
Instructions
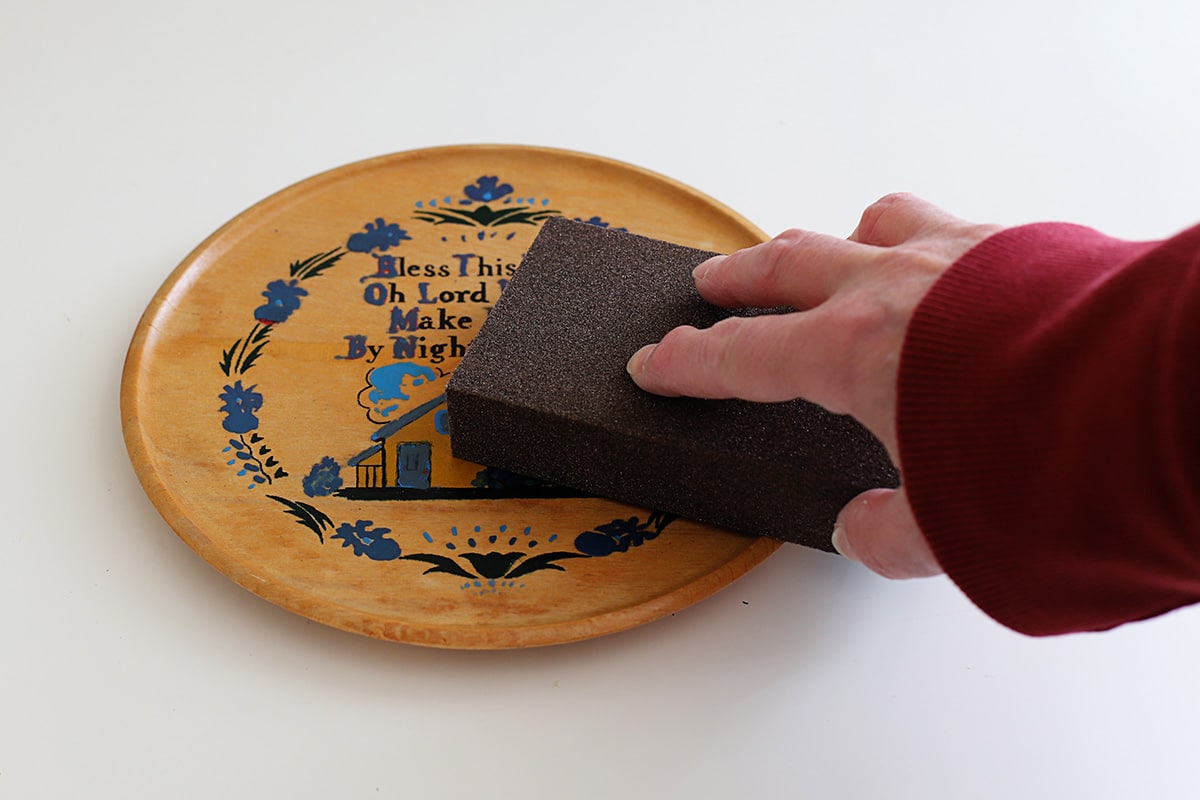
- Sand Your Item
Lightly sand the painted surface of the item to make the surface level.

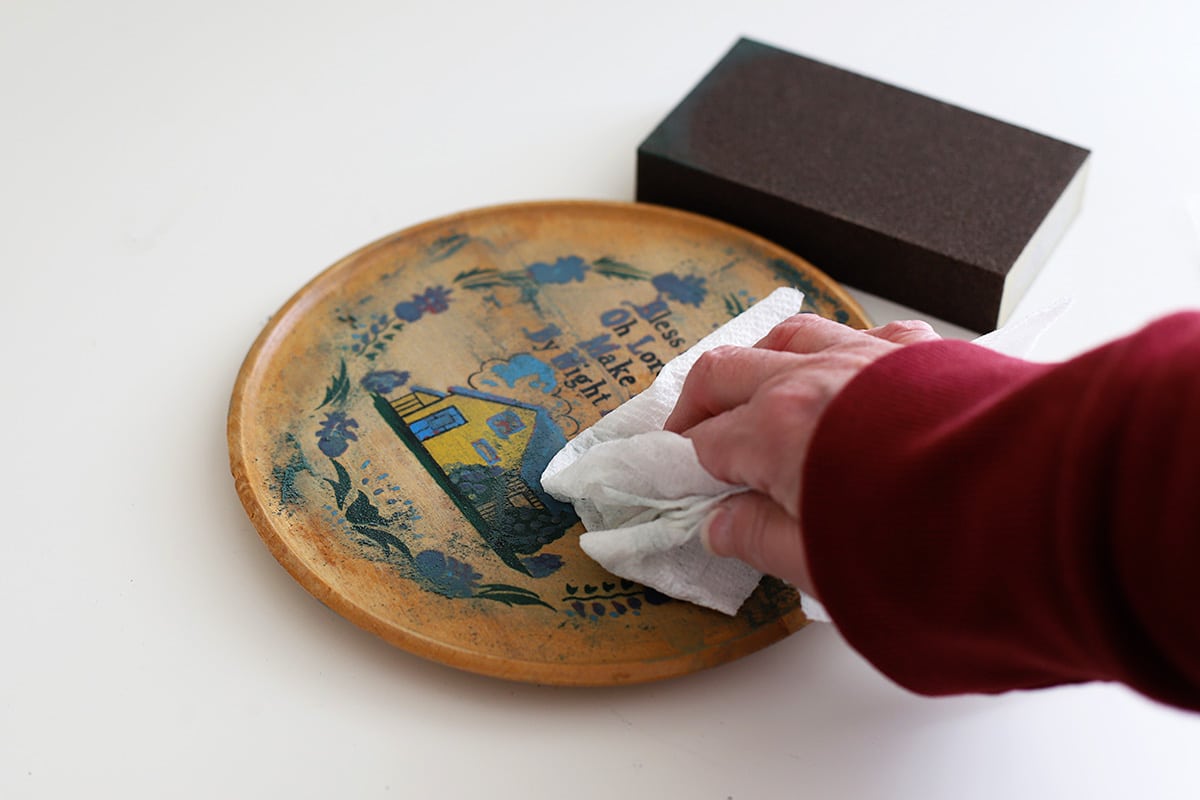
- Wipe Down Item
Use a tack cloth or damp rag to wipe down the plate to remove sanding residue.
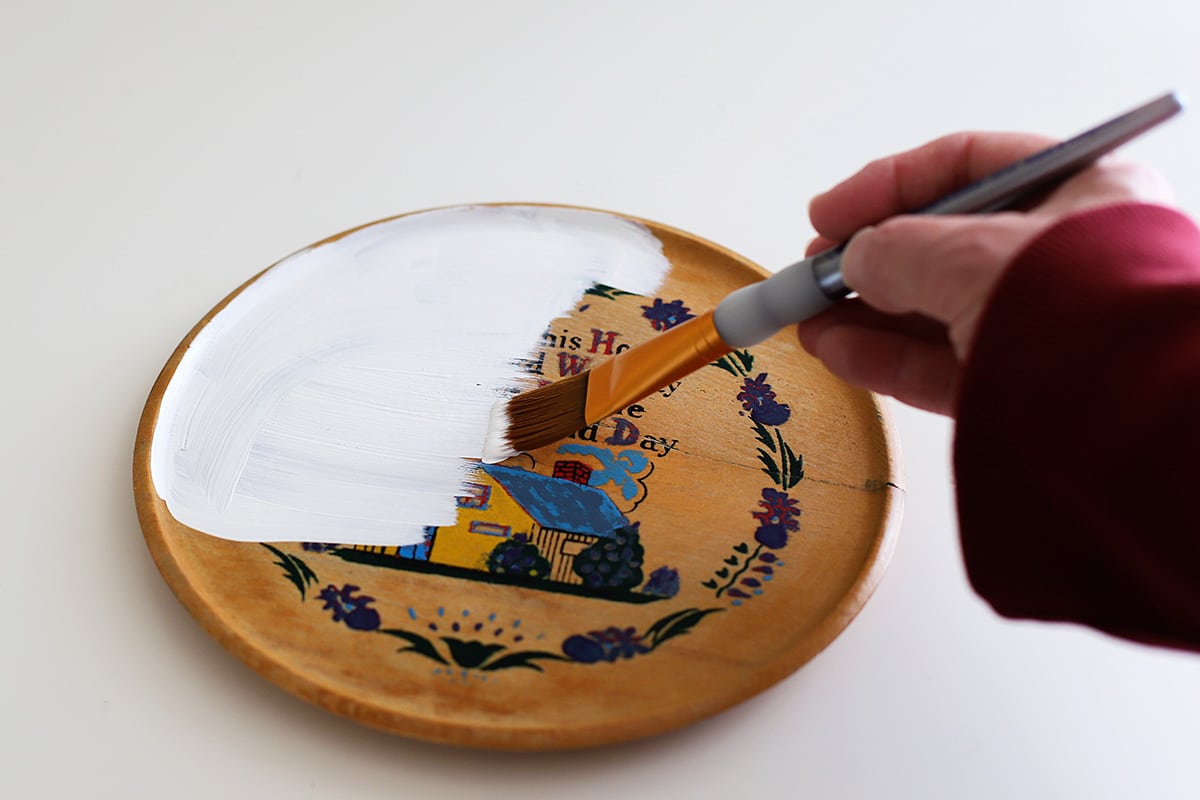
- Paint Front Of Piece
Using a craft paintbrush, paint the front of the piece. This may require 2-3 coats.
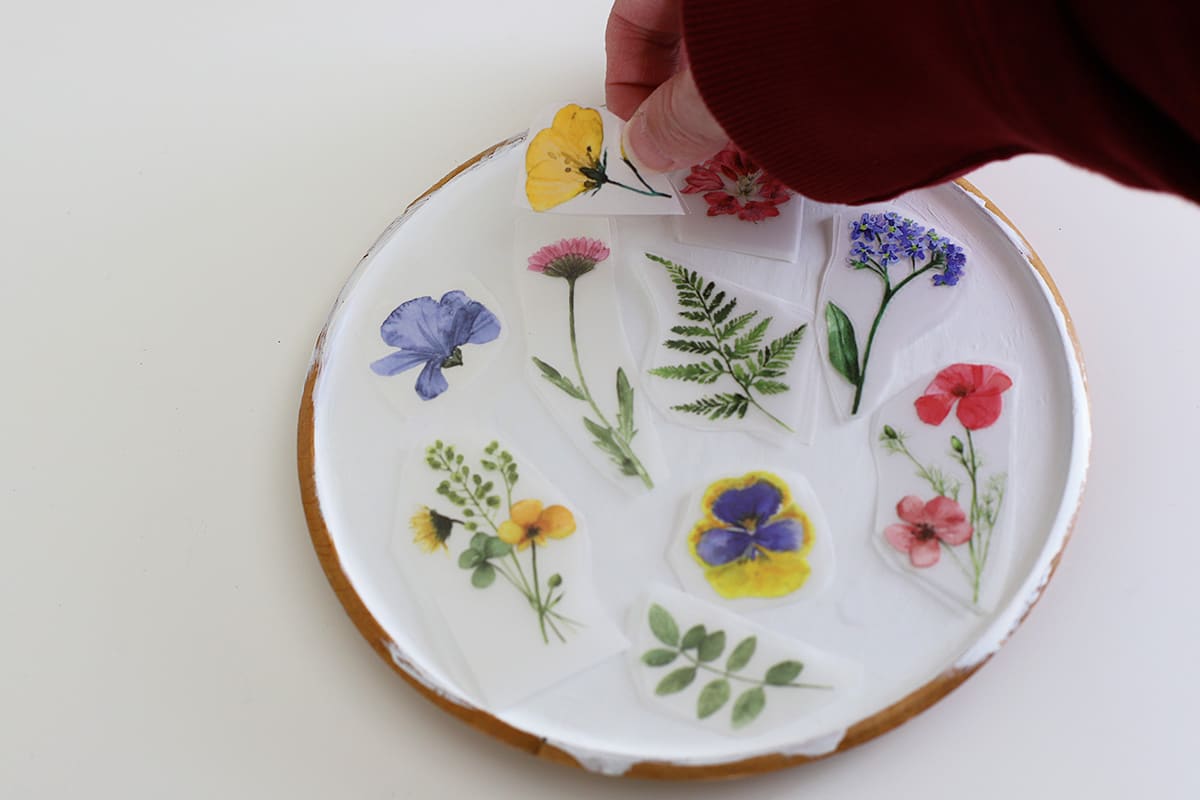
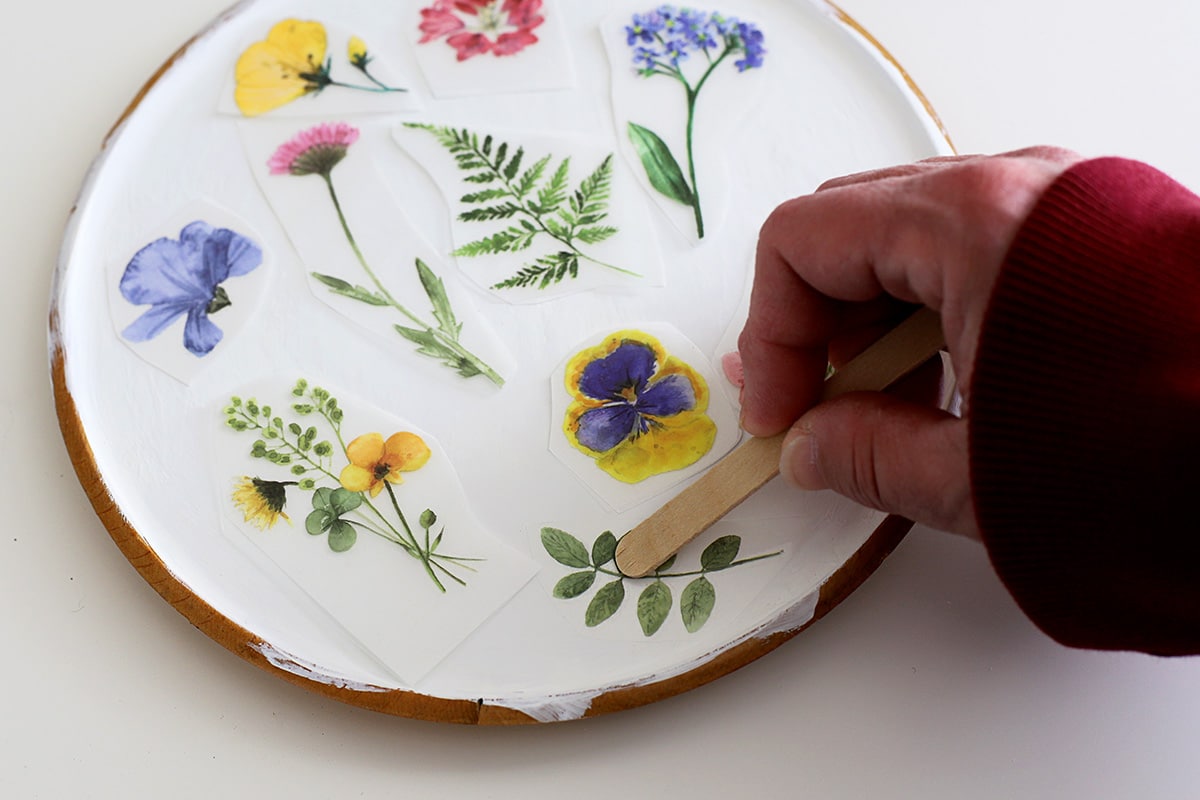
- Cut Out Rub-On Transfers
Cut out your transfers so you can better place them on the object you want to transfer them to.
The transfers consist of a white paper backing sheet and a clear covering sheet that has the transfer adhered to the back of it. In other words, it looks and feels like two sheets, but it actually has three parts. - Do A Dry Run For Placement
Take the time to gently lay the cutout transfers with white backing attached to your piece.
This gives you a chance to rearrange them if needed to create the best design before they are permanently attached. - Remove Paper Backing And Place Transfers
When you have a design that you like, peel the paper backing off a transfer and lay it in place.
Using the mini popsicle stick included in your transfer packet, firmly rub over the entire design. Apply even pressure to transfer the entire image onto the surface.
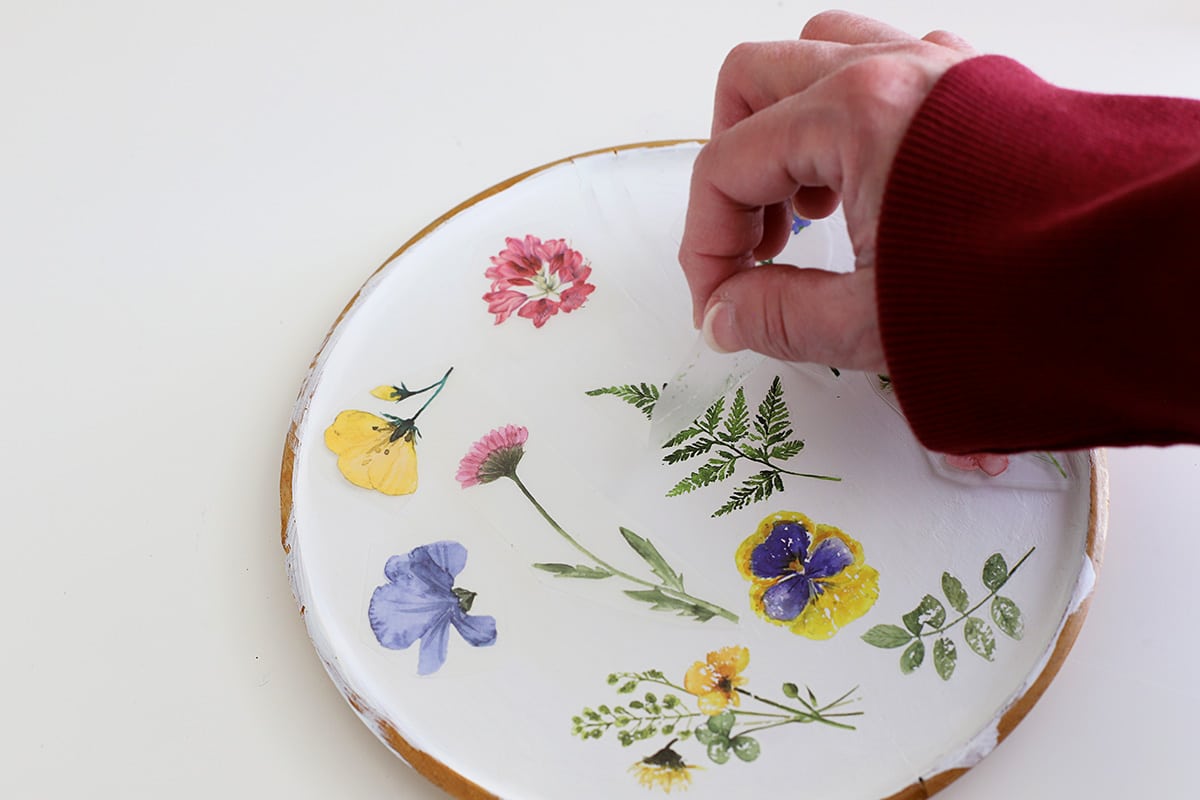
It's easiest to adhere one transfer at a time before moving on to the next transfer. - Peel Off The Clear Covering Sheet
Slowly peel off the clear covering sheet from the transfer starting in one corner.
Important: Go very slowly with peeling it off. If the image hasn't fully transferred, press it back down and rub it again.
There was not one single transfer that I didn't need to go back and press again in a few areas. - Apply Clear Sealant
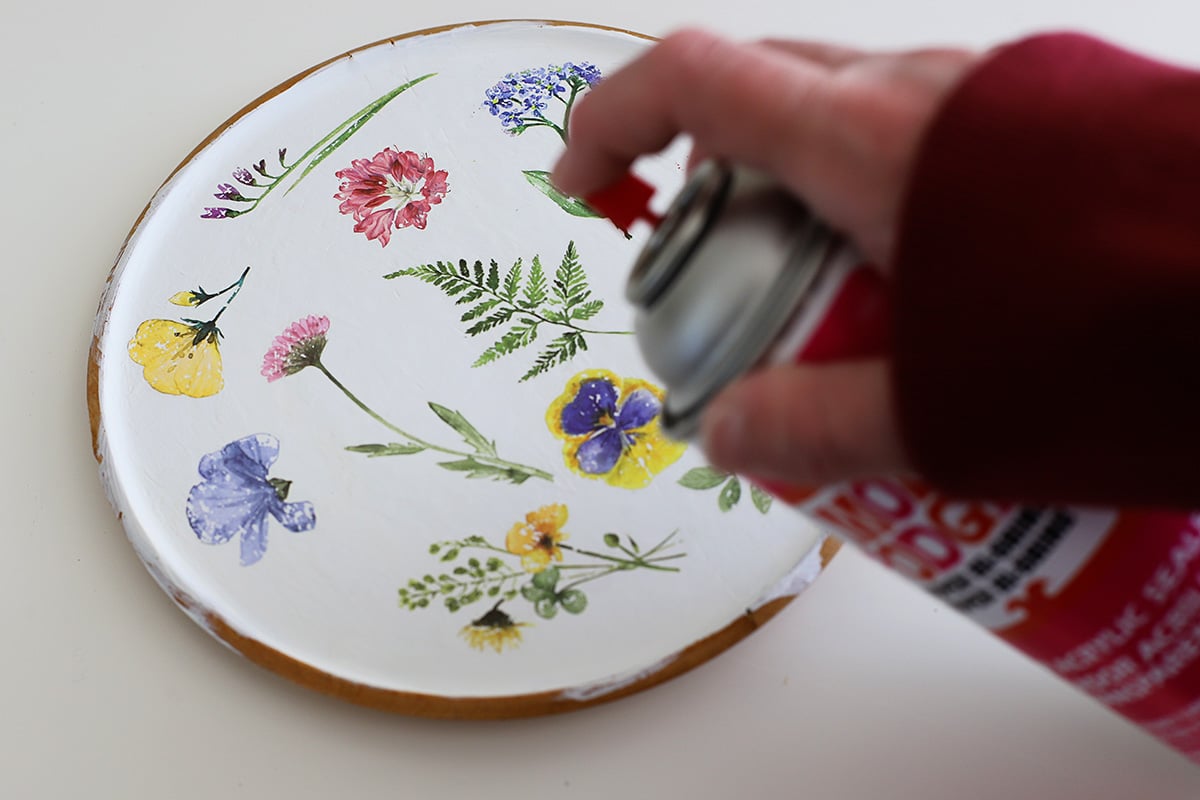
Since I am using this as a catch-all tray, I used a water-based clear acrylic sealant for a protective coating. My thought is if I'm throwing keys or change on it, it might scratch the surface otherwise.
If you are going to hang it on the wall, this step would not be necessary. - Apply Gold Leaf Edging
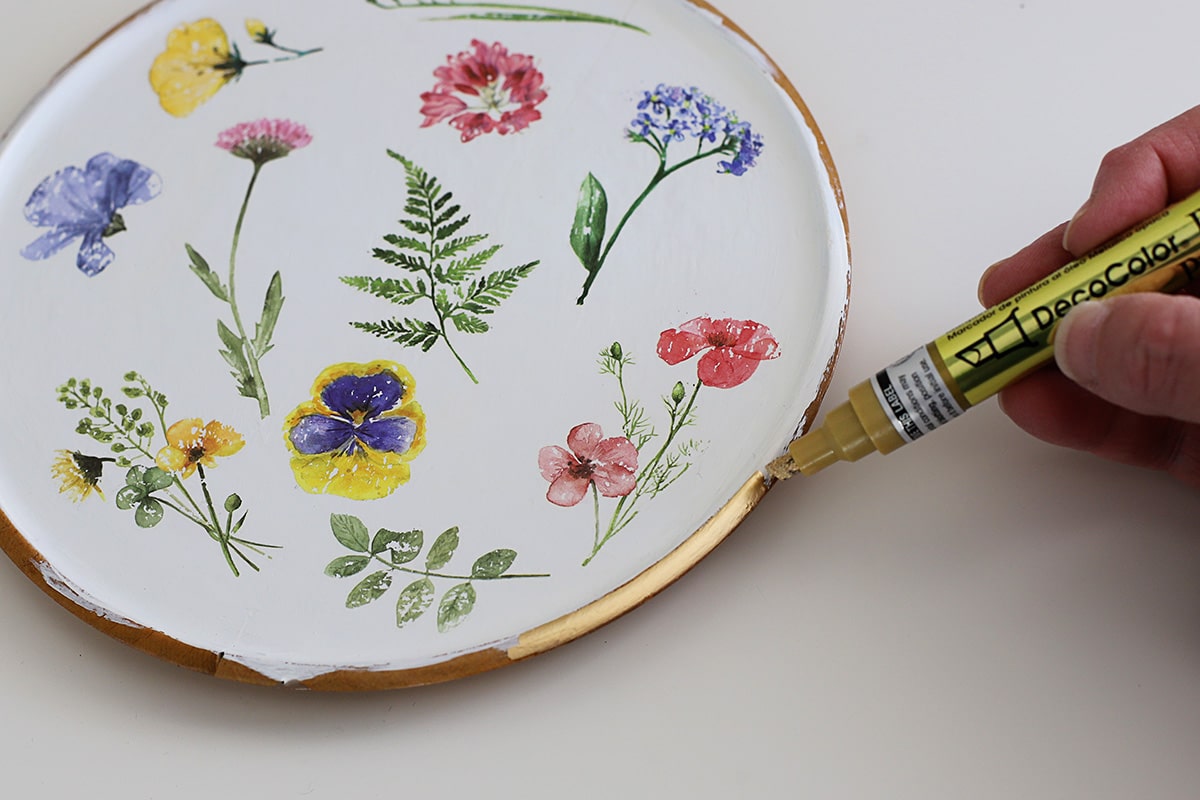
Using your Paint Marker (which I have to say is the best invention since Mod Podge, or wheels or something like that), paint a gold band around the edge of the tray.
The chisel tip paint marker is such an EASY way to get a clean, sharp edge, and the gold leaf really takes the tray up a notch in fanciness.

💡 Thrifting Tip
I've had some people tell me they don't know how I get so lucky with my thrifting finds. They tell me they never find anything worthwhile at their local thrift store.
My #1 thrifting tip is to shop often.
New stuff gets put out on the shelves every single day (and in some stores multiple times per day), so you just have to be vigilant and stop into thrift stores often.
I can walk in a thrift store one day and find pretty much nothing and the next day I walk back into the same store and find a cute little stack of Johnson Brothers china just waiting for me to take it home.
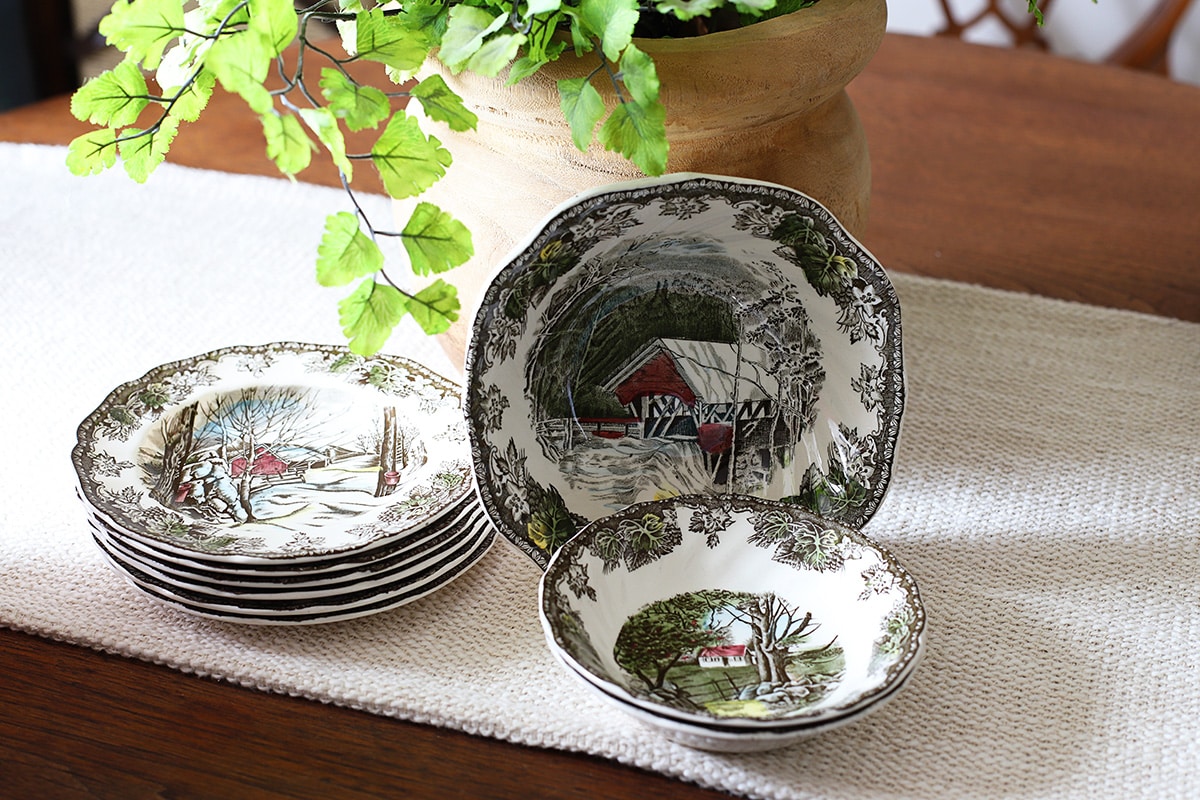
Although I do wonder if they originally had a whole set of this Johnson Brothers Friendly Village china at that store, and these small pieces just got separated from the rest. And there's another lady out there with the dinner plates and coffee cups wondering what happened to the bread and butter plates and fruit bowls.
BTW, I found a nice YouTube video from Vintage Farmhouse Antiques that describes collecting Friendly Village if you want to learn more about the pattern.
And if you want to learn more about thrifting, I have a whole post dedicated to my favorite thrift store shopping tips HERE and some tales from my thrifting adventures HERE.
Thrift Store Decor Team Projects
- How To Repurpose Miniature Glass Dishes - Petticoat Junktion
- Thrift Store Lamp Makeover - Our Southern Home
- Cutting a Kitchen Chair Down to Size - My Repurposed Life
- How To Paint Furniture To Look Like Wood - My Uncommon Slice of Suburbia
- Fixing a Cracked Marble Tray with Kintsugi - Sadie Seasongoods
- Vintage Wooden Box Upcycle - Shop At Blu
- Rub-On Transfers For Thrift Store Upcycles - House Of Hawthornes (that's me)
Jo Johnston
This make-over is so attractive!
Gina
What a pretty update that is!
Sarah @ Sadie Seasongoods
We WERE twinning with the gold paint pens!! And oh my gosh, you're gonna make me actually want to step inside a Walmart to look at their rub-on transfers. Because those are SO gorg!
Kristin salazar
I love this tutorial and how your plate turned out for a catch-all. I forgot about rub on transfers. I'm going to be on the look out for some wood pieces!
Gail Wilson
Ohhhh Pam! I love this makeover using Walmart rub-on transfers. I didn't even know they sell them.
That marker? Genius! You make it look so easy.
so, so cute!
Pinned!
gail
Sue at Blu
Another fabulous upcycle! I am obsessed with all of the wooden things at the thrift store. Love that you have limits to your kitschy-ness. LOL,
Pinned.