• Skip to primary navigation
  • Skip to main content
  • Skip to primary sidebar
House of Hawthornes
  • DIY
  • Gardening
  • Budget Decor
  • Thrifting
  • Seasonal
menu icon
go to homepage
search icon
Homepage link
  • DIY
  • Gardening
  • Decorating
  • Thrifting
  • Seasonal
  • 🛒 Our Amazon Shop
    • Facebook
    • Instagram
    • Pinterest
    • Twitter
    • YouTube
  • ×

    Home » Yard Art And Upcycled Garden Decor

    How to Make A Penny Bowling Ball

    Published by Pam Kessler | 516 words. · About 3 minutes to read this article. - 81 Comments

    This weekend I turned an old bowling ball that I found at a garage sale into a gazing ball-like piece of yard art.

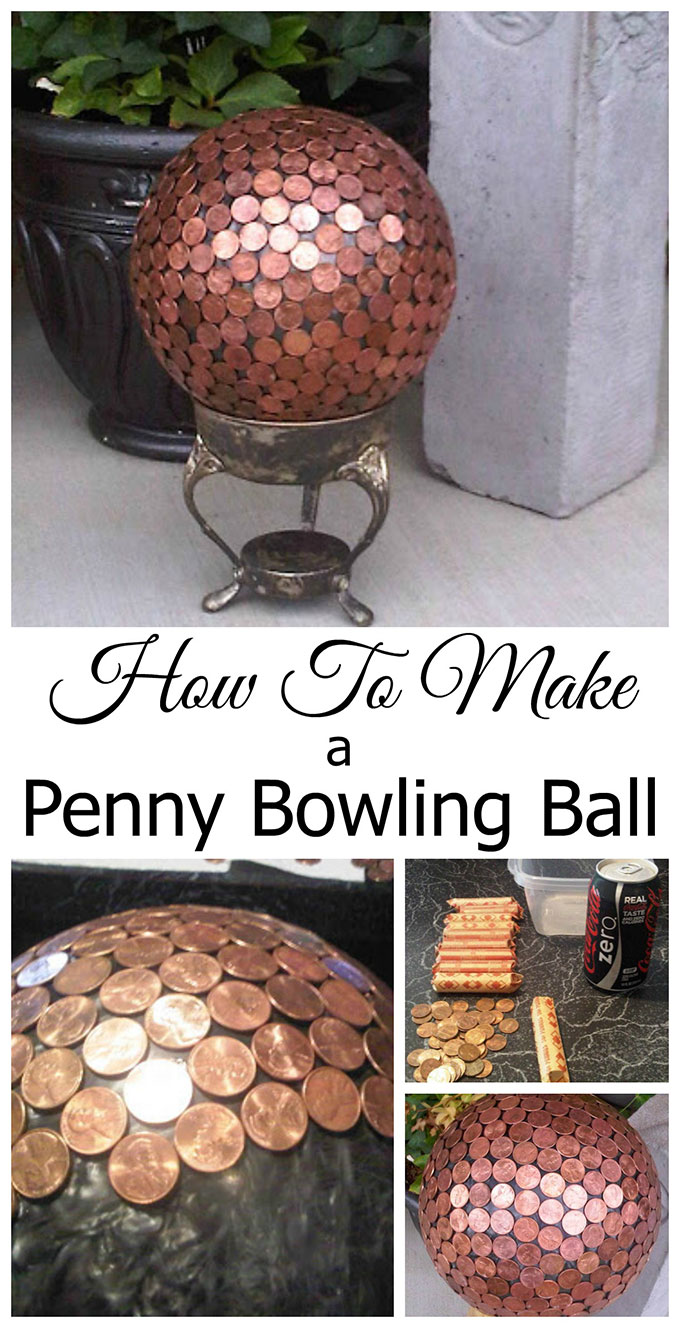
    A penny bowling ball!

    How to make a penny bowling ball yard art

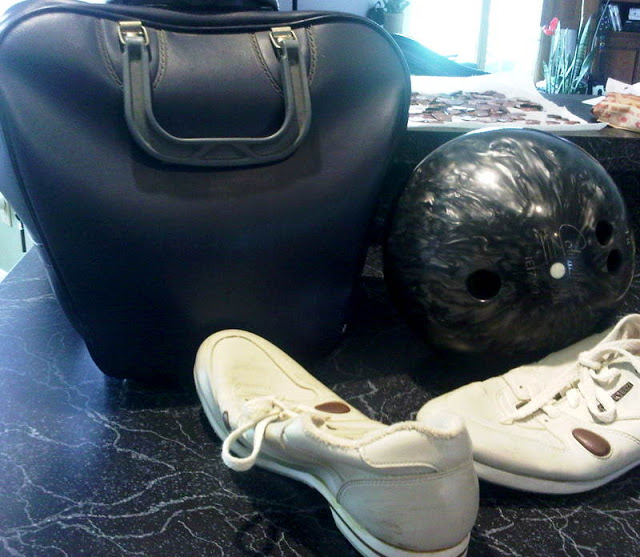
    I bought this bowling ball, bag and pair of old used bowling shoes (yuck) at a church garage sale all for just $1.00. I knew I only wanted the bowling ball itself, so the other items were just along for the ride.
    How to make a penny bowling ball, fun and unique yard art for your garden. And some people say the copper pennies repel slugs!

    How To Make A Penny Bowling Ball

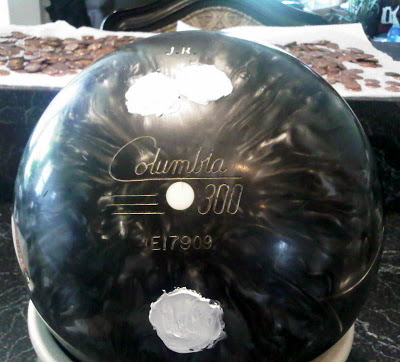
    The first thing I did was fill in the finger holes with paper towels until there was about ¼" of the holes left and then filled the rest of the holes in with some caulking I had laying around the house.

    And then threw the bag and shoes into my Goodwill pile.
    How to make a penny bowling ball, fun and unique yard art for your garden. And some people say the copper pennies repel slugs!

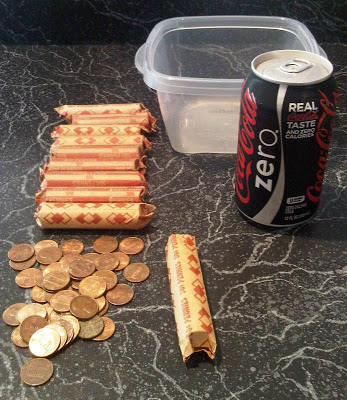
    I wanted to cover the ball in pennies so I used roughly $4.50 worth.

    I wanted them to be all bright and shiny so I decided to clean them with my beloved Coke Zero to see if Coke's cleaning abilities are an urban legend or not.
    How to make a penny bowling ball, fun and unique yard art for your garden. And some people say the copper pennies repel slugs!

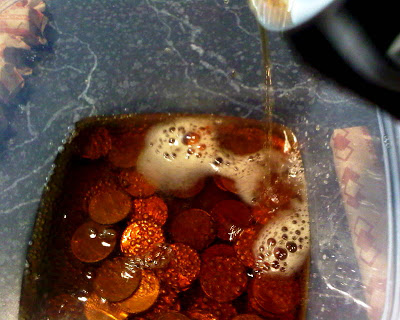
    So I emptied a roll of pennies into a bowl and added the Coke Zero and let them sit for five minutes.
    How to make a penny bowling ball, fun and unique yard art for your garden. And some people say the copper pennies repel slugs!

    The Coke Zero cleaned them a little bit, but they were definitely not as bright as I was expecting them to be. It's not often that my Coke lets me down.

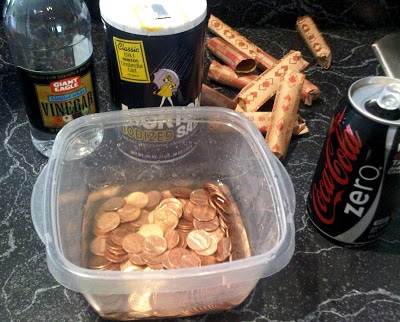
    So then I searched the Internet for other penny cleaning tips and ran across some science experiments for kids that uses ¼ cup white vinegar and 1 teaspoon of table salt to clean them.

    The vinegar is 5% acetic acid and dissolves the copper oxide on the pennies. The salt acts as a catalyst to speed up the process. But enough of the fascinating science lesson of the day.

    Anyhow, I just put the pennies in there for about a minute, rinsed the solution off them and they came out amazingly shiny.
    How to make a penny bowling ball, fun and unique yard art for your garden. And some people say the copper pennies repel slugs!

    (This post does contain some affiliate links. You can read my full disclosure policy here.)

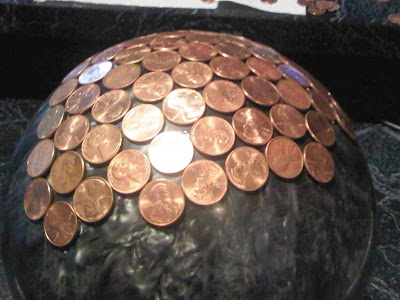
    Next I used Dap Clear Silicone Sealant for Doors And Windows to glue the pennies onto the bowling ball.

    How to make a penny bowling ball, fun and unique yard art for your garden. And some people say the copper pennies repel slugs!

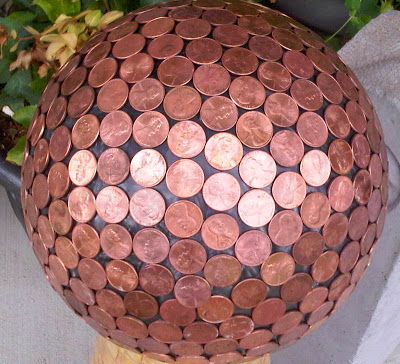
    I glued them all heads up, but that was my OCD kicking in - you could mix it up if you wanted. Or maybe do all heads except for one tail???

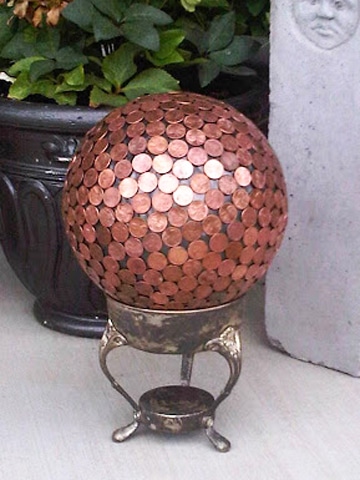
    And here is the finished project.
    How to make a penny bowling ball, fun and unique yard art for your garden. And some people say the copper pennies repel slugs!

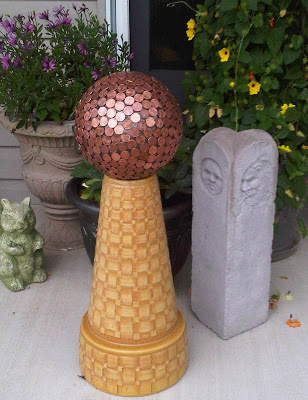
    I tried sitting my penny bowling ball on my birdbath base as a regular gazing ball.
    How to make a penny bowling ball, fun and unique yard art for your garden. And some people say the copper pennies repel slugs!

    Then I remembered that I had bought this silver chafing dish pedestal at a garage sale. It's almost like it is made to be a penny bowling ball holder.
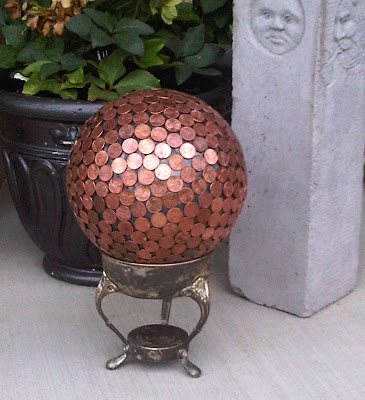
    How to make a penny bowling ball, fun and unique yard art for your garden. And some people say the copper pennies repel slugs!

    Of course you could place it directly on the ground or leave one of the finger holes exposed and place a wood dowel to stake it in the ground.

    How to make a penny bowling ball, fun and unique yard art for your garden. And some people say the copper pennies repel slugs!

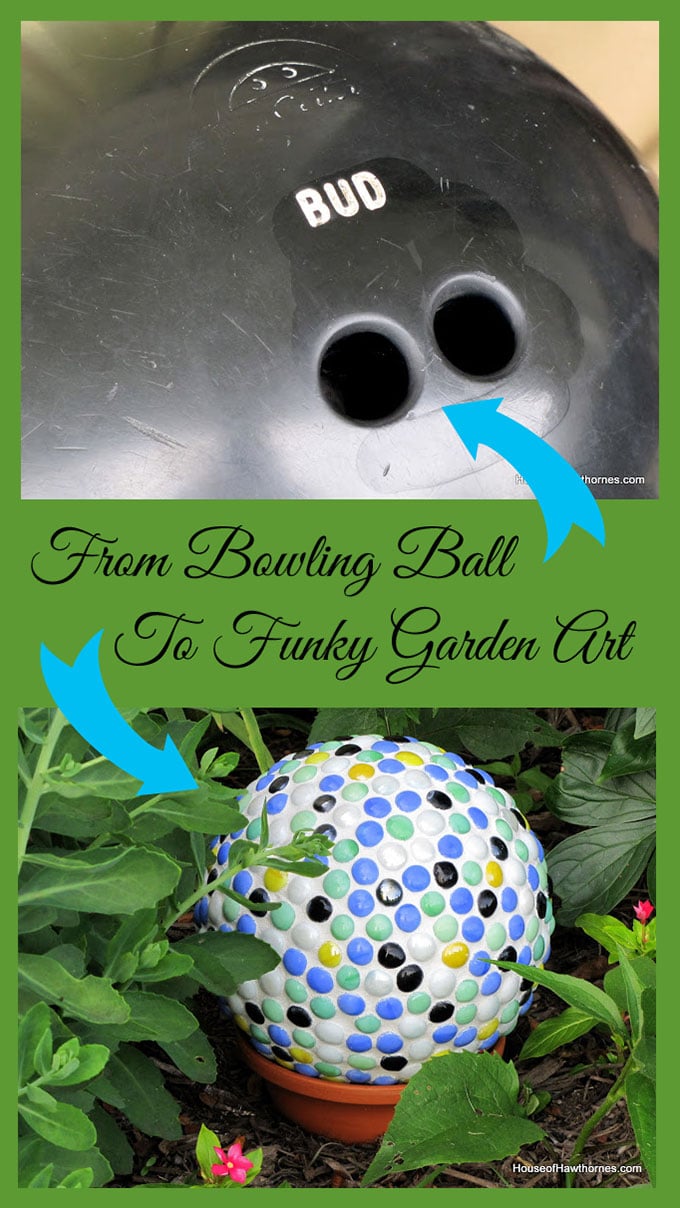
    Another fun bowling ball project is my Mosaic Bowling Ball made with dollar store gems.

    DIY yard art for your garden made from a bowling ball. Great upcycle project!

    New For Spring 2021:

    Purchase printable garden planner

    Check out the web story version of this article HERE.

    Other posts you may enjoy:

    25 Upcycled Garden Ideas

    Repurposed Sink Planter

    DIY Terrarium Tutorial

    How to Make Hypertufa Planters (LIGHTWEIGHT concrete planters)

    « First Post
    Weekend Garage Sale & Auction Finds »
    220.9K shares

    Reader Interactions

    Comments

    1. Anonymous

      October 23, 2014 at 9:13 am

      I came across a bowling ball at an Antique/Junk store. Got it for $1.00. It has a crack down the side but I figured I can fill that in. Now I have a project to work on during the winter. Like the idea about using grout also. Eleanor, Copake, NY

      Reply
    2. Delonna Albertson

      March 28, 2015 at 7:41 pm

      My local bowling alley was happy to give me as many bowling balls I wanted for free! They have hundreds of old balls that they dispose of on a regular basis.

      Reply
    3. Sherry

      May 15, 2015 at 12:59 pm

      May I ask, how do you keep the pennies from tarnishing? Is there some sort of sealer you use?

      Reply
      • Pam

        May 16, 2015 at 10:37 am

        You could spray it with a clear sealer from the hardware store if you wanted to keep them shiny for a long time. I'd look for one that says it's for outdoor use (Krylon makes one called Make It Last that says it is for outdoor use, but I've never tried it myself). Without a sealer they'll last about a year before you'll either have to re-clean them (just apply the cleaning mixture with a toothbrush) or just embrace the tarnished look.

        Reply
    4. Kelly

      July 02, 2015 at 11:01 am

      I now have my gazing ball all ready to go into the yard but want to keep the shine on the pennies.. What would you recommend to spray on the whole ball to keep that shiny look?

      Thank for the inspiration!!

      Reply
      • Pam

        July 02, 2015 at 11:57 am

        I did not put a sealer on mine, but if you want it to stay shiny you would want to spray it with a clear sealer made for outdoor use. Krylon has one called Make It Last that sounds like it would work well although I haven't used it on anything myself. If you Google "Krylon Make It Last" you can read about it and see where it's sold. I would say any clear sealer would work as long as it specifically says it is made for outdoor conditions 🙂

        Reply
    5. GARY

      December 17, 2015 at 4:24 pm

      I'M JUST TRYING TO FIN OUT HOW MANY PENNIES IT TAKES COVER A BOWLING BALL???

      Reply
      • Jamie

        July 13, 2016 at 7:38 pm

        About 5 bucks

        Reply
    6. Nancy

      January 28, 2016 at 9:41 am

      Nice project. I like the concrete piece beside it too. Did you make that?

      Reply
      • Pam

        February 03, 2016 at 6:41 am

        I did not, but actually it doesn't look like it would be too hard to make. It reminds me of one of those old mile markers 🙂

        Reply
    7. Jamie

      July 13, 2016 at 7:37 pm

      I made a penny ball last summer. It is no longer shiny copper but a dull, greenish color. I'm curious if you clean your ball each season to make it shiny again, and if so, what do you use? I've even contemplated spray painting it a copper color.
      Your thoughts?

      Reply
      • Pam

        July 14, 2016 at 12:36 pm

        I'm not sure the copper color spray paint would not flake off, since it is paint over metal??? But, yes your ball will tarnish again eventually unless you clean it yearly (I cleaned it with the salt/vinegar solution and rubbed it on with a toothbrush) or put a sealer on it. Something like a spray clear coat from the hardware store would probably keep them from tarnishing if you want to keep the shiny penny look. I'm just not sure the copper paint would hold up 🙁

        Reply
    8. Char

      February 15, 2017 at 7:40 am

      Beautiful! I'm wondering, how long does that glue " Dap Clear Silicone Sealant for Doors And Windows" last for all seasons outdoors?

      Reply
    9. Jane

      March 14, 2017 at 4:18 pm

      The idea is very good. I purchased 5.00 worth of pennies and soaked them in small batches in vinegar and salt mix and did it again the next day and later that day soaked uIn ketchup but found out that they cleaned up partially and not good enough to use on the gazing ball. I am going to use stones instead.

      Reply
    10. Paul

      March 25, 2017 at 9:44 am

      Cool idea, I'm so curious to hear how it sounds when rolls, haha. I've seen a floor made of pennies, and now a bowling ball. What else could be covered in pennies and look cool? Hmm

      Reply
    11. Carolyn

      August 13, 2017 at 1:57 pm

      What kind of glu did you use ? Imade one with the round glass pieces used hot glue and they fell off. Thanks in advance

      Reply
    12. tina

      April 18, 2018 at 10:04 am

      Hi Pam, I love this! I am in Oregon and plan to make for my mom and MIL for Mother's day.
      I have read through the comments and didn't see this addressed.......... Did you or, looking back, would you sand the bowling ball with coarse sand paper? It appears your pennies haven't had much trouble staying on with the Dap but I wonder if as added security you would recommend.
      Thank you in advance and thanks for sharing this super cool project!
      Tina

      Reply
      • Pam

        April 22, 2018 at 3:09 pm

        You definitely could sand it a bit to rough it up a little. It never hurts to have extra "tooth" for the glue to hold onto (I actually did that when I made my second bowling ball where I glued little stones on to a bowling ball - https://www.houseofhawthornes.com/bowling-ball-yard-art-number-2/). Hope the moms enjoy them!

        Reply
    13. Marcy

      April 20, 2018 at 7:17 pm

      Hi I am from Canada and we no longer use pennies as currency and we have a pile of them sitting around so this is a very cool thing to do you them. Good-bye SLUGS. I am also wondering uf it is better to sand the bowling ball first.

      Reply
      • Pam

        April 22, 2018 at 3:11 pm

        You could definitely sand it a bit first. My bowling ball was sort of beat up, but if the ball is still smooth (and slick looking), that would be a good way for the glue to have some extra grip.

        Reply
    14. Denice

      July 28, 2018 at 1:13 pm

      Grout question.
      Have you tried it with pennies? It looks great but my OCD wants the spaces filled. Or, could it be filled with seed beads , very course sand...very small rocks. Broked glass...for a twist...something on that order. Just thinking out loud.. thanks..

      Reply
      • Pam

        July 31, 2018 at 9:14 am

        I haven't on a penny one, but I made one with mosaic one with little glass "stones" and used grout on that one!

        Reply
    15. Jacqueline Heyer

      August 29, 2018 at 9:52 am

      I also made the penny ball but all my faces go the same direction

      Reply
    16. Jacqueline

      August 29, 2018 at 9:56 am

      I made the same Penney ball except all my faces go the same direction

      Reply
    17. Suzanne Normoyle

      February 08, 2020 at 12:54 pm

      I have read on other sites that the pennies fall off. Have yours fallen off with the type of glue you used? Also did you spray it with an acrylic spray once you were done gluing all the pennies? I have just started mine and I would appreciate the answers to these 2 questions.
      I was lucky with the bowling ball. I called a local bowling alley to see if they had any they could spare and they did. I was so happy.
      I am also lucky to have a gemstone tumbler so the pennies turned out really shiny.

      Reply
      • Pam Kessler

        February 09, 2020 at 10:05 am

        I like the gemstone tumbler idea!!! I've only had one fall off right by the finger hole, but I do bring mine inside in the dead of winter when the snow starts flying. As for spraying with a sealer, I did not. Without sealer it should last about a year before you'd either want to re-clean them (I just used a toothbrush to brush on some of the cleaning solution) or you can embrace the tarnished look 🙂 Whatever sealer you use, make sure it's OK for outdoor use. I know Krylon makes one called Make It Last that specifically states it's for outdoor use.

        Reply
    18. Sandra

      February 19, 2020 at 11:12 am

      I have round globe light shades I’m gonna try it on one of those.. And will also glue them to the bottom edges of my planter boxes this spring.

      Reply
    19. Dana

      July 18, 2022 at 8:07 am

      My daughter and I will be doing this project today. I've been saving pennies for awhile and I've finally got enough. I did a couple coats of acrylic copper paint on the ball beforehand. Next up, doing the looking glass mirrored spray paint on the other bowling ball we have.

      Reply
    20. MrsSW

      September 14, 2022 at 1:26 pm

      Hi Pam - neat project.
      I am curious why you chose to use the DAP Silicone Sealant? And how did you apply it - in strips or sections on the ball? a dot on each penny?
      Thanks,
      Sheila

      Reply
      • Pam Kessler

        September 15, 2022 at 8:35 am

        That was the sealant I used at that time (that project is a few years old). It worked very well and was the best available at the time, but I've recently switched to the GE Advanced Silicone 2 for Windows & Doors. It's a more updated product that dries quicker and is a little better in rainy situations (outdoor projects).

        And I put it on as a dot on each individual penny. Either one is fine, but the GE products seem to get upgraded more often.

        Reply
    « Older Comments

    Leave a Reply Cancel reply

    Your email address will not be published. Required fields are marked *

    Recipe Rating


    Primary Sidebar

    Learn how to create a budget friendly home you'll love using repurposed thrift store finds, easy DIY & craft projects and seasonal gardening tips.

    Trending Content:

    • DIY Industrial Pipe Shelves
    • How To Grow Peonies - A Complete Guide
    • How To Paint A Front Door Without Removing It
    • Homemade Squirrel Repellent Recipe
    • DIY Earring Holder
    • How to Make A Penny Bowling Ball
    • Top 10 Thrift Store Shopping Tips
    • Blueberry Crostata Recipe
    • How To Make Winter Porch Pots
    • How To Grow Hydrangea In Pots

    About Me

    Pam Kessler | Author of House Of Hawthornes

    Footer

    ↑ back to top

    About

    • About
    • Contact
    • Privacy Policy
    • Web Stories
    • Blog

    Let's Connect

    • Subscribe
    • Instagram
    • Pinterest
    • Facebook

    Shop

    • Amazon Favorites
    • Shop The Look

    Please use appropriate safety precautions when attempting projects. All projects are attempted at the reader's own risk.

    As an Amazon Associate, I earn from qualifying purchases.

    Copyright © 2023 House Of Hawthornes, LLC

    🍪 We use cookies to give you the most relevant experience by remembering your preferences and repeat visits. By clicking “Accept”, you consent to the use of ALL the cookies.
    Do not sell my personal information.
    I Accept Read Privacy Notice
    Privacy & Cookies Policy

    Privacy Overview

    This website uses cookies to improve your experience while you navigate through the website. Out of these cookies, the cookies that are categorized as necessary are stored on your browser as they are essential for the working of basic functionalities of the website. We also use third-party cookies that help us analyze and understand how you use this website. These cookies will be stored in your browser only with your consent. You also have the option to opt-out of these cookies. But opting out of some of these cookies may have an effect on your browsing experience.
    Necessary
    Always Enabled

    Necessary cookies are absolutely essential for the website to function properly. This category only includes cookies that ensures basic functionalities and security features of the website. These cookies do not store any personal information.

    Non Necessary

    Any cookies that may not be particularly necessary for the website to function and is used specifically to collect user personal data via analytics, ads, other embedded contents are termed as non-necessary cookies. It is mandatory to procure user consent prior to running these cookies on your website.