

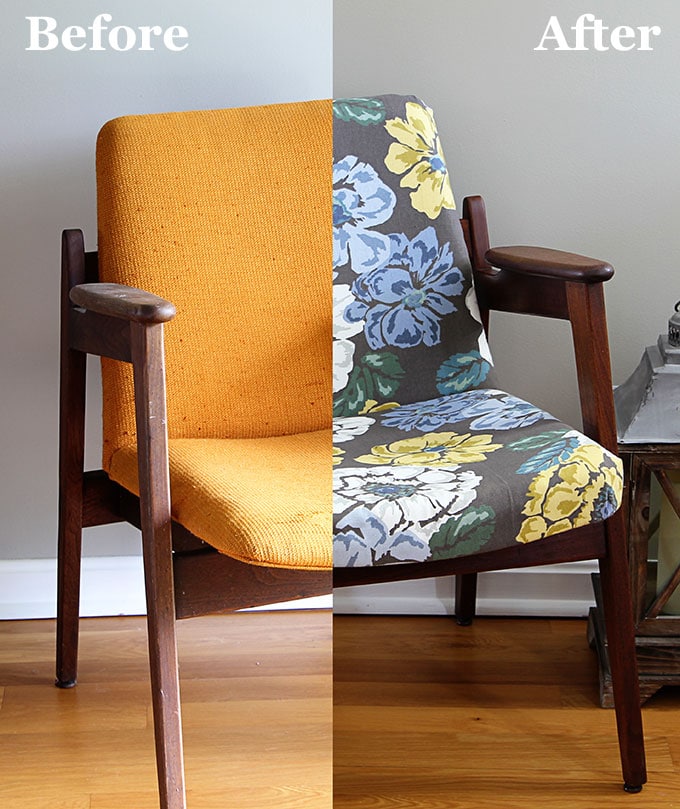
Well, it's done. My mid century modern chair restoration project is complete. Zip-A-Dee-Doo-Dah and alert the media. She's finished a project in less than a year.
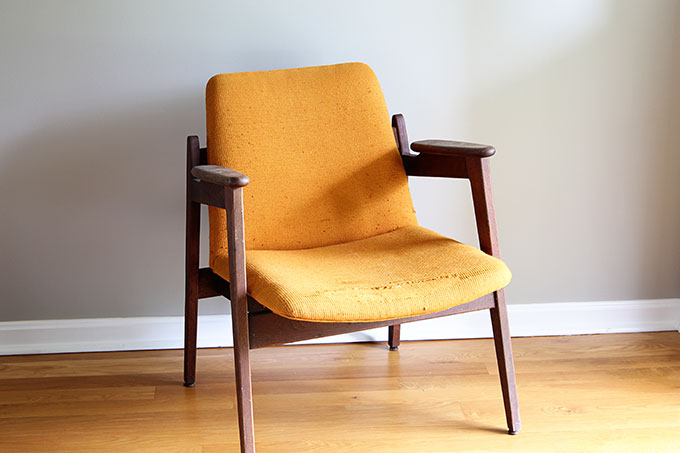
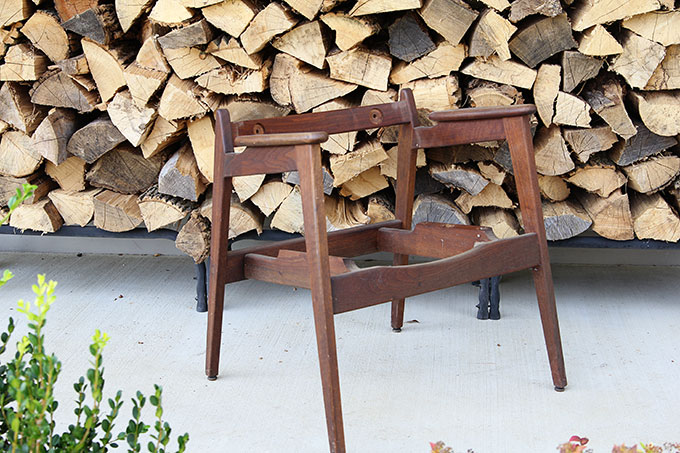
Oh yeah, it was way back in August when I first showed you this gem of a mid century modern chair I bought at a yard sale for a buck.
As in 7 months ago!!!
As in this is the longest recorded restoration job in the history of the world.
In reality, the project could have been finished in a few days or a good weekend. But no, I had to him-haw around about every single decision on this project.
Do I want to use the existing padding? (Heck no, and you'll see why in a minute.)
Do I want to go loud and fun with the fabric? Or more mellow and traditional? (You can see that Mrs. Loud And Fun won that one.)
Do I really want to redo this stupid chair in the first place? (I started to call it the "stupid chair" somewhere around the second month into this project.)
After months of decisions and starts and stops on this chair project, on Saturday I had had enough and just finished the darn thing.
And you know what?
It feels good to finally get the chair D. O. N. E. And I love how it turned out!!!
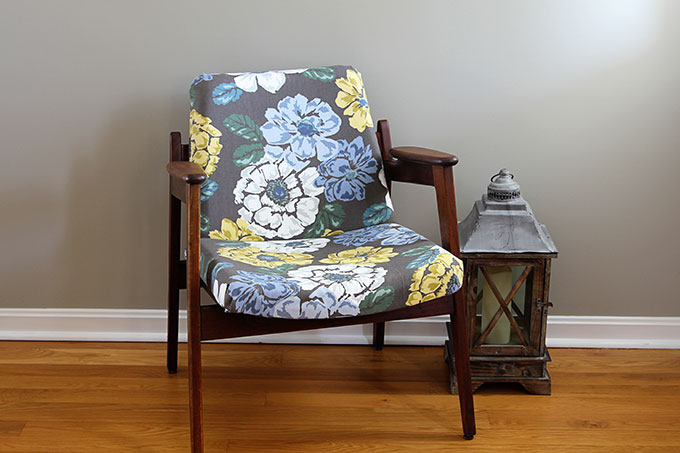
Betty Draper is looking pretty sexy with her fancy new designer dress!
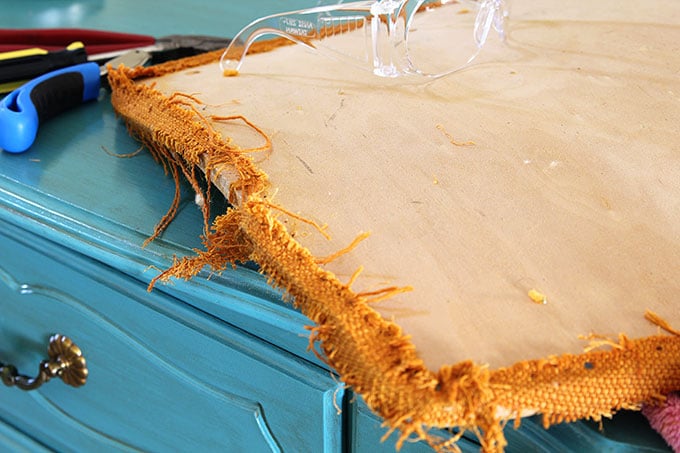
If you remember, it had this super groovy orange fabric on it from the Mad Men era.

That was snagged all to heck.
Oh, if we could count the butts that have sat in this thing over the years!
My biggest dilemma in this project really was finding just the right fabric.
I found some wonderful atomic fabrics online that would have looked very retro-chic on this chair, but in the end decided to go outside of the traditional mid-century modern fabric designs and go with this more modern gray and blue floral that kept jumping out at me at the fabric store.
I know. I know. Not everyone will like my fabric choice. Remember it only took me three months to decide, so go easy on me.
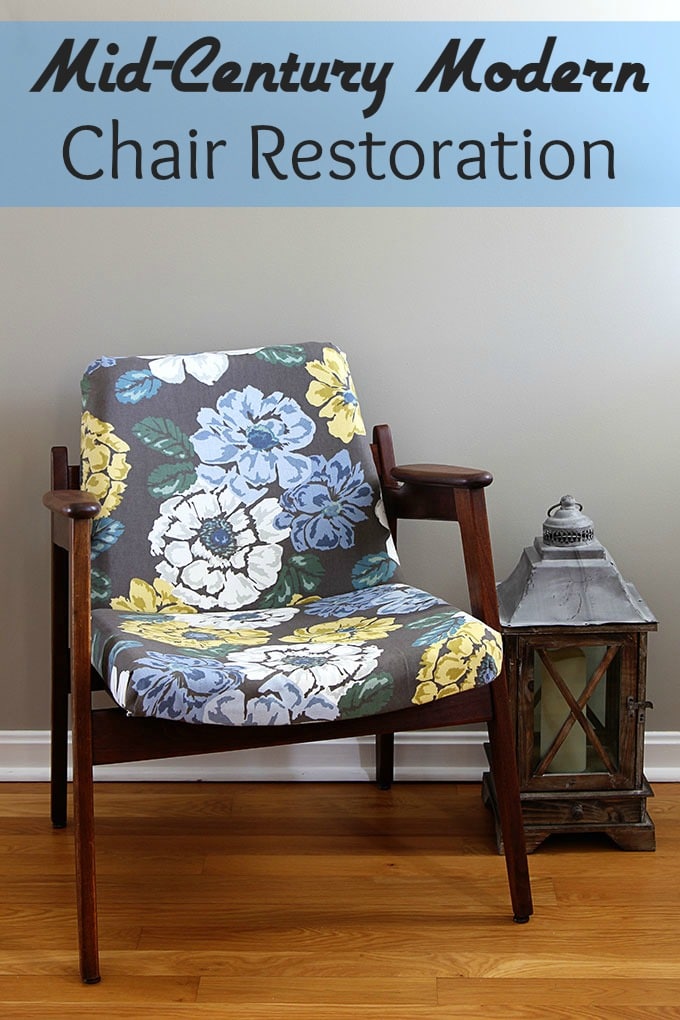
A Mid Century Modern Chair Restoration Tutorial
Before we go any further, please use all necessary protective equipment when doing this project, including gloves, eye protection, particle masks, etc. I will not be held responsible for you sanding your fingerprints off, inhaling 40 year old butt dust or anything like that. Seriously though, be safe, not sorry.
My first step was taking the chair apart.
It was basically a seat attached to a wooden frame with 8 screws, so it was not hard to take apart at all. So I will break the project up into two parts - the wooden frame and the seat.
Refinishing The Wood:
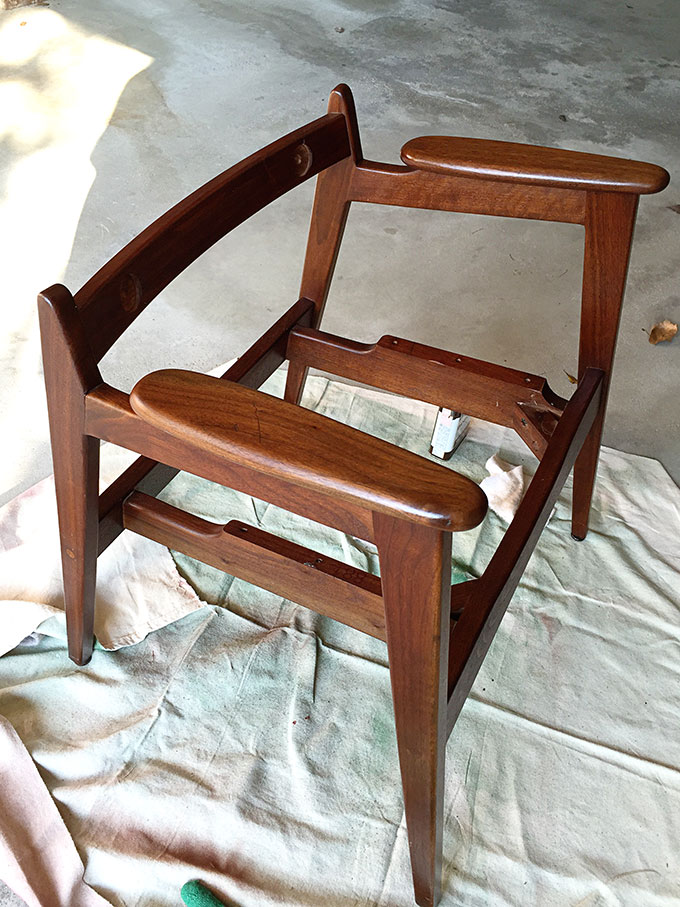
The wood on the chair was very very dry and in need of a lot of tlc. So I decided to use Watco Danish Oil finish to freshen up the wood.
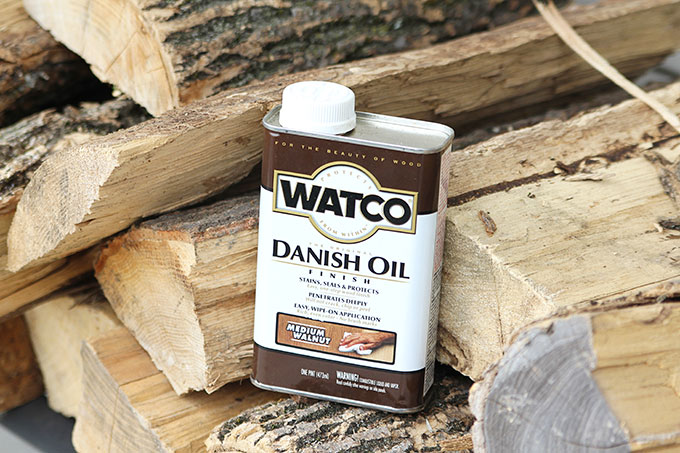
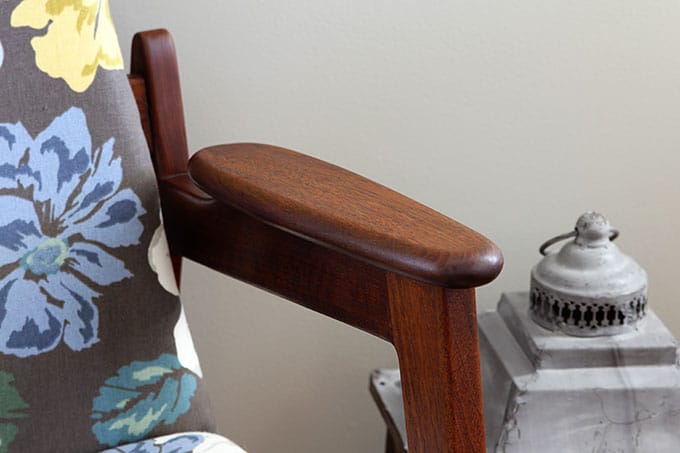
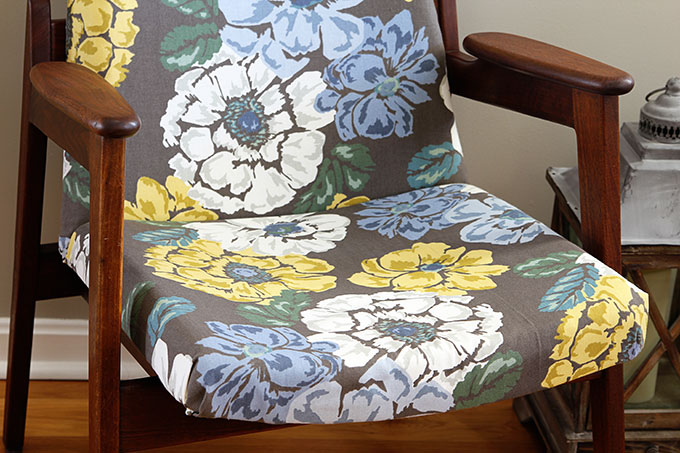
Watco stains, seals and protects in one fell swoop by soaking into the wood and spicing up the color from within rather than just setting on top of the wood. It gives it more of a hand rubbed oil finish rather than a stain with varnish type of finish. Although it comes in different colors, I chose to use the medium walnut since it looked closest to the original color of the piece.
I gently sanded any nicks and gouges on the wood, so the final finish would be even. My wood did not have a varnish on it, it was just wood that had been treated with an oil finish in the past, so there was no need to go all wild and crazy with a sander on the whole piece. Thank God, because it might have taken me two years to finish it in that case!
I took a paint brush and GENEROUSLY applied the Danish oil onto the piece and let that sit for 30 minutes. And then generously applied a second coat for another 15 minutes. I believe the directions on the can mentioned to "flood the surface", so really you can't put too much on.
After the 45 minutes had elapsed I took pieces of an old white sweatshirt and wiped the surface dry. It will be fully dry and ready to use in 8-10 hours.
So really, me waiting another 4 months to put the chair back together was just a little lazy over-protective of me.
I love, love, love how the finish turned out. So much so that I will probably use this product again when I freshen up my dining room chairs this spring.
BTW, this isn't a paid advertisement for Watco, I just ran across this product and fell in love with it and now I want to marry it.
Reupholstering The Seat:
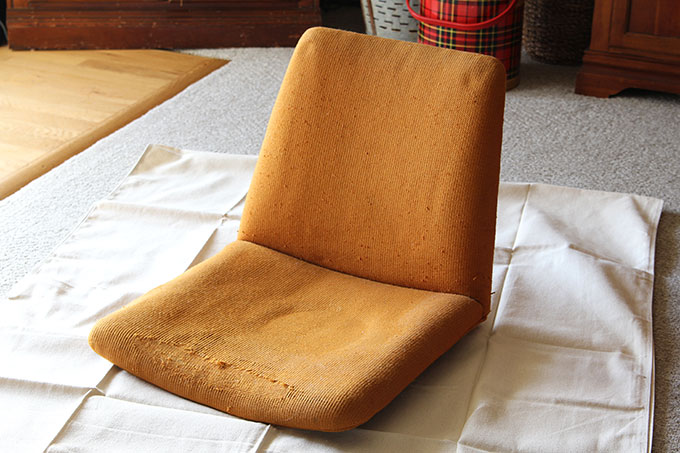
You need to remove the old fabric and padding.
There I said it.
As much as you want to just throw some new fabric over it and go about your life, you will need to actually remove the fabric and padding that has had approximately 49,000 strange butts sitting on it over the last 50-60 years.
Keep the fabric that you take off in case you need to use it for patterns for the new fabric later on (and I did use it).
I started by taking off the back and bottom fabric (the black fabric in the photo was on the under-side of the chair).
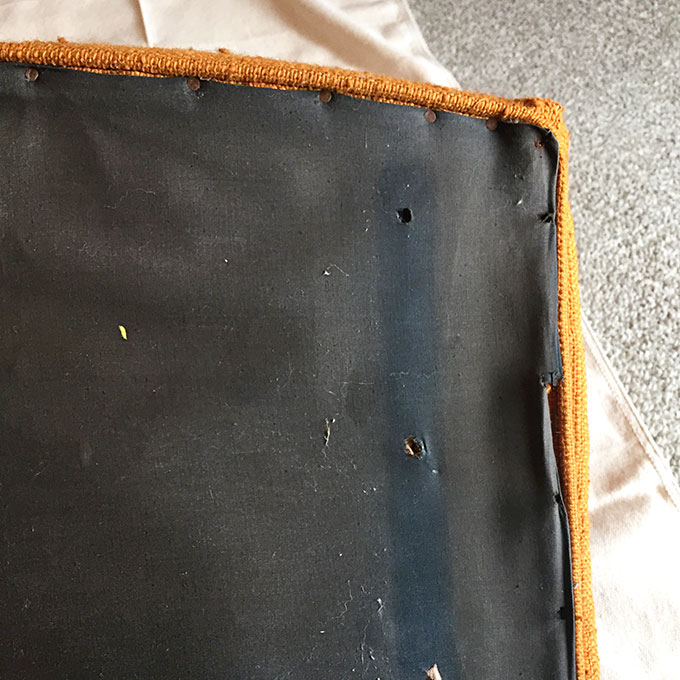
The chair had both nails and staples holding the fabric onto it, so I just used a putty knife and pliers to pull the nails out. I found a handy upholstery staple remover at the craft store that made taking out the staples easier.
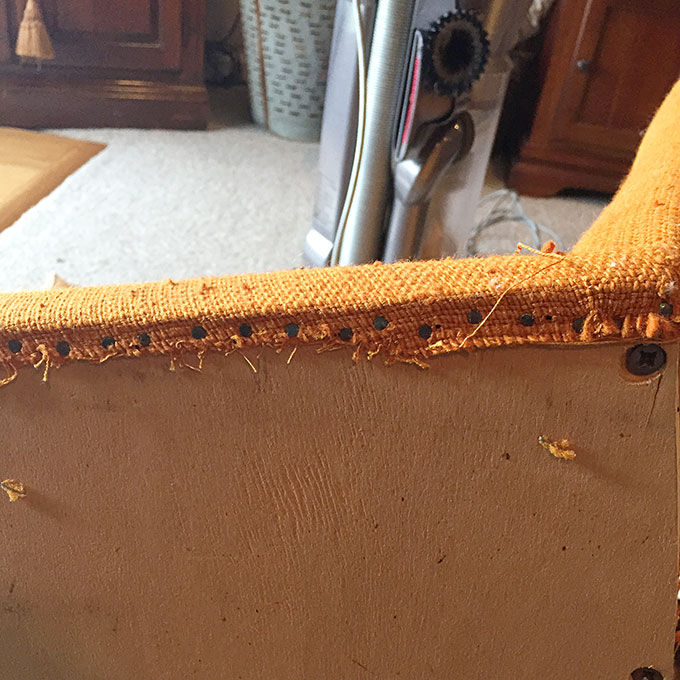
After removing all those nails and staples, I was covered in a fine yellow dust (hence the vacuum in this photo). I was perplexed and a little grossed out thinking maybe it was rat poo or something.
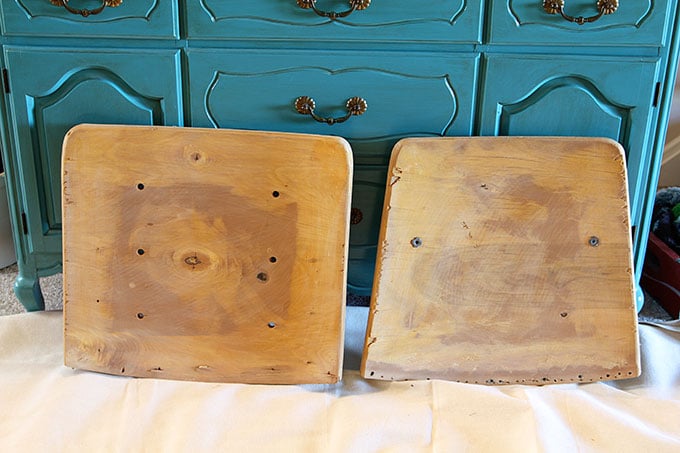
I ended up taking the top of the seat (where you put your back) apart from the bottom of the seat (where you put your butt). And then took the seat parts outside since I had a feeling it may get messy.
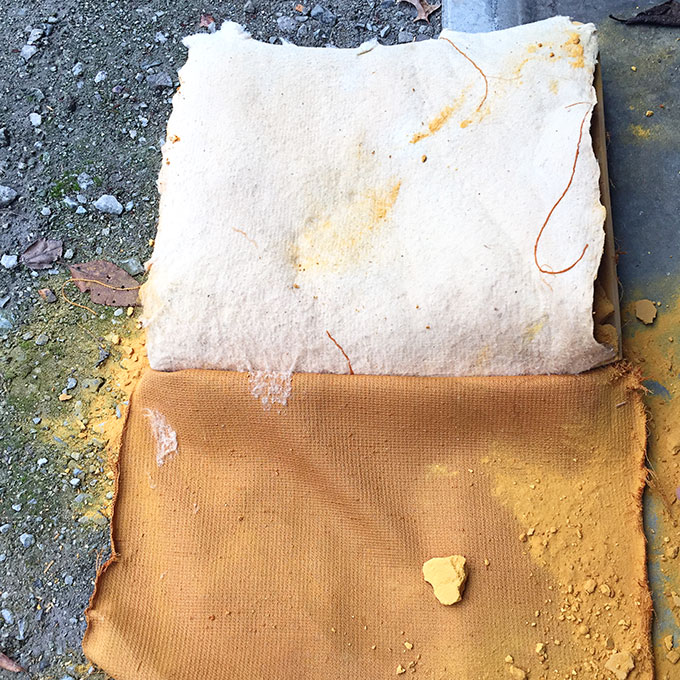
And it got messy. Very very messy. The cushions had disintegrated over time into a powder.
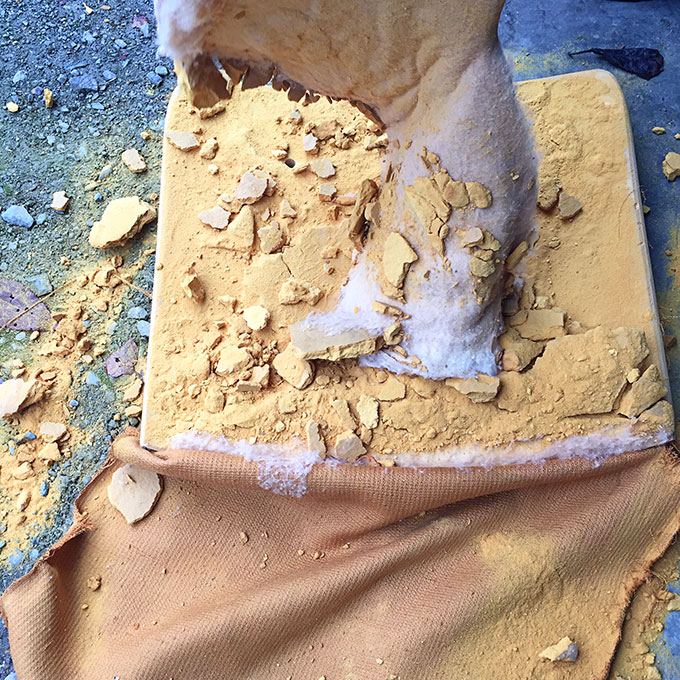
After using the leaf blower to blow all the nasty dusty stuff off the floor of my husband's garage, I still had more staples and nails to remove.
I really do not want to see another nail in my life!
Eventually, I was left with two clean wooden parts of the seat.
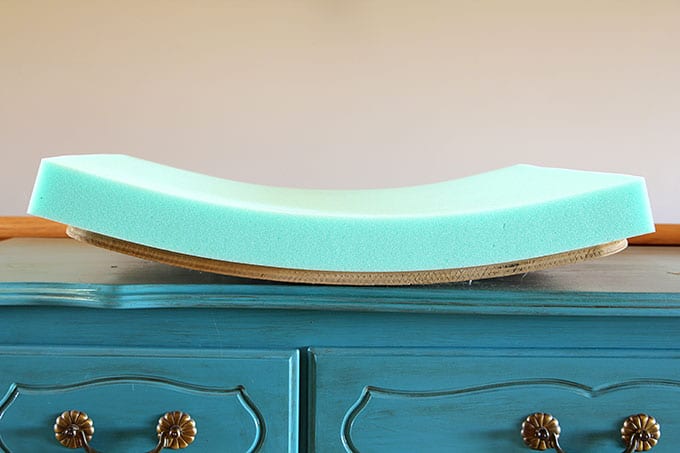
I replaced the dusty padding with brand new clean and smell-free padding that I bought at JoAnn Fabrics. In hindsight, I probably would have bought a 1" padding to go more with the style of the chair, but this 2" padding will do in a pinch.
I covered that padding with cotton batting, wrapping it around the back to keep my upholstery fabric from rubbing up against the edges of the wood.
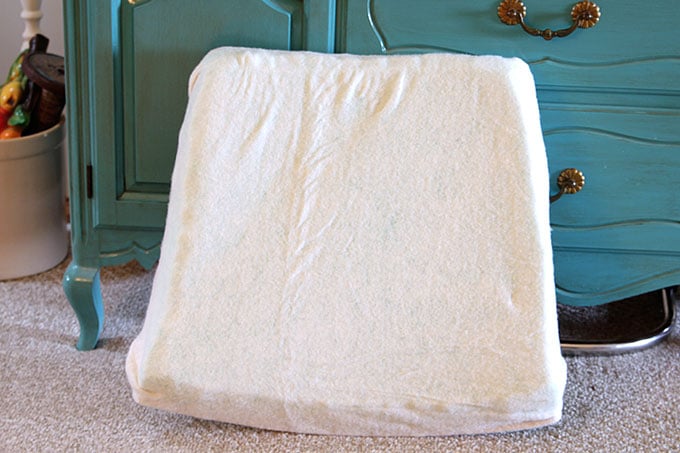
Think of it as Spanx for your fabric.
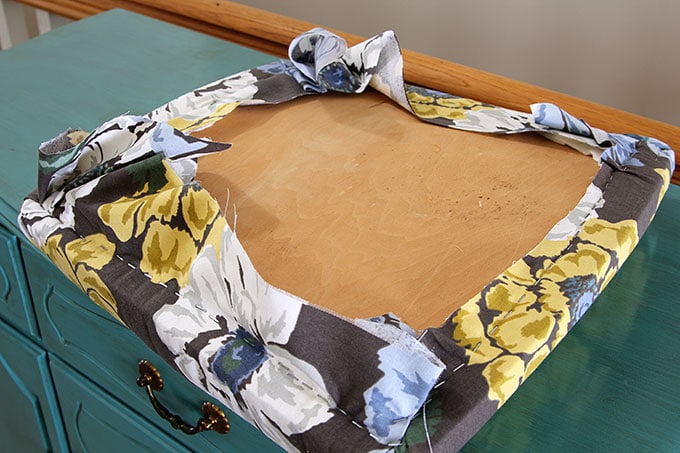
I then wrapped the upholstery fabric around that and stapled it into place.
For the most part, I used the pneumatic stapler which makes it SO MUCH EASIER than using a regular hand staple gun. Pneumatic all the way, baby!
I trimmed around the fabric, cutting closer to the staples, to get rid of the excess bulk.
Luckily for me, this part will all be covered by fabric, so neatness and straight lines are not that important.
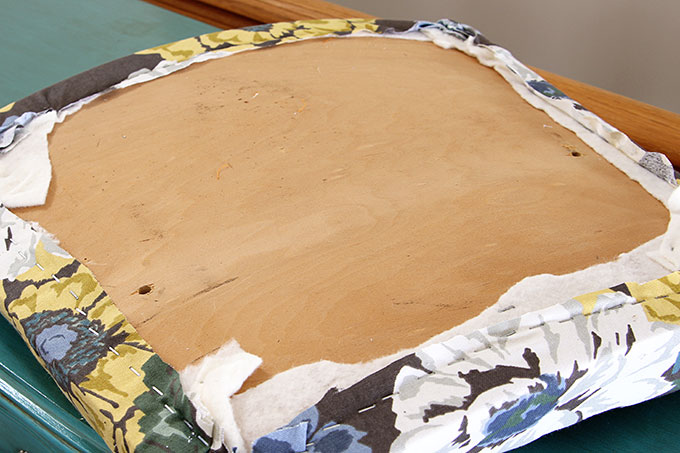
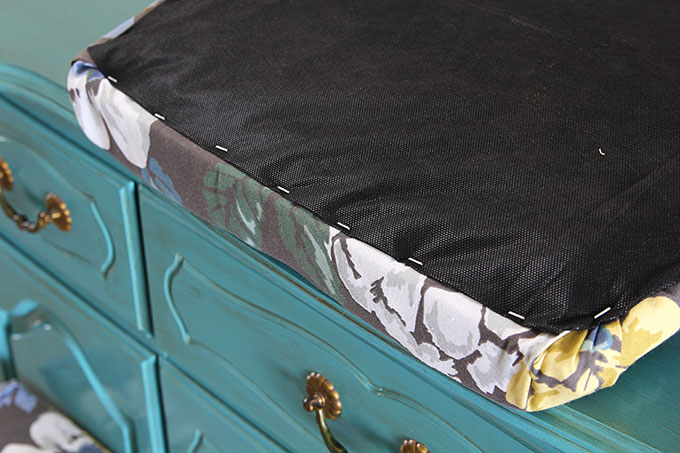
For the back of the top and the bottom of the seat I wanted to cut the fabric closer to the actual shape needed, since these two pieces will give it a finished, tailored look.
So I used the fabric that I had removed previously to make a little pattern. I just cut out my new fabric about an inch larger all around.

I used cardboard tack strip to staple the right side of the back piece to the top of the back of the chair (is that confusing?).
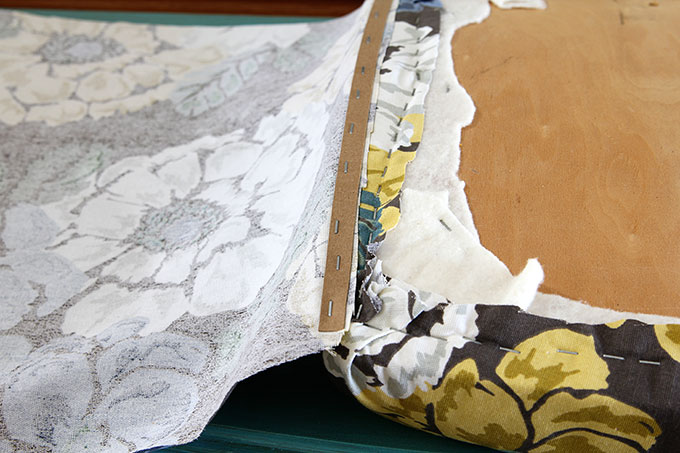
And then flipped the fabric back down against the top and used tack strips with tacks already in them to adhere the sides. These make very crisp and clean lines.
The bottom of the seat was covered in this black upholstery dust cover fabric, which is made for the bottom of chairs. I just used staples to attach it, since it won't be seen.
Quick, go look under your sofa and I bet it's sporting this same black fabric underneath it.
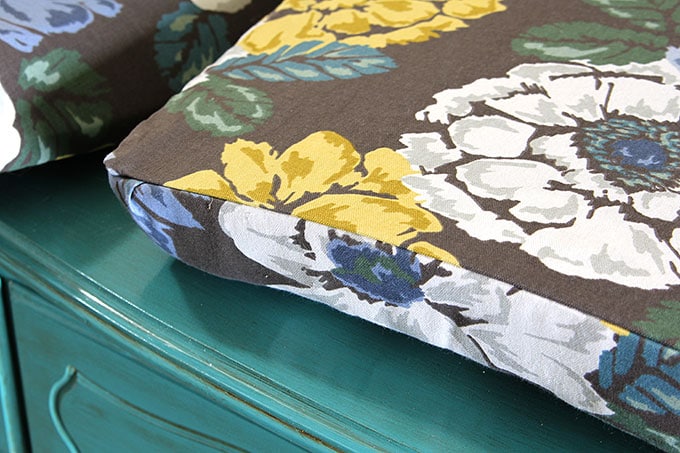
And then I just had to put the chair back together and IT WAS DONE!!!
Rae
I *think* I understand how you did the back of the chair (with the tack strips, etc.) but I'm a visual learner. Do you have more photos of the steps or, better yet, a video? Do you have a YouTube channel? I'm just getting into these types of projects, and I like your style (and sense of humor). Would love to watch these projects "live!"
Karen
Your chair looks fantastic!
I just saw your blog post today, and without knowing it I have been mimicking your exact process just 6 years in the future! I purchased 3 walnut mcm dining chairs a year ago, started stripping them 9 months ago, decided on fabric and started referring to them as the “stupid chairs” 6 months ago, and if I’m dedicated I’ll finally finish them this weekend. I also ended up purchasing the Watco danish oil but went with solid colour fabric because I couldn’t decided on a pattern.
Glad to know I’m not the only one who needs a year for a “2 weekend” project!!
Kathy
Beautiful chair and you did great! It looks professional!
I don't want to stress you or anything but you should be writing books. I read your posts even though I'm too old to even carry the chair out of the store.
Your writing style is light and funny and just easy to read, not to mention you're really doing a tutorial!
Let me know when to look for your first book on Amazon!
Susan
I'm glad I stumbled across your restoration. I have a mid-century dining room table and six chairs I'm about to start on. I've been wondering what to use on the chairs and I think the Danish oil is the ticket. Your chair looks terrific, btw.
Kacey
What did you use as the tack strips along the sides and bottom so that they were covered from the outside? I see the tack strip that you used to start the back fabric and folded over it, but wondering how you finished it. Looks great! Thanks!!
Anya
I LOVE it. I think it is a perfect choice for the chair. Actually, I'd love to have something like this in my own house! A funky enough fabric to be interesting, but not so crazy that it doesn't 'go' with things. I've seen a lot of chair reupholstering tutorials recently, and it makes me want to go find an old chair to give some new life to!
Audrey
Absolutely LOVE the chair and the fabric! I have a piece of mid-century furniture that's looking a bit dry, I'll have to try that Watco oil! And the fabric you chose is heaven. It's actually the colors of my living room!
Well done!!
Pam
Thank you! I kept going back to that fabric in the fabric store, so I figured it was meant to be!
sandie
What did you do with the webbing? I am trying to refinish the same type of chair but it has webbing.
Pam
Mine didn't have any webbing, it was just the padding over the wood. I actually have a rocking chair in my garage that I've been working on for quite a while, because when I took the old upholstery off and found it had webbing and springs (how do you tie springs?) it stopped me in my tracks. I need to do some research on how to work with the webbing and springs now 🙂
Vickie
WOW!!! You did right by that chair, Pam! I think I would have given up after removing the orange fabric, but you stuck to it and ended up with a winner!! Love it!
Pam
I was THIS CLOSE to tossing the thing on the curb after the whole padding fiasco 🙂 I'm glad I kept with it, even if it took FOREVER!
Cindy
I love your chair. The fabric is perfect. And, I personally think you finished this project in record breaking time! 🙂
Susie
Your chair turned out great. I like the print you chose for it and the heavier foam makes it more comfortable I am sure. The way the wood finish came out was so nice. Perfect.
It made me itch just looking at that old yellow foam dust.
I think we have a very similar chair from our first apartment days. It must be lurking somewhere in a corner of our basement hidden by thirty five years worth of other treasures that have been piled on it.
Pam
You'll have to dig it out and spruce it up 🙂
rue
I think it turned out great! This is coming from a purist too 😉
Pam
Thanks, Rue!