

I have the worst time with charging cords and electronics cluttering up my countertops.
What started out with one or two cellphones being plugged in has turned into a mess of cords going every which way. I'm pretty sure they have wild parties at night and multiply like crazy when I'm sleeping!
It's not only a crumby decorating dilemma, you're toast when you can't find the right cord. My solution was to go against the grain here and use a breadbox as a charging station because:
- it looks like it belongs on my kitchen counter
- it's nice and roomy
- I can't stop repurposing thrift store finds
OK, now I'm done with breadbox related puns. Not because I don't WANT to use more, I just can't THINK of any more.
(This post contains some affiliate links for your convenience. You can read my full disclosure policy here.)
Repurposing A Breadbox Into A DIY Charging Station
DIY Charging Station Supplies:
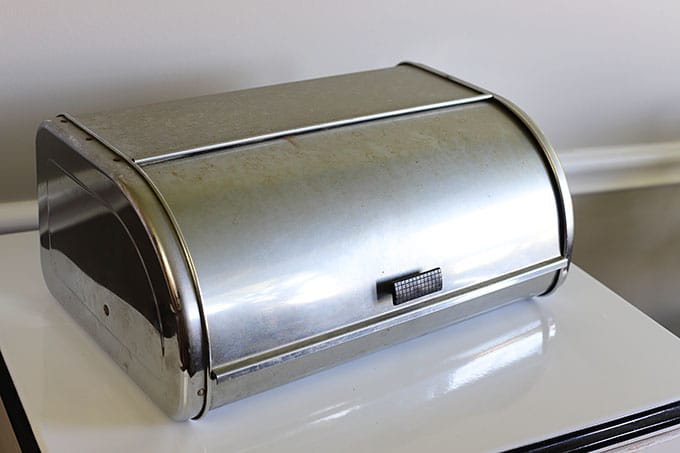
- Cool breadbox from the thrift store
- Drill
- Drill Bits
- Step Drill Bit
- Metal File (Half Round)
- Power Strip w/ Surge Protector
- Velcro Strips
- Contact Paper
- Appropriate safety gear - eye protection, gloves, etc
Instructions:
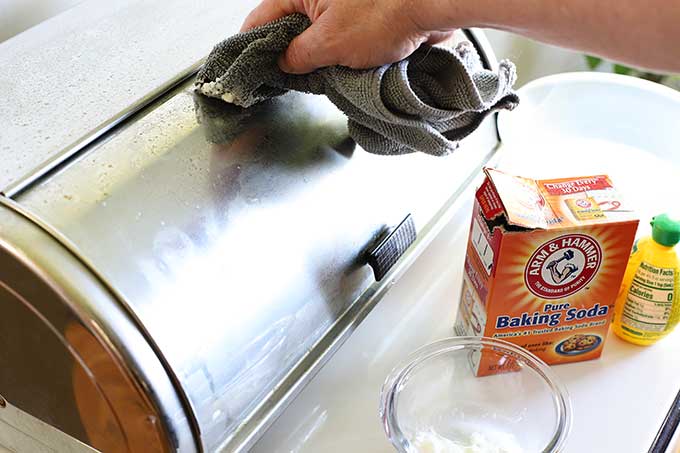
Thoroughly clean your breadbox. If it's grimy, discolored or basically OLD, you can use a mixture of baking soda and lemon juice to get the grime off, if plain old dish soap and water won't do the trick.
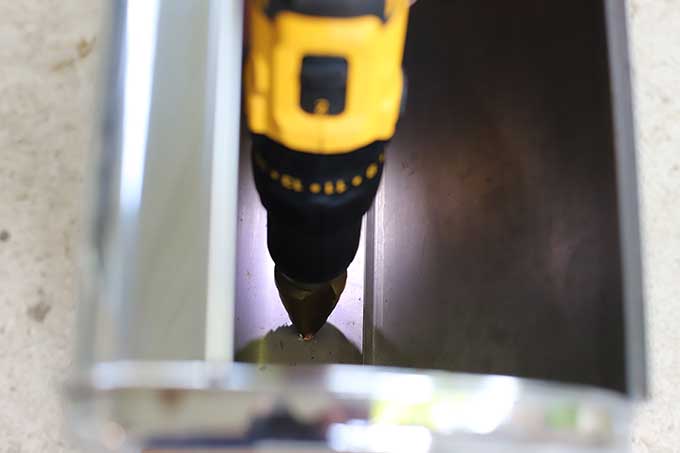
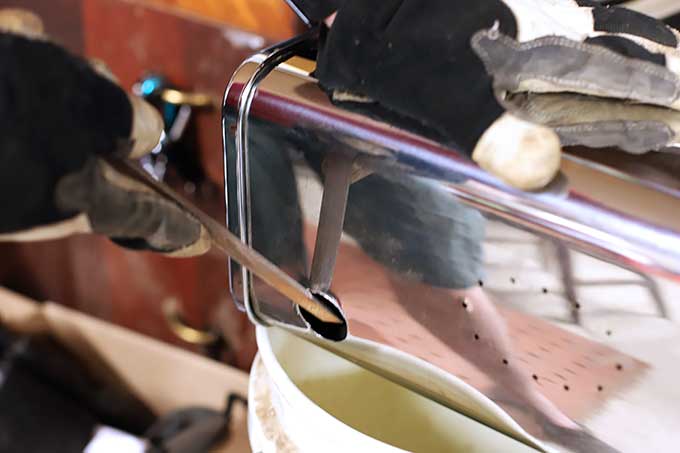
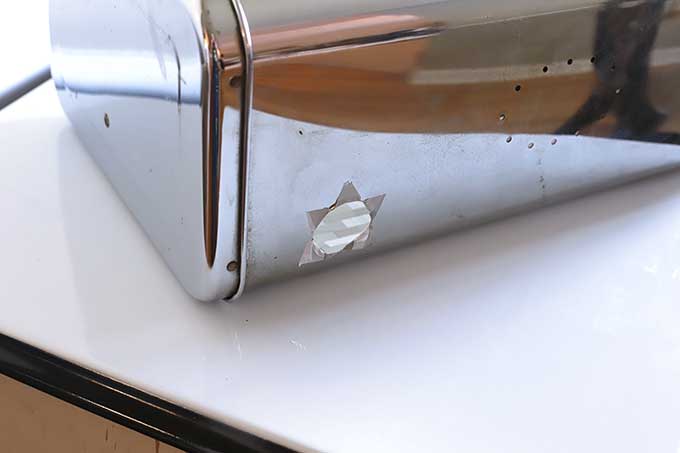
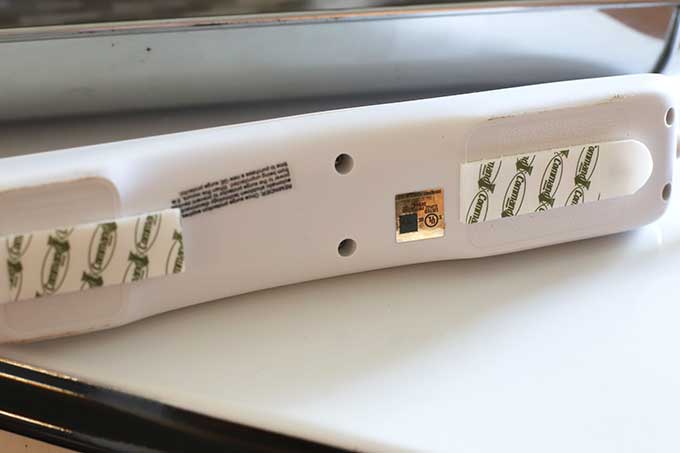
Drill a hole in the back of the breadbox large enough for the plug of the power strip to go through.
My power strip had a 2 ft cord which was perfect, since I didn't want too much cord hanging out the back to clutter up the counter, yet it would be long enough to plug into the nearest outlet (a very important thing not to overlook).

Use a very small drill bit to start a pilot hole.
Then use a slightly larger drill bit to make the pilot hole larger.
Finish it off with the step bit to make a hole large enough for the plug (remember the fat plug itself has to go through, not just the cord).
File down any stainless steel shavings around the hole.
Oh, and did I had shavings! This is what it looked like before I started using the metal file.
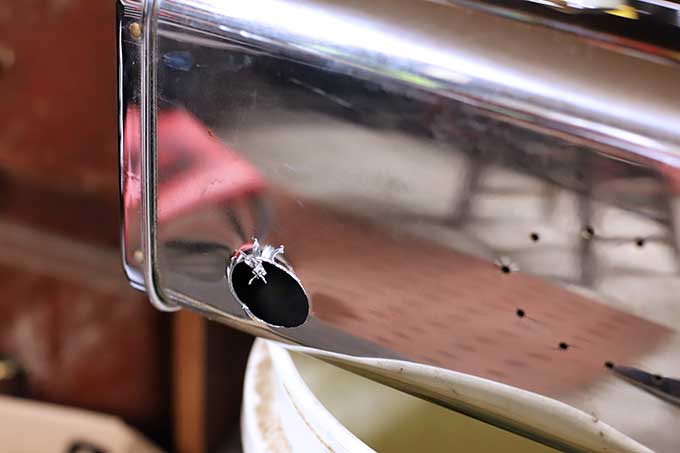
You don't want to get jabbed by that!
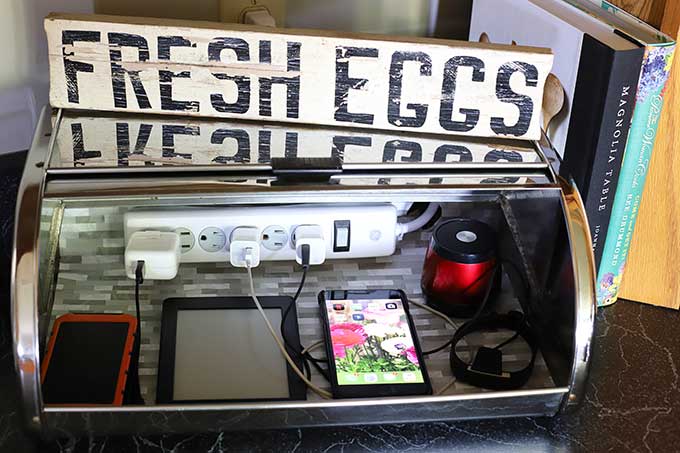
Use contact paper or shelf liner to line the bottom of the breadbox and as far up the back as you can get.
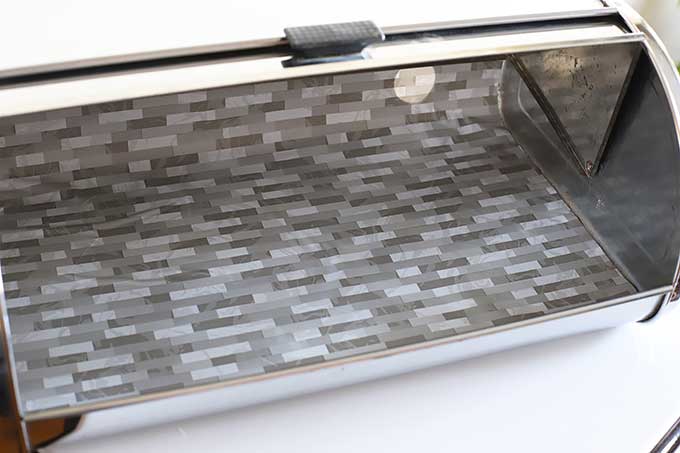
Cut slits in the contact paper where the hole is and wrap the contact paper around the backside.
Add velcro strips to the back of the power cord and adhere it to the inside back of the breadbox.
I used the Command Strips I had on hand, which were rated to hold 12 pounds each and were total overkill. Smaller velcro strips would work just fine.

Plug in the power strip and your electronics and get to charging!
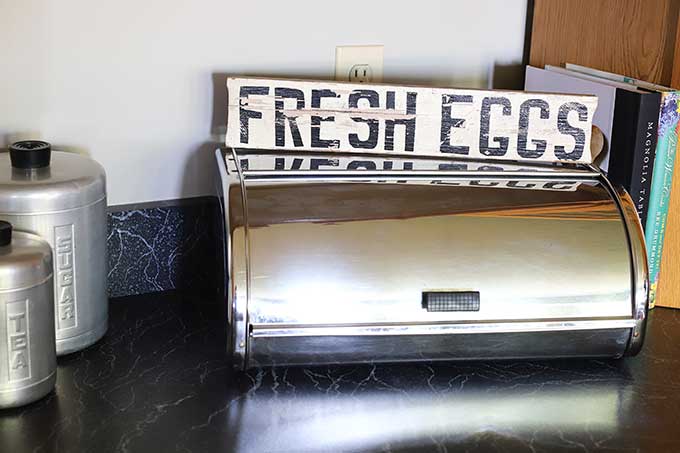
As a bonus, did you notice the vintage kitchen canisters in the first photo?
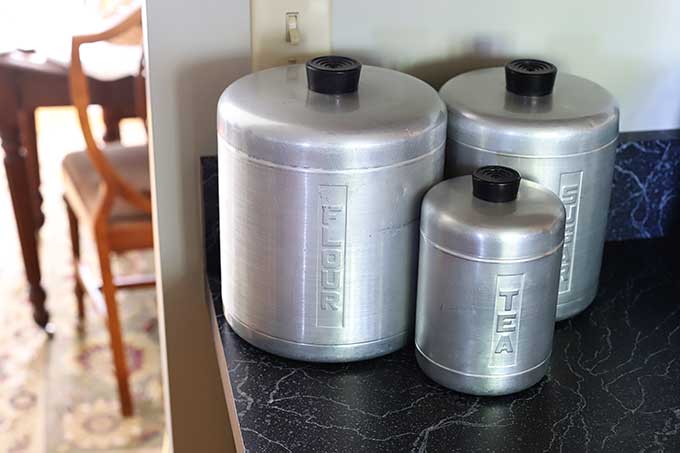
Did you think they had baking supplies in them? Not at all, I use them for dog treats. No need to be confined to labels around here!
![]()

And if that wasn't exciting enough, my friends from the Thrift Store Decor Team have a few repurposes for you today also! Go check them out!

Refresh Restyle - Vintage Wood Bowl DIY
Petticoat Junktion - Metallic Spray Paint Makeover
My Repurposed Life - Wind Chime Makeover
My Uncommon Slice Of Suburbia - Accent Table Makeover
Sadie Seasongoods - "Retrending" From Country Decor To French Farmhouse
Domestically Speaking - DIY Nautical Oar
Our Southern Home - Chandelier To Lantern Makeover
House Of Hawthornes - Breadbox Repurposing (that's me)

Other posts you may enjoy:
DIY Earring Holder
DIY Industrial Pipe Shelves
Baking Soda Paint Thrift Store Makeover
Christy @ Our Southern Home
This is so clever! I've seen several bread boxes that I've passed over lately! I need to find one.
Florence
I love your bread box idea Pam! So clever & one I have to have when I can find the right bread box. I'm so sick of all the phones & cords scattered on the counter. This is brilliant, and the cannisters for dog treats aren't bad either. I definitely need those too.
Michele M.
Brilliant.
Sheila
This is just awesome Pam! Super cute and oh, so handy!!
Leslie Schmidt
This is really cool, Pam! I've never run across a breadbox, much less a metal one. It's a perfect solution for an annoying situation and a terrific blend of form and function. This is going on my Pinterest board called "Clever Crafters."
Pam Kessler
Thank you! I find wooden ones ALL THE TIME, but have only found metal ones a few times.
Bev Regoulinsky
That really is a super nice idea ! How did you even come up with such a useful idea ? I really like that !
Pam Kessler
I actually bought it thinking it would look cute on my kitchen counter because it sort of looks vintage. But after I got it home I realized I really never have bread in the house! I was feeling a little stupid for buying it, but then realized I had tossed it on the kitchen counter right next to my jumbled cell phone charger cord mess. It just made sense to combine the two!
Sarah Ramberg
PERFECTION! So neat and clean, I love it!
Kristin salazar
NO way, I love this! I was wondering what you were going to do with it! Great project.
Maryann
What a great idea!!! I need to search for one now.
Linda @ Itsy Bits And Pieces
This is an awesome project, Pam! I so need to do something like this...you've inspired me! Pinning!
gail
Pam,
That's an awesome bread box and you are so right, it looks right at home. I love the contact paper you used.
pinned!
Linda Hubbell
That is super clever! Thank you! I will keep my eyes open this weekend for a similar item. I thought of your blog last weekend, when I tripped over an adorable vintage turquoise metal Remington typewriter I just had to bring home from a church sale. Happy hunting!