

This project is one of my all-time favorites: pipe shelves! With just a few supplies from your local home improvement store, you can have a chic open shelf project that adds just the right amount of industrial edge to any room in your home.
I've been wanting to build something out of an industrial pipe for the last few years, but I never really had a good reason to try my hand at pipe fitting (all the professional pipefitters in the world are glaring at me right now).
I've seen lots of great projects. End tables, curtain rods, paper towel holders. Even dog beds! However, I had a lightbulb moment when I wanted to give my bathroom a bit of a face left and needed some cute, yet inexpensive shelving. These wood and pipe shelves were just what I needed! Want to make your own DIY pipe shelves? It's simple - I'll walk you through the entire thing!

Table Of Contents
Pipe Shelves in the Bathroom

So I got busy in the bathroom last weekend building some new industrial pipe shelves. Because hey, if you're going to use plumbing pipe for a DIY project anywhere in your house, it might as well be in the bathroom. But, as you can see - it was a success!

A couple years ago when we renovated my son's bathroom and made it handicap accessible, we opted to use vintage gym baskets as "shelves". You can see more of that initial renovation on my Industrial Style Child's Bathroom post.

The problem was a gym basket, as fun as it looks, just doesn't have enough usable surface area to be used as a shelf.

So we decided to ditch the vintage gym basket look and go for a more traditional shelving idea. Well, as long as you consider industrial pipe and reclaimed lumber "traditional".
DIY Industrial Pipe Shelves Tutorial
These shelves have a serious cool factor, coupled with loads of practicality! I love when things can be both useful and stylilish. Even better This project is fairly affordable and simple to put together.
Pipe Shelf Supplies
To make these 3 shelves we used:
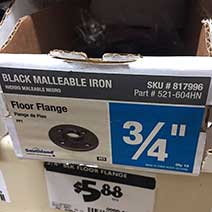
- 6 ¾" Floor Flanges
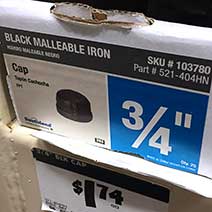
- 6 ¾" Caps
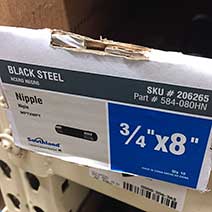
- 6 ¾" x 8" Nipples
- 1 ¼" x 8 - 3.18 cm Coarse Thread Drywall Screws
- 1 Board cut to the length you need (in our case we used reclaimed lumber that was roughly 2" wide x 6" deep x 5' long, cut in thirds - if you buy a new board from the hardware store, have them cut it to length for you)
- Black Spray Paint (I used less than 1 can of Rustoleum's Universal Hammered Paint & Primer In One in the black color)
- Measuring Tape
- Phillips head screwdriver, handheld or electric as you prefer
- Pencil
- Level

(A) Coarse Thread Drywall Screws / (B) Floor Flange / (C) Nipple / (D) Cap
Where To Buy Pipe Shelves Supplies
Home Depot
For buying in the store, this is what the plumbing pipe items look like on the shelf at Home Depot.
Don't forget, you can shop online at Home Depot and have the items all ready for you to pick up. This is amazing as it saves you from wandering down the aisles looking for this and that or waiting for your online order to arrive via UPS!
Amazon
On Amazon, you can also buy kits for building pipe shelves HERE. They are not put together for you (you still have to screw the pipes together), but it includes all the pieces to make 2 shelves (4 brackets), not including the wood. It would save you the time of picking out each individual component and it would be shipped to your home for you.
Or if you have quite a few shelves to make you can buy pre-painted versions in bulk quantities from Amazon also - floor flanges, nipples (pipe) and caps.
Instructions for Putting Together Your Shelves
- If you have shelves already in place, remove those shelves and patch any holes if necessary
- Wipe the grease and grime off your plumbing parts. I used soap and water for the floor flanges and the caps and since the nipples had tape wrapped around the price stickers, I used some Goo Gone on those. I think they are covered in "greasy stuff" so they don't rust while at the store, which reminds me, be careful when carrying them around the store while wearing a white shirt. Been there, done that, not doing it again.
- Next, screw one floor flange and one cap onto each nipple (ouch). These will be your brackets.

- Then, spray paint the brackets and allow them to thoroughly dry.

- Next, decide where you want shelves to be.
- If possible, try to align your flanges with wall studs. We were only able to do this on one side of the shelf, due to the size of the shelves, but still felt they were pretty darn sturdy. You may want to use dry wall anchors if you are unable to hit a stud with your placement of the brackets.
- It looks best to have at least 2 ½" - 3" between the outside of the bracket and the outside end of the board.
- Then, position your first bracket on the stud and screw into place.
- You can use a pencil to mark the floor flange holes onto the wall if you want to drill pilot holes first. I went straight into the drywall without pilot holes though. I'm wild like that.
- Next, hold your second bracket in place, put the board on top of the bracket and the level on top of that. Once the board is showing it is in a level position, screw the 2nd bracket into place.
- Finally, screw the remaining shelves into place the same way making sure they are spaced equal distances apart and all the brackets are placed vertically in line with each other.

Stand back and admire your handiwork!

Really these industrial pipe shelves are probably one of the easiest DIY projects out there. They give you so much bang for your buck!
How To Childproof Your Shelves
I did this project several years ago (it's held up GREAT, by the way!). But in that time, my number one asked question about this project is what to do if you want to attach the pipes to the boards.
Now in my case, the weight of the boards are enough to keep the wood in place. However, I don't have anyone in the house who would be pulling down on the shelves or trying to climb up onto them.
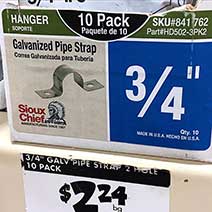
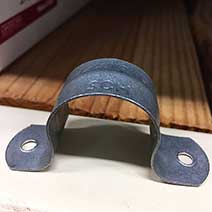
However, that isn't the case for everyone - and it's better safe than sorry when it comes to child safety! If you want to secure the wood to the pipes, you can attach pipe straps to the bottom of the wood. All you need to do is place a galvanized pipe strap around each pipe and screw them up into the wood shelves. Below are photos of what the part looks like on the shelf at Home Depot.
Have you taken the plunge and made anything fun out of plumbing pipe lately? (You know, there are really no good plumbing puns out there if I have to resort to a "plunge" reference!)

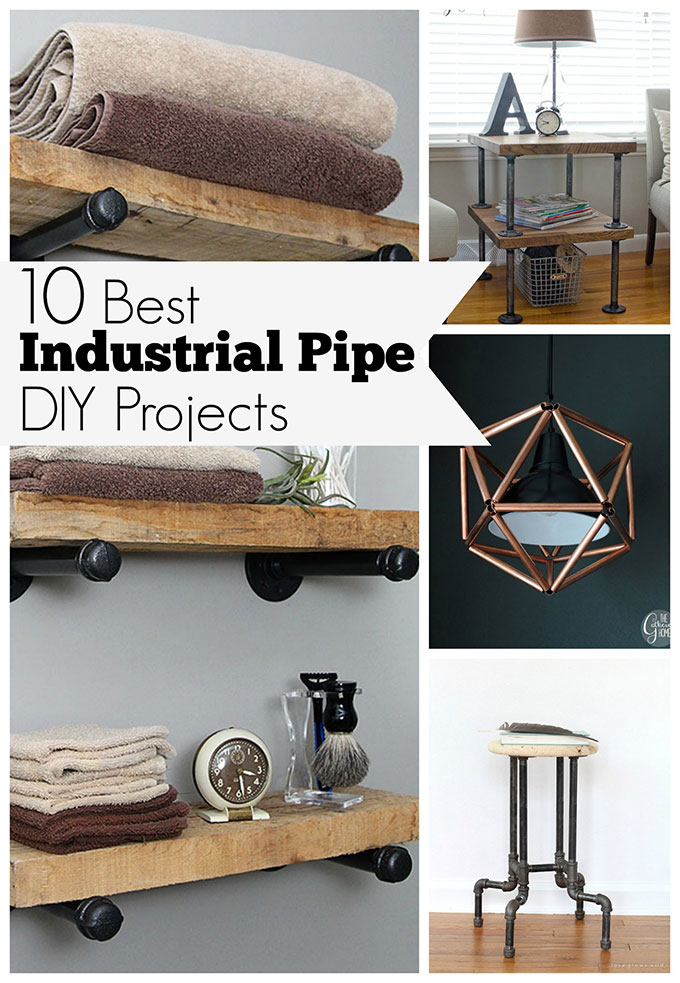
UPDATE: Love this look as much as I do? I've collected some other Industrial Pipe Projects for you from around the internet and listed them in my 10 Best DIY Industrial Pipe Projects. Along with the top Affordable & Creative DIY shelf Ideas.
Check out the web story version of this article HERE.
christine
Genius!!!:), I have been trying to find a DIY easy kitchen shelving tutorial before i take down my upper cabinets. Can't wait to do this. thank you sooo much for the links, it gives me the confidence that I have the right parts and can follow your easy to understand steps with the pictures you provided. thank you for the time you put into this. I really appreciate it. Again, Genius!!!!:)
Pam Kessler
You are so welcome! They are really so easy to make and you'll love the look!
Melissa
Hey! I’m working on this project now and just got all my supplies from Home Depot. I was wondering if it’s on to use the pipes as-is or is spray painting required? I’ve looked at a bunch or tutorials and almost all include spray painting and I was wondering if there’s a reason for this other than aesthetics?
Pam Kessler
Just aesthetics. I mainly wanted them to have a uniform look and the long piece (nipple) was smooth and shinier than the floor flange and cap were 🙂 You could leave them metal colored if you wanted.
Danielle
Could you use 1/2 inch flange, nipple and cap? Or would it be too thin?
Pam
You could use 1/2" if you want. I think the 3/4" gives it a "hefty" look, but the 1/2" looks good also and should be equally as strong for what you're using it for.
Jackie Slepoy
I am a visual learner and your directions are perfect! Love this and can’t wait to try! Thanks!
Kylie
Just thought I’d share as I was doing this project, I found on Amazon you can get Pipe Decor industrial Shelf Brackets for less than half the price of buying all the pieces at the hardware store. They come complete as a set of 4 and they are already black.
Michelle
Hi the shelves are beautiful. I’m doing my own this week. I was wanting to know what color stain did you use?
Thanks
Pam
I actually did not use a stain at all. My boards were reclaimed wood, so they already had that look to them. I would look on the shelf at Home Depot at the MinWax stains and see if there is a stain color you love, but I think a pine colored stain would be similar.
Angela Long
Love the shelves & will try this out! Working on restoring an old chest of drawers with veneer UGH!
I made a garment rack with galvanized piping back in March.....now I need another one?it’s better than a closet. You can see everything. Once yo do it it’s not so bad. I can’t wait to try out this shelving.
FABULOUS idea!
Thank you for sharing.
Angie
J
I never thought about using pipes. This is fantastic, Pam! Where did you get the idea for this? I’ve never seen anything like it.
TROY
Great looking shelves! I’m doing the exact same in our master bath and by the looks of it, we could have had the same builder... layout looks almost identical to ours lol .
So we bought 8” nipples and the wood we bought was 8” depth as well which seems to fit almost perfectly between the flange and cap. Did you say your wood was only 6” in depth? Do you know the exact wood depth you used? I dont want ours to stick out too far so I’m debating on if i should go get 6” nipples and wood... thanks!
Pam
On ours, we did 8" nipples and 6" wood (it's actually closer to 5 3/4"). You could definitely do the 8" wood (which is going to be closer to 7 1/4" just by the way they sell wood), but it might be really close to laying up on the flange in the back or the cap part in the front. I think you'd have to screw together one side bracket and see if the 8" wood just fits or if it's just a hair over. We went back and forth at Home Depot and just decided that since we had already bought the 6" wood, we'd go with the 8" nipples. It was more of an aesthetic thing at that point.