Beeswax food wrap and bowl covers are a simple eco-friendly alternative to plastic wrap. Learn how to make your own DIY beeswax wrap with this EASY tutorial.
I have a thing for bowls. Pyrex bowls, stoneware bowls, McCoy Pottery bowls.
And it's not all about vintage bowls, just about anything able to hold potato salad is my BFF.
But it's a shame to just throw plastic wrap on these bowls when I put them in the fridge or on my picnic table. It seems disrespectful and just plain wrong!
So I decided to make some cute DIY reusable bowl covers. And some beeswax food wrap to boot.
Now when I started out I thought maybe this would be one of those projects that was going to look cute, but be way too much trouble to actually make very often.
On the contrary!!! It's just about the quickest, easiest project you can do.
Plus, since it's made with beeswax, you're supporting the local bees. Go Bees!
I've channeled my inner Steven Spielberg and created a Youtube video for you on my bowl covers, tentatively titled E.T. The Extra-terrestrial Loves A Pretty Bowl Too:
If you prefer, you can watch an ad-free version of this tutorial on my YouTube Channel HERE.
Now onto the tutorial!
DIY Beeswax Food Wrap And Bowl Covers
Supplies:
- Fabric
- Beeswax -block or pastilles (pellets)
- Pinking Shears
- Baking Sheet covered in aluminum foil
- Paintbrush (fresh and never before used, which you will be using ONLY for this project - please don't pull out a nasty one from the garage with paint flakes all over it)
- Oven
- Tongs - optional (I didn't find them necessary, but you may)
- Plate - to use as template for bowl covers
- Tape Measure - to measure for sandwich wrap
- Cheese Grater - if using a block of beeswax
Instructions:
Preheat oven to 200 degrees.
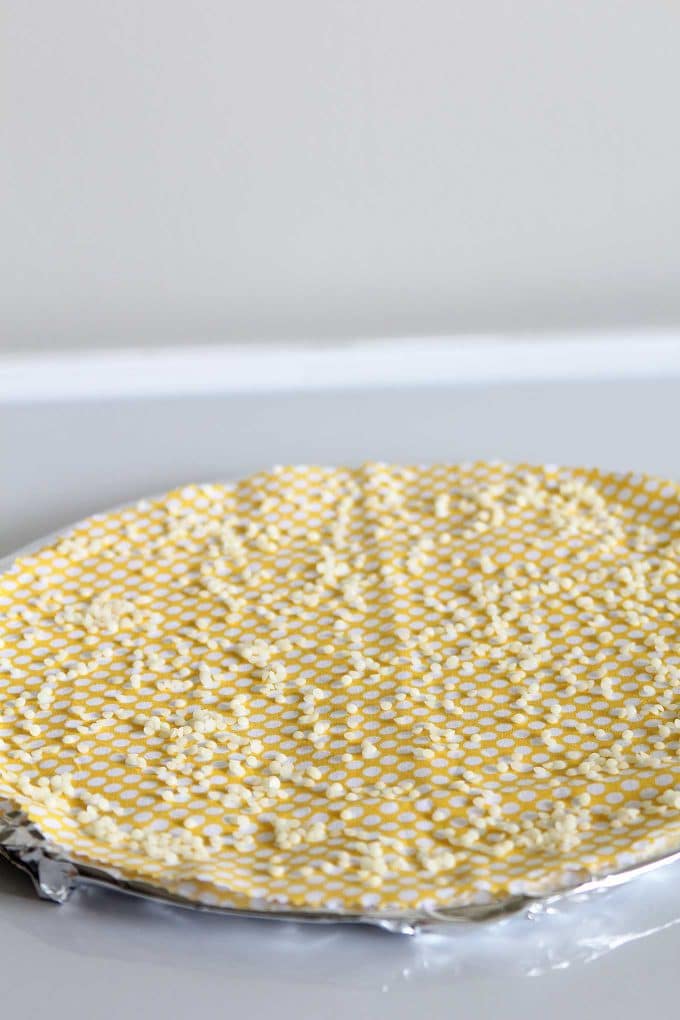
Cover your baking sheet in aluminum foil.
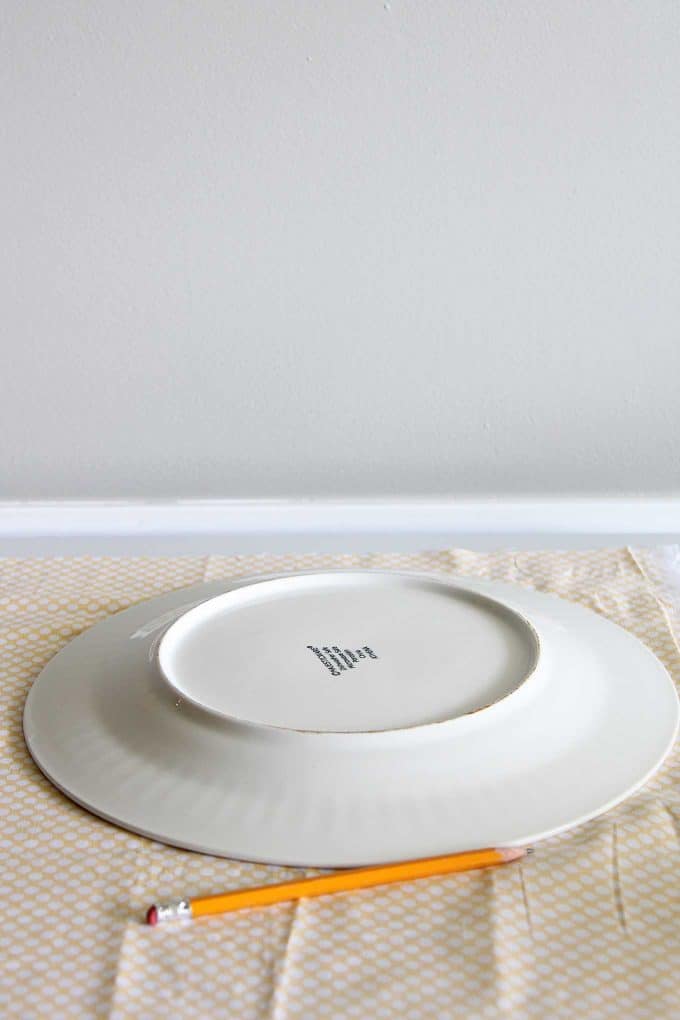
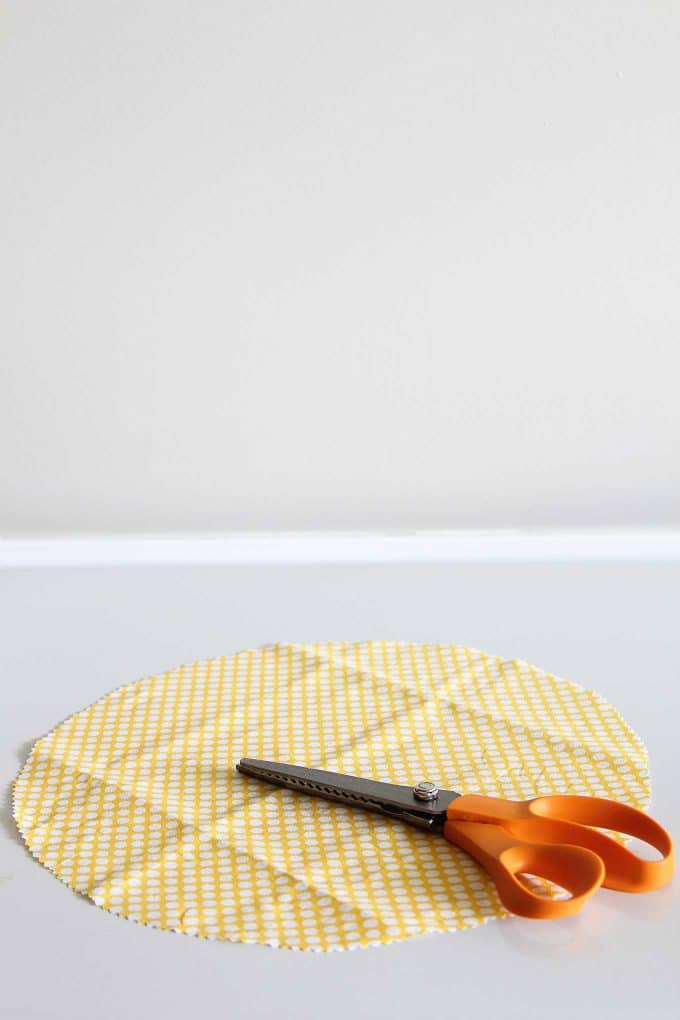
Cut out your fabric in the desired shape. I used a large plate as a template for my bowl covers and a tape measure for cutting out the sandwich covers (12x12).
Lay fabric onto the baking sheet and sprinkle beeswax lightly over the fabric.
Place baking sheet in the oven for 4-5 minutes.
Check to see if the beeswax had melted sufficiently. If there are any un-coated areas, use a paintbrush to move the wet wax around to cover them.
Remove the baking sheet from the oven and use tongs to grab the fabric (like I said above, I didn't use tongs and my fingers are fine, but I'm just going to say to use tongs to cover my behind).
Wave the fabric around in the air to cool (just takes a minute or so) and then you can either hang them in your laundry room to firm up or lay them on a cookie cooling rack.
But really, they dry so quickly you don't have to go nuts about this part.
I went nuts on this part.
I made a little "clothesline" in my kitchen.
To use your bowl covers, place the cover over the bowl and press it down to the sides. The warmth of your hands will allow the bowl covers to mold to the bowl.
For the sandwich wraps, I just wrapped them like I would a Christmas present and used the warmth of my hands to mold it into shape.
CONFESSION TIME: I didn't have any bread or cheese blocks in the house, so that's actually a pocket-sized thesaurus wrapped up in there. I won't tell, if you don't.
So now that you know how quick and easy these DIY bowl covers and food wrap are, go pretty up your refrigerator!
FAQ:
How do I wash my super cute new bowl covers and food wrap? They can be washed in cool water with dish soap and allowed to air dry. No hot water and no dishwashers, because beeswax tends to melt (remember the stove?).
Can I wrap my favorite bologna up in this wrap? Nope. They are not recommended for wrapping meats, because you can't use hot water to clean them sufficiently for possible meat bacteria. And really, do you know what they make bologna out of?
Will these last 20 years? Not really, but they can last up to 1 year. At that point you can either re-coat them or make new ones. Fabric styles will change in 20 years anyhow and who wants to be wrapping your food in out-of-style fabric choices anyhow.
Speaking of fabric, is there a certain type of fabric recommended for making these? I found that using a tightly woven, thin fabric works great! Thick fabric isn't bendable enough and a loose woven fabric (cheesecloth, etc) will allow the beeswax to flake off easily. I bought my fabric in the inexpensive quilt fabric section at my local fabric/craft store.
How do I store these when not in use? I wrap mine around an old aluminum foil cardboard tube for storage. So not only are you saving the environment, you're saving the environment.
Where can I buy that rad retro kitchen fabric? Well, go back to the 90's when rad was a word and then pop over to Hobby Lobby for the fabric along with the beeswax pastilles.
Can I make bee-free vegan version? Yes, you can substitute candelilla wax for the beeswax.
Marci @ Stone Cottage Adventures
What a super clever option! This is so much nicer than plastic wrap (which can awfully argumentative). Thank you for the tutorial! -Marci @ Stone Cottage Adventures
Marci @ Stone Cottage Adventures
Pinned! -Marci @ Stone Cottage Adventures
Linda @ Itsy Bits And Pieces
I love these! I've seen reusable covers, and they are expensive. I never thought of making them. Your fabric choices are so great looking, and I love the wonderful tutorial! Thank you!
Fonda Rush
And, don't let them lay in the sun...it's like that stove that you mentioned earlier.
Tracy
You are awesome. Thank you for sharing. I saw something like this on Amazon and they were so expensive. I will try this. Love your site too. Makes me smile.
Diane
Amazing! Love! Pam, you keep bringing us the most wonderful ideas!
Pam
Great idea and easy to follow tutorial!
Karen Steinmann
Have you tried 2 layers of fabric for this project? Thinking of doing some applique projects with antique camper designs for our camping friends. This would be great. Thought of towels and pot holders but this is so cute.
Pam
I have not, but I bet you could! Just make sure the fabrics are THIN.
Judith Koffler
My kind of project! Easy and useful. I will share this idea with my sister.
FLORENCE @ VintageSouthernPicks
These are just the cutest things! I'm afraid I'm guilty of plastic wrap....I didn't know I was committing a terrible faux pas....LOL. The only thing I'm concerned about is that the fabric might catch fire in the oven, but didn't happen to you, so guess it's OK. Cute bowl covers though! I love the patterns, especially that one you illustrated with.
Pam
Pam, sooo cute. Reminds me somewhat of the little "shower cap" covers for bowls! That kitchen fabric is Adorable.
taryterre
This is a clever use of materials. I like it alot.
Amy West
Oh how I love thee's (thee's ?), crafting posts...let me count the ways. Crazy, awesome idea. Thanks!
Jayne
You make the most fun items and I thank you for sharing this great idea that I am going to give a try !
Jeanne
Does the waxed side face down over and around the food? Thanks.
Pam
The wax actually soaks into the whole cloth, so it's on both sides.
Leta Donohoo
Hi Pam, I knew to your page, but I love this idea. Anything vintage for me! But I do not understand what I do with the sandwich wrap. Did I miss a step?
Thanks,
Leta
Leta Donohoo
Boy I should have proof
read that comment before I posted. lol
Pam
I think I got all excited about the pretty bowl covers I didn't go into the sandwich wrap too much 🙂 The sandwich wrap is square so you can either use it to wrap up a sandwich (sort of like you would with wax paper back in the day) or a hunk of cheese. It can double as a bowl cover too as long as your bowl is small enough.
Julie Byrne
Hi, I'm trying out making these and am having trouble .. the colours in the fabric are running. Have you had this problem?
cheers Julie
Pam
I'm sorry, I didn't have a running problem with any of the fabrics I used. Not sure why it would run.
Amanda T
Hi there! Do you use the standard "yellow" beeeswax or will it discolor the fabric? Would you recommend white beeswax?
Pam
I use the 100 natural beeswax which is slightly yellow colored, but it doesn't seem to discolor the fabric enough to make a noticeable difference. Most of the fabrics I have used have at least some white in them also.
Sonja
Can the bowl covers be washed if they get dirty? Would you have to redo the bee wax part after washing?
Vickie
Love the bowl covers! Would have never thought of doing that. So pretty and useful!
Sabrina Jaye
This is a strange question I'm sure but wondering if it is safe to melt the beeswax in a gas oven?
Amy Cook
Can they go in the freezer.
Elizabeth
Is there anything that I can use instead of aluminum foil? I try not to use this with the links to autism and dementia. Thanks.
Karen Bridden
Just saw beeswax bowl covers at a store today. They were selling for $24 for a package of two. Came home and wanted to see if I could find some that were cheaper - found your DIY video!!! I'm definitely going to try this project. Thank you!
Brooke
Could these be used to cover food? For instance if you were to make one and designate it only to onion and then cover the extra onion half that you may have not used in a recipe?
Ruth
I love this idea, but I'm concerned about food-borne illnesses. How safe is it to use this with the possibility of contamination and spread of bacteria/germs? I know these covers aren't and cannot be washed thoroughly, and the bacteria, mold and germs on the surface will transfer to the next food item that it touches.
Billie
I wrapped cheese in the one I made and no it didn't mold, which was a plus but it did dry out. I wrapped it tight. Can you tell me how to solve this problem?
Mary
This was a great tutorial and pictures were really helpful. The information was great, but what I really liked was your sense of humor! Love it!
Pam Kessler
Thank you Mary! You made my day!
Lavada Smalley
Just CBD Affiliate Program
Just CBD™ was founded on the basis that CBD is nature’s secret miracle. Looking around we found that the CBD business was consistently misrepresented and being taken advantage of. At Just CBD™ we believe that you have the right to know exactly what is inside your CBD products. It is our mission and promise to never misrepresent the content of our products. With the help of world class labs to test our products, we are confident that Just CBD™ is made with industry leading quality, honesty, and love.
We're invested in our affiliates, so we strive to provide everything they need to be successful.
Not long ago, Just CBD was nothing more than an idea. We turned that idea into a industry-leading product it is today through our passion to spread the word about Just CBD products through the web. We are extremely passionate about growing our business and we LOVE nothing more than helping affiliates do the same.
Sign up now at https://signup.cj.com/member/signup/publisher/?cid=5121792#/branded
Karen Funk
I just tried this and it was easy! Just a suggestion for the best application of the beeswax is to iron your fabric flat before you start. That way you won't end up with spots without beeswax (or with less beeswax) like I did. Thank you for the great idea. I think I will make some of these for gifts.
John Hobkirk
This is coming from a guy and I think it is a wonderful idea. Thanks
Pam Kessler
Aww, thank you!
Dianne
Do you only melt the wax on one side or let side 1 dry and then do side 2. Dianne
Pam Kessler
You only need to put the wax on one side. It will melt through the fabric so it will coat both sides at once.