

The good thing about Pinterest is that you see all sorts of neat craft project that you just have to make.
The bad thing about Pinterest is that you see all sorts of neat craft project that you just have to make.
As in, they bug the bejeebers out of you and sit in the back of your mind nagging at your subconscious until you just have to run to the store at 9:00 at night to buy the supplies for the project.
This was one of those projects.
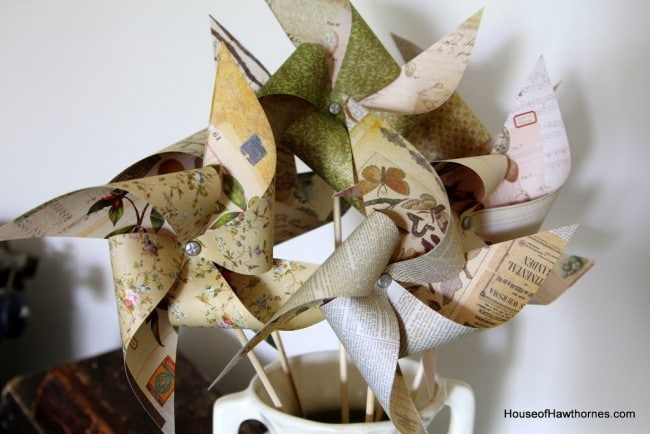
How To Make DIY Pinwheels That Spin
Supplies
- 6x6 double-sided scrapbook paper
- wood skewers normally used for shish kabobs
- scissors
- ruler
- paper hole punch
- brads (found in the scrapbooking embellishment area of your local Michaels, JoAnns or Hobby Lobby)
- a little bit of glue, if you are so inclined
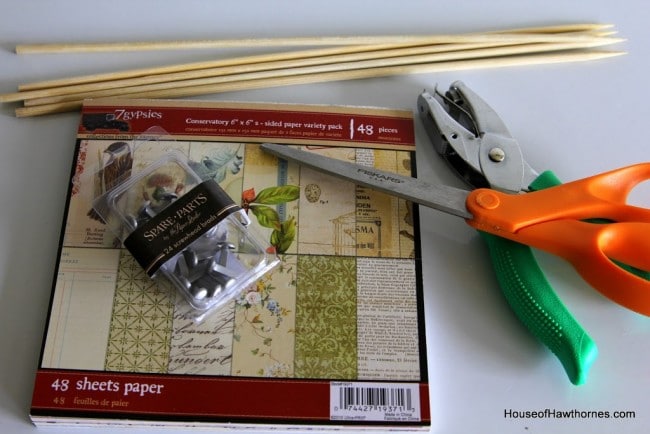
You could cut your own paper into the correct size, but the 6x6 paper was so darn convenient. The double-sided paper is important since you can see both sides of the paper when looking at the front of the pinwheel.
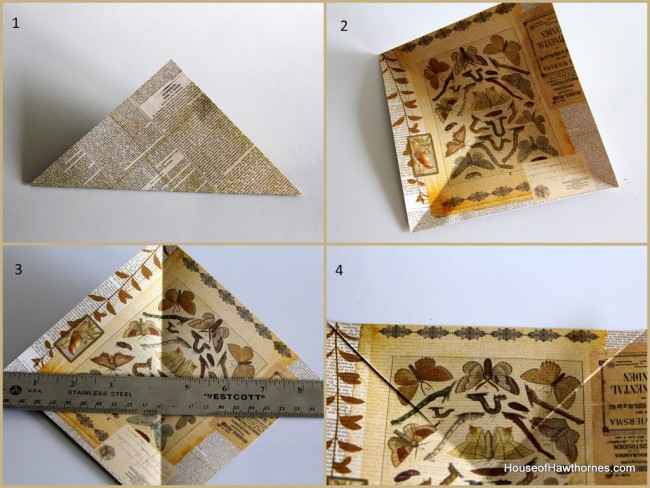
Instructions
1. Fold my paper in half diagonally.
2. Then fold in half again.
3. Use a pencil to mark a tiny dot 3" into the pinwheel.
4. Cut 3" into each corner to that dot to create your pinwheel spokes.
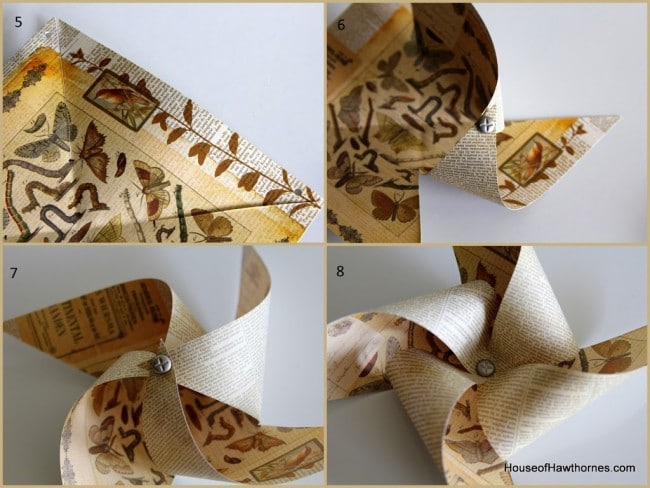
5. Punch a hole in every other corner of the pinwheel.
6. Take the brad and thread it through the punched holes.
7. Until all holes are in the brad.
8. Push the brad through the middle of the pinwheel (I used a little knife to cut a slit so it wouldn't rip the paper).
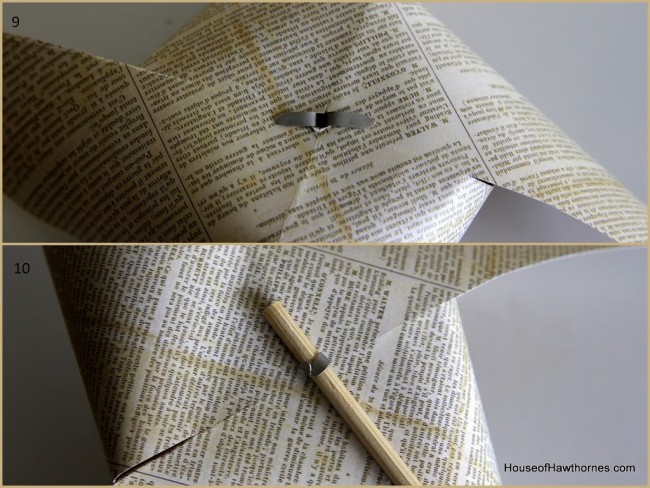
9. Turn the flaps of the brad over to hold the pinwheel together.
10. Attach your skewer to the pinwheel by folding the brad ends around the wood. You may need a tiny touch of glue to keep the pinwheel from sliding around on the skewer.
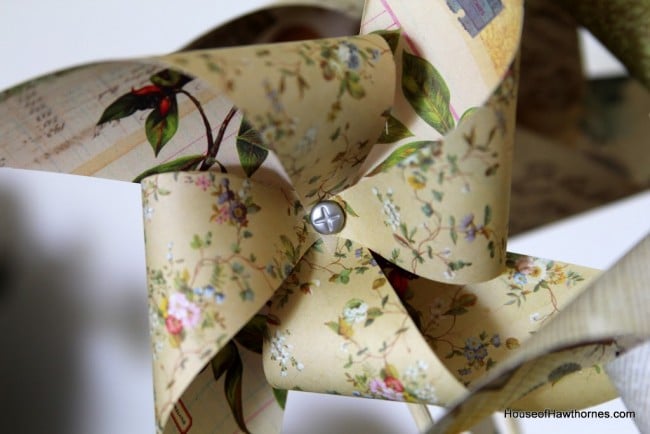
Voila. Pinwheels.

BTW, they make a zillion types of brads. All different sizes, colors, and designs on them. I chose ones that look like screw heads.
Your basic old-fashioned all-American slotted screws
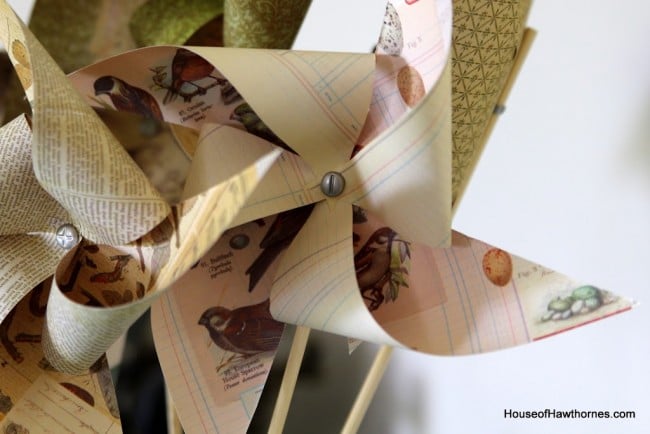
and your newfangled Phillips head screws. Industrial pinwheels are all the rage.
Happy pinwheeling!
Shabby chic Sandy
Cute pinwheels 🙂 The kids would probably enjoy making those with me. TFS!
Laurel@chippingwithcharm
Love 'em...think I may have to try some too 🙂
Tete
Those are so cool! I think I should make some, too. Thanks for the idea!
Olive Cooper
Since I do not Pin but do Pinwheel you are my go to source for all things crafty. They are adorable. Would a giant one in my yard be tacky?
Sweet Posy Dreams
Really charming. Such a fun project -- looks great!
Vickie @ Ranger 911
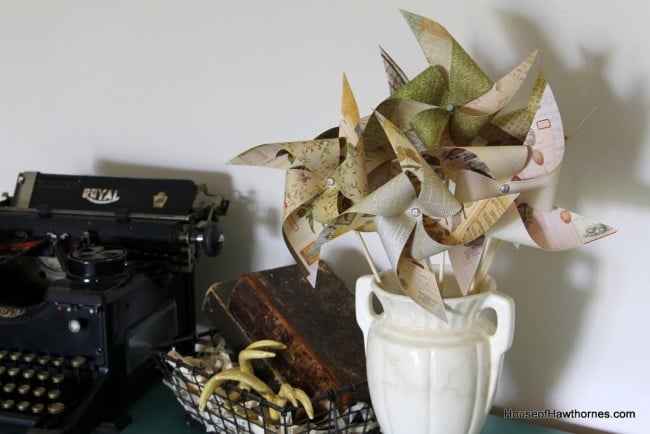
Ha ha! Yours are cuter and more springy with all the floral prints. So there! They look like a bouquet of flowers all together in the vase.
Into Vintage
Oh pinterest ... I tried to break it off but I am so very weak and went crawling back, even without the 25th hour in the day. (You can achieve extra hours in the day by skipping over sleep).
I *love* this project and how cute would a massive display of these be in say, an antique mall or vintage event?! The industrial touch is quite timely! 🙂
Kim K.
Great paper selections. Your pinwheels are splendid. I totally understand obsessing about a project and needing to get supplies at strange hours of the night. A few years ago, I made a bunch of giant pinwheels for Josie's Rainbow birthday party and hung them together as a garland. I loved them so much, she still has them hanging up in her bedroom.
http://kenward.blogspot.com/2010/06/pinwheel-balloon-garland.html
Happy crafting!
Sally
Pam, these are SO CUTE. I LOVE the paper you chose!!!
Linda@Coastal Charm
They are so cute Pam...thank you for showing us how to make them. I am hoping to get some made before next weekend, when the marketplace opens.
Blessings,
Linda
NanaDiana
How cute are those! I think my grand kids would LOVE making these with a little help. They are just darling! xo Diana
Robin from highpointcircle.blogspot
Very cute. Who doesn't smile looking at a pinwheel, but a grouping just makes a person happier all the way around. Love them.
Tricia
That's the problem with pinterest, there's so many great ideas that just force me to spend money. Your pinwheels turned out so good! I love the paper and the industrial look 😉 I've been wanting to make some little mini ones for the tops of cupcakes. Wouldn't that be cute?!
Debby
Thanks for showing us how. I did see the other post. She used old pags from DIck and Jane books. Where could you find those. That's how I learned to read.
I love pinwheels and will have to try these. Thanks for sharing.
TARYTERRE
I LOVE that paper you used. LOVE it! LOVE it! Delightful pinwheels. Sad they do not spin, though. GREAT project, nonetheless. Take care.
JunqueMagnet
Oh how evil you are.The reason I don't Pin is to avoid this problem.It's bad enough the number of ideas I see on blogs.But you had to go and put this on a blog which means I found it (I stopped following MMS a while ago) and now I will obsess.I remember a million years ago Martha Stewart did this and I bet if I go through my ancient hoard of ideas (the ones pre-blog) I will find the instructions from her magazine. Because this has been on my radar for, oh about, five million years now. Must resist. Must resist. Can't resist... Thanks for your evil sharing. Enjoy! They look fab by the way.